tabs

es about us es contact es archive es challenge es we love 9 es recipes es pintests es links
Showing posts with label erin. Show all posts

Friday, 9 January 2015

Jewellery 101 - Necklace Chains

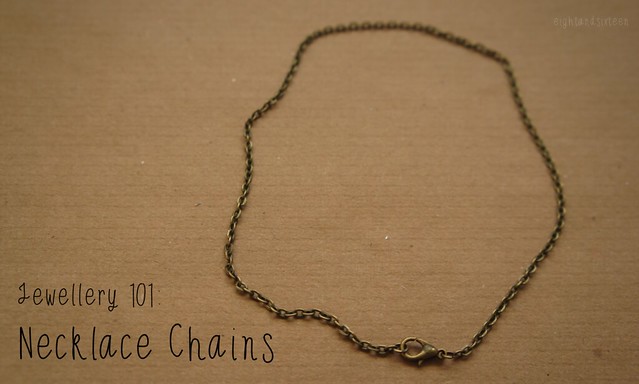
101 chains

If you enjoy making lots of jewellery as a hobby or are looking to start up your own jewellery business selling handmade pieces why not invest in the supplies to make your own chains?

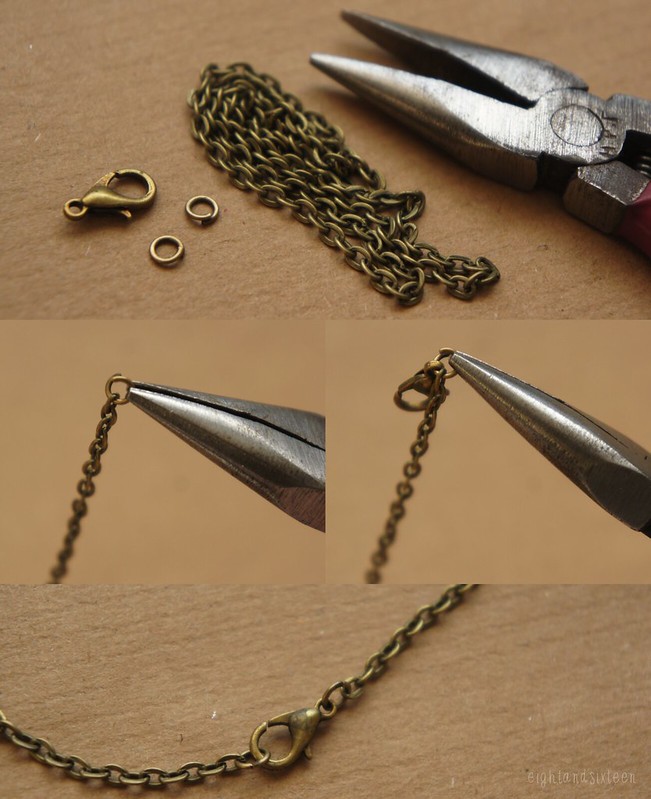
All you need to make each necklace is a length of chain, two jump rings, pliers and a clasp (example shows a lobster style clasp) - once you have the supplies you can make one in minutes! To create a necklace simply cut the chain to your desired length, open up a jump ring, thread it onto one end of the chain and close. Then add a jump ring and clasp to the other end of the chain and you're done.

With just these few items you'll be able to make specific length necklaces as and when you need them for a project allowing you to customise your pieces, plus if you're making high volumes it may save you money in the long run.

If you're not sure on what length of chain to use for your necklace I recently created a handy visual guide using the same necklace design on different length chains. You can find it over on my blog.

101 chains step by step

We love hearing from our readers - use the hashtag #eightandsixteen to share your comments & photos with us!

Erin

Wednesday, 7 January 2015

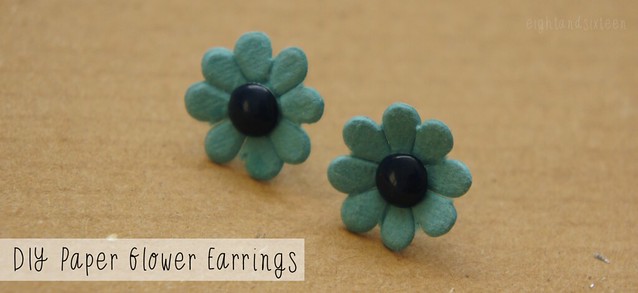
DIY Paper Flower Earrings

diy paper flower earrings diy flower earrings by eight and sixteen

Today's project is a quick and simple statement jewellery DIY perfect for adding a pop of colour to your outfit. Don't fancy paper jewellery? Upgrade this project by using leather scraps for the flowers instead!

You will need: 'paper blossoms' or a flower paper punch, two earring posts, matte Mod Podge, coloured nail polish, glaze, a blob of blu tack

1. Start by adding a little glue or matte Mod Podge to the back of your earring posts, then push on the paper flowers

2. Set aside to dry by standing up the posts in a blob of the blu tack or a piece of polystyrene packaging

3. Once dry I would advise coating the flowers with a layer or two of your matte Mod Podge to make them a little more durable

4. When the Mod Podge has dried use nail polish to colour the flat tops of the earring posts - these will be the centre of flowers

5. Once the polish is dry add layer of glaze and again leave to dry. Add on an additional layer of glaze if necessary and once dry they'll be ready to wear!

We'd love to hear from you if you try out this or any of our other DIY projects - use the hashtag #eightandsixteen to share your photos with us!

Erin

Wednesday, 31 December 2014

Erin's Five Favourite Projects Of 2014!

diy quilted cobweb coasters halloween crafts
DIY Quilted Cobweb Coasters


harry potter pouch
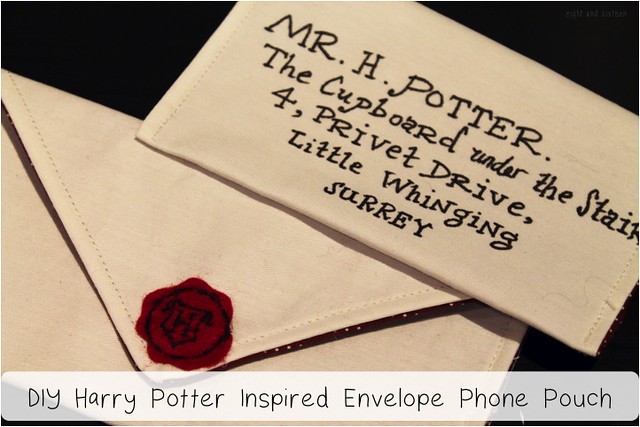
DIY Harry Potter Inspired Envelope Pouch

pintest wire skulls
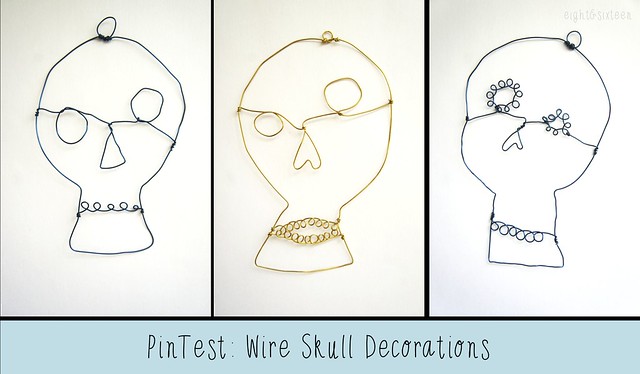
Wire Skull Decorations


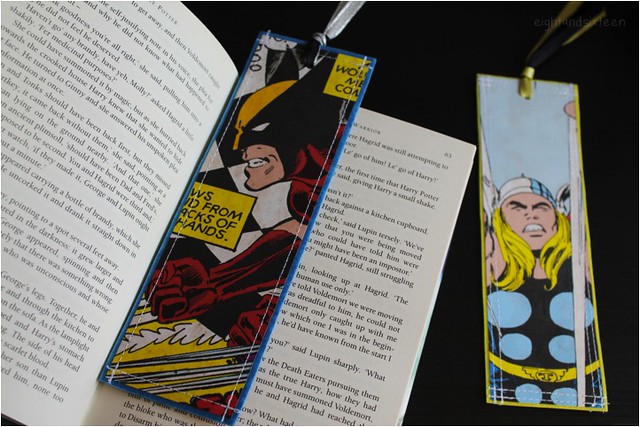
diy upcycled bookmarks 9 eight and sixteen
Upcycled Bookmarks


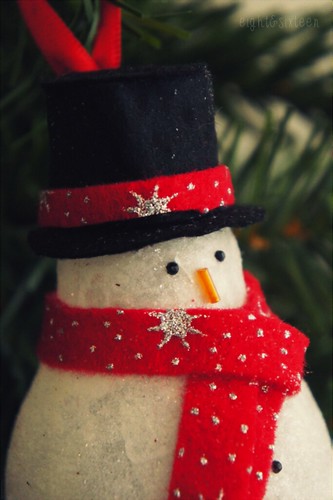
diy upcycled light bulb snowman ornament by eight & sixteendiy upcycled light bulb snowman ornament by eight & sixteen
Light Bulb Snowman Ornament

It's been a crazy seven months here at Eight & Sixteen, who would have thought that we would have created so many projects in such a short space of time?! I've really enjoyed working with Skye on this little blog and found it so difficult to choose just five favourite projects. Although it was tempting to opt for all Halloween ones (those are always my favourites to work on!) I eventually managed to narrow it down to the five shown above.

The quilted coasters had to make my top five as not only were they for Halloween but they also required me to learn new skills as they were my first completed quilting project. I learnt the single binding method especially for this project and was really proud of how the coasters turned out. Similarly the envelope pouch was a project that took perseverance to complete. Again having dreamed up the idea I didn't have a pattern or instructions to follow and in the end it took me three attempts to get the finished product looking exactly how I wanted.

The skulls represent how much I've been really enjoying working with wire this year and not just on jewellery projects. It's such a versatile craft supply and I'm hoping to find more new ways to use it in 2015!

The final two projects on my list are both upcycles, something I've become more and more enthusiastic about this year. I had so much fun making both the snowman ornament and the bookmarks which were one of the first Eight & Sixteen projects I set to work on. I loved seeing the simple light bulb and wallpaper samples transform into new items.

I hope you've enjoyed our 2014 DIYs just as much as we have. If you've got any particular projects or techniques you'd like to see featured in 2015 please do let us know!

We'd love to know what your favourite projects of the year have been - use the hashtag #eightandsixteen to let us know or share your photos with us!

Erin

Wednesday, 24 December 2014

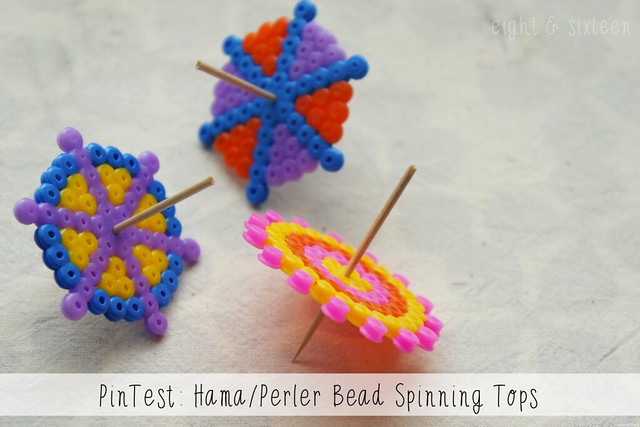
PinTest: Hama/Perler Bead Spinning Tops

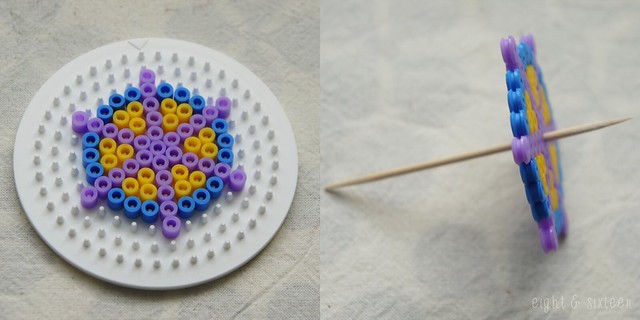
diy pinterest test spinning tops from hama perler beads

The inspiration for today's PinTest came from various Pins including this one which show how you can easily make your own colourful spinning tops with just a few Hama beads and a cocktail stick - perfect for a Christmas Eve crafting session! I love using these beads as there's so many great little projects you can create with them from simple toys like this to jewellery, decorations and more - the possibilities are endless!

All you need to do to make your own spinning tops is create your design on a circular peg board, cover with ironing paper and iron to fuse the beads together. Whilst still warm, carefully push a cocktail stick through the centre of your beads and trim down the other end to use as a handle.

This quick project is not just simple but is also a lot of fun to make and would be perfect for a rainy day!

We'd love to hear from you if you try out this or any of our other DIY projects - use the hashtag #eightandsixteen to share your photos with us.

Erin

Monday, 22 December 2014

9 Wearable Festive DIYs

9 wearable festive diys

1/ Christmas Tree Earrings (via Legendary Beads) - if you want to practise your wire work skills these earrings are the perfect project. Made simply from coils of wire with bead embellishments they're great for beginners.

2/ Snow Globe Necklace (via Tatertots & Jello) - this design takes a classic Christmas decoration and recreates it in miniature to be used as an eye catching necklace pendant.

3/ Icy Earrings (via Epbot) - this idea is perfect for anyone who loves to upcycle as these pretty statement earrings are made from bubble wrap!

4/ Bracelet For Christmas Day (via PandaHall) - if beading is your craft you'll love this festive bracelet made using tiger tail wire and Swarovski crystals.

5/ Quickie Candy Cane Earrings (via All Free Jewelry Making) - another beginner project is these cute candy cane earrings that can be made in no time! Again they are perfect for beginners and don't require too many supplies.

6/ Frosted Snowflake Charm Bracelet (via e-elise etc) - this tutorial uses frosted shrink plastic to create snowflake charms which hang alongside simple beads for a fun festive bracelet.

7/ Ornament Headband (via in-lala-land) - if you want to go for something more quirky this bold headband is sure to turn heads. Made from colourful baubles this one could be perfect for a festive party!

8/ Quilted Christmas Booties (via Fave Quilts) - if sewing and quilting are your favourite crafts you'll love these cute patchwork slippers, brilliant for a handmade gift!

9/ Glitter Christmas Light Bulb Necklace (via Sugar Bee Crafts) - another colourful piece, these glittery bulb pendants are sure to make a statement.

We'd love to hear from you if you give these DIY's a go - use the hash tag #eightandsixteen to share your photos with us!

Erin

Wednesday, 17 December 2014

DIY Button Flower Brooch

DIY Button Flower Brooch by Eight and Sixteen

Today's button tutorial is for this cute accessory that's perfect for a handmade gift this Christmas! These brooches would make great stocking fillers - just customise the design to suit your friends and family members by using their favourite colours.

You will need: buttons, felt, a brooch back, a pen, scissors, fabric glue + a needle & thread

1. Arrange your 'petal' buttons in a circle on a sheet of felt, draw around them and cut out two of this shape.

Tip! You can choose any buttons that you like for your brooch however I would recommend heart shaped ones as they lend themselves well to creating the button flower's petals. 

2. Next take a needle and thread and sew each of your buttons onto one of your felt shapes until you have your finished button circle. Then sew your centre button.

Tip! You can also make any sized brooch you like - just make sure your centre button is large enough to slightly overlap the 'petal' buttons for a 3D effect.

3. Take your second piece of felt and neatly stitch on a brooch back. Then use fabric glue to attach this onto the back of your first piece of felt, covering up your stitching for a neater finish. Once dry your button flower accessory is ready to wear or give as a gift!

We'd love to hear from you if you try out this or any of our other DIY projects - use the hashtag #eightandsixteen to share your photos with us.

Don't forget to check back tomorrow for another button project idea!

Erin

Monday, 15 December 2014

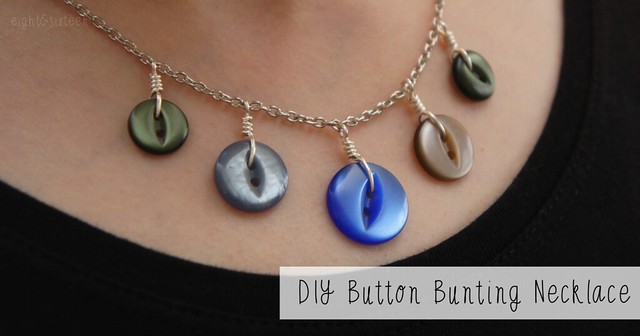
DIY Button Bunting Necklace

diy button bunting necklace tutorial by eight & sixteen

With Christmas fast approaching we've decided to share four button projects including gifts and decorations! For the first project of the week I wanted to share this necklace design that I think could be the perfect DIY for anyone looking to give unique handmade gifts this year!

To make your own you will need: buttons, jewellery wire, wire cutters, flat and round nose pliers, an assembled chain (or supplies to make your own)

diy button bunting necklace tutorial by eight & sixteen

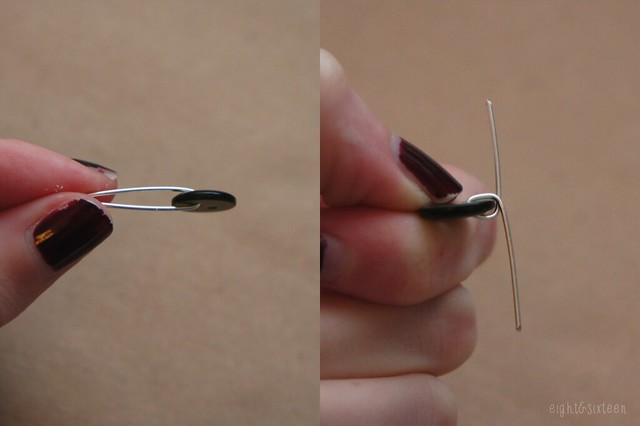
1. To make your bunting necklace you will need to turn each of your chosen buttons into a charm. Start with a piece of wire approx. 2" long, thread it through one of the holes in your button and bend in half

2. Use your flat nose pliers to bend out the lengths of wire in the opposite directions, creating a loop around the edge of the button

diy button bunting necklace tutorial by eight & sixteen

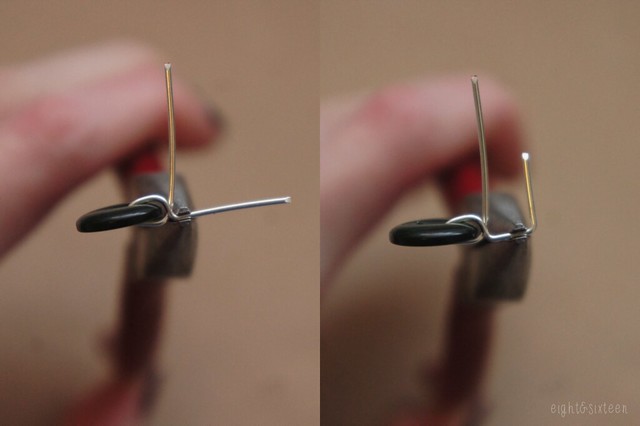
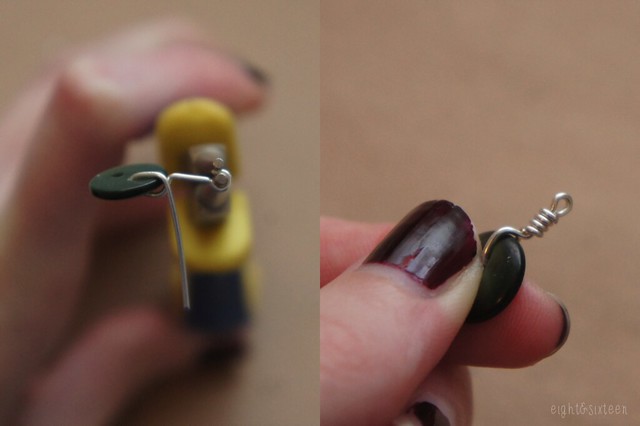
3. Take your pliers and bend the wire that sits on the front side of the button up at a right angle - this will be the piece you turn into the loop

4. Move a little way along the wire then add a second bend in the opposite direction

diy button bunting necklace tutorial by eight & sixteen

5. Switch to your round nose pliers and bend the end of the wire around them to create a loop

6. Finally, wrap the other length of the wire around it securing it in place and adding a decorative finish

diy button bunting necklace tutorial by eight & sixteen

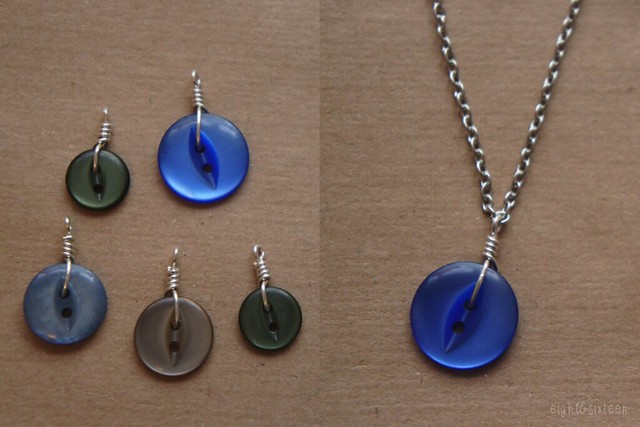
7. Once you have all of your button charms, find the centre of your necklace chain and attach on your middle charm. To do this use pliers to gently open up the hanging loop you created, thread through the chain link and close.

8. Repeat this process to add on the remaining button charms making sure to space them apart evenly, and your necklace is done!

We'd love to hear from you if you try out this DIY project - use the hashtag #eightandsixteen to share your photos with us!

Erin

Monday, 8 December 2014

DIY Festive Miniature Bottle Ornaments

DIY Festive Miniature Bottle Ornaments by eight and sixteenDIY Festive Miniature Bottle Ornaments by eight and sixteen

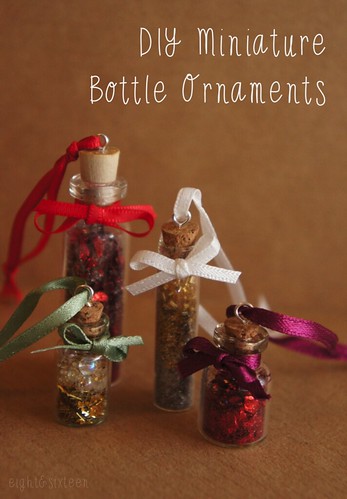
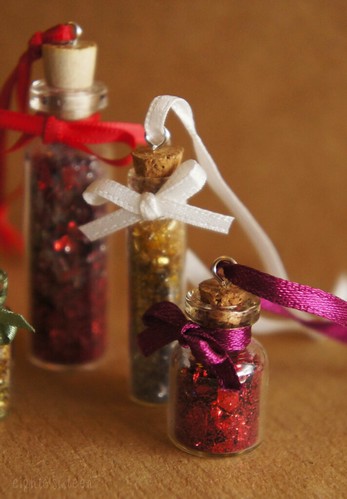
These pretty glitter-filled miniature bottle ornaments are the perfect addition to anyone's decor this season, no matter how much space you have! With just a few supplies they're easy to make and can be customised to suit your colour scheme.

You will need: miniature glass bottles with corks, headpins, flat and round nose pliers, a pin, glitter/beads/sequins, thin ribbon, scissors & strong glue

DIY Festive Miniature Bottle Ornaments by eight and sixteen

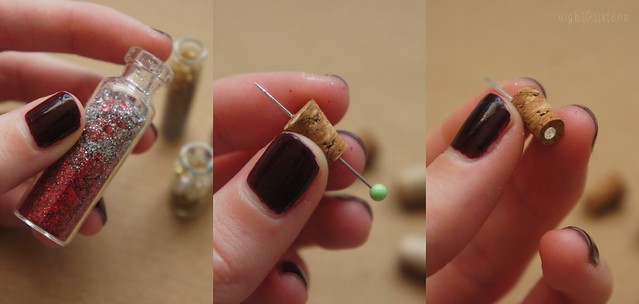
1. Fill up your bottles with glitter, beads, sequins or other sparkly items and set aside

2. To hang the bottle you'll need to add wire hoops to the corks. To do this first use a pin to pierce through them vertically - this will allow you to thread through a headpin more easily

DIY Festive Miniature Bottle Ornaments by eight and sixteen

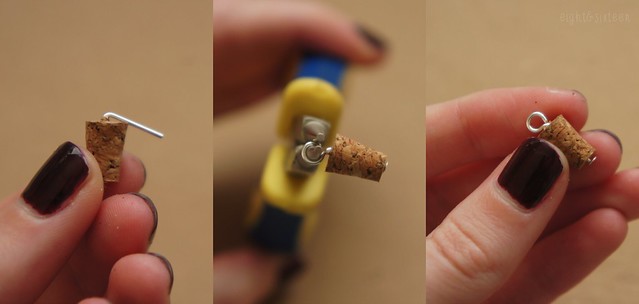
3. Next use pliers to turn the end of the headpin into a hanging loop. Start by bending the wire to the side then use round nose pliers to shape into a loop

DIY Festive Miniature Bottle Ornaments by eight and sixteen

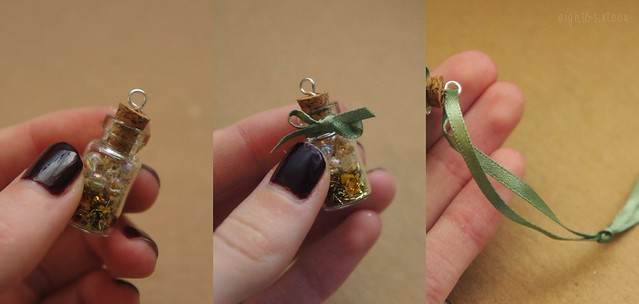
4. Use strong glue to secure a cork into each bottle

5. Cut lengths of ribbon and tie one into a bow around the bottle neck for an extra embellishment. Use another length of ribbon for hanging by threading it through the wire loop and tying a knot

We'd love to hear from you if you try out this DIY project - use the hashtag #eightandsixteen to share your photos with us!

Erin

Wednesday, 3 December 2014

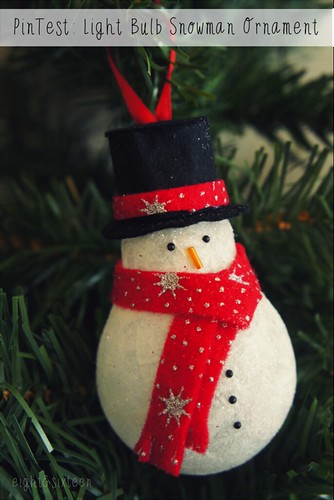
PinTest: Light Bulb Snowman Ornament

diy upcycled light bulb snowman ornament by eight & sixteen diy upcycled snowman ornament eight and sixteen

Welcome to a festive edition of PinTest, this week featuring a popular light bulb ornament idea I originally came across last year. This one caught my eye as I loved the idea of upcycling a simple everyday object into something festive - it's perfect for those on a budget! Of course there are lots of different versions of this idea out there already but here's my take on the project...

pinterest test light bulb snowman ornament eightandsixteen

The Base
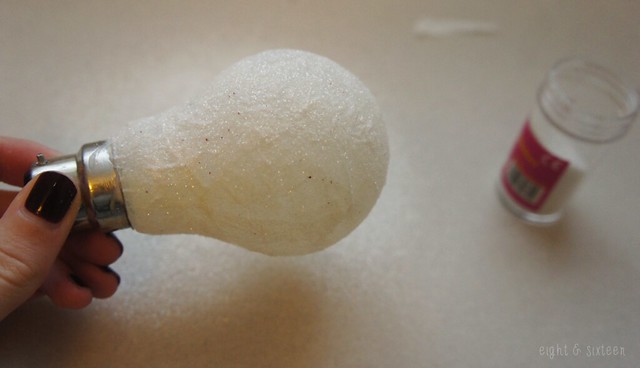
As I wasn't able to get hold of a white bulb I used Mod Podge and tissue paper to create a white base on a clear bulb then sprinkled on white glitter to give both texture and sparkle. There are also ways to colour the bulb with paints but as I had used this method for jars & tea light holders in the past I knew it would work well for this project too. I'd recommend more than one layer of tissue paper if you want to create a fairly opaque finish once the glue has dried.

pinterest test light bulb snowman ornament eightandsixteen

Adding The Details
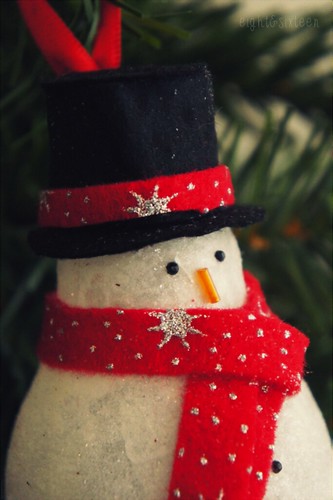
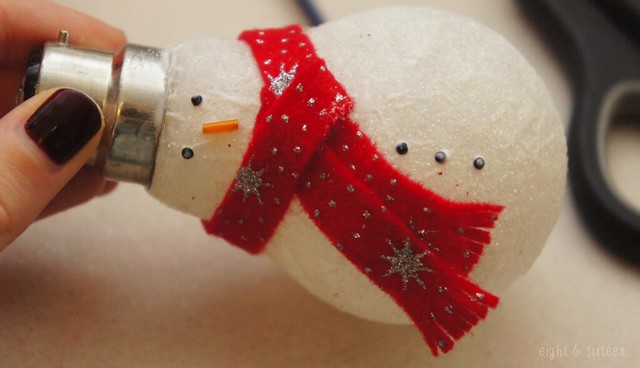
Next up I created a scarf using some festive print felt I had leftover from another project. I cut a thin strip and tied it around the bulb then snipped into the ends to create a tassel look. For the other features I used black nail art gems as coal and an orange bugle bead to represent a classic carrot nose. Again these were both items I already had in my craft stash but you could also use paint, buttons, sequins, paper or felt to add on the features.

pinterest test light bulb snowman ornament eightandsixteen

Finishing touches
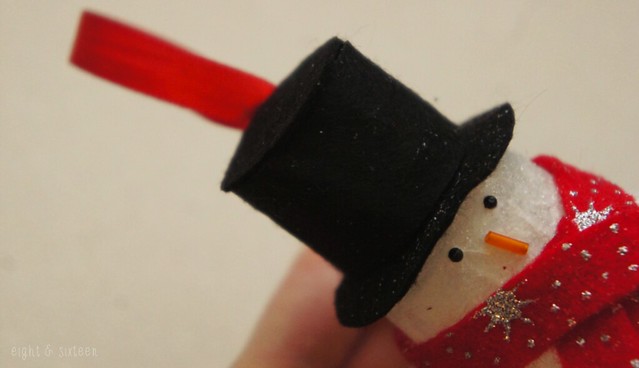
Although a lot of versions of this project seem to leave the silver top of the bulb on show I decided to give the snowman a top hat using black felt. First I cut a circle of the felt that would be big enough to slide over the metal then I cut another circle in the centre of it creating a ring that would fit snugly around the base of the bulb. To make the ornament suitable for hanging I created a loop in a piece of red ribbon then tied it around the metal part of the bulb and used a glue gun to secure it in place - this is where you have to be careful as you don't want it to fall and smash! Finally I covered up the whole thing with a long rectangle of black felt wrapped around the metal and a circle on top, both nicely held in place using hot glue.

The Verdict
For me this is one of the better Christmas ideas out there on Pinterest as it's so easy to do as well as being thrifty and completely customisable! I'm really happy with how my version turned out however if I were to make another one I would definitely try and find a screw top light bulb so that I could hollow it first to make it safer, but overall I think this is definitely one to pop on your to-do lists this year!

We'd love to hear from you if you try out this or any of our other DIY projects - use the hashtag #eightandsixteen to share your photos with us!

Erin

Wednesday, 26 November 2014

20 Awesome Festive Decorations To DIY

20 awesome festive decorations to diy

1/ Tiny Tree Decorations (via Noodlehead)
2/ Rustic Snowflakes (via Little Things Bring Smiles)
3/ Beaded Star Ornaments (via Tara Dennis)
4/ Toilet Roll Reindeer (via The Craft Train)
5/ Quilted Christmas Stockings (via Even Artichokes have Hearts)
6/ DIY Lantern (via All Things Handmade)
7/ Bottle Cap Snowman Ornaments (via One Artsy Mama)
8/ Crafty Reindeer Games (via Jen Kim Made)
9/ Felt House (via Poopscape Projects)
10/ Sewing Machine Sampler Ornaments (via Craft Log)
11/ Button Wreath Ornament (via Martha Stewart)
12/ Cinnamon Wrapped Candles (via e-elise etc)
13/ Light Bulb Snowman Ornament (via Ginger Snap Crafts)
14/ Ribbon Christmas Tree Decoration (via Be A Fun Mum)
15/ Christmas Card Baubles (via Tara Dennis)
16/ Popcorn Garland (via A Kiss Of Colour)
17/ Snow Globe Ornament (via Cook Love Craft)
18/ Candy Cane Mice (via Martha Stewart)
19/ Felt Snowflake Decorations (via e-elise etc)
20/ DIY Advent Calendar (via Even Artichokes Have Hearts)

We'd love to hear from you if you give these DIY's a go - use the hash tag #eightandsixteen to share your photos with us!

Erin


Wednesday, 19 November 2014

DIY Upcycled Paper Garlands (featuring The Hunger Games)

upcycled paper garlands hunger games

To celebrate the release of Mockingjay - Part 1, which Skye and I are both very excited to see, our latest We Love... topic is of course The Hunger Games!

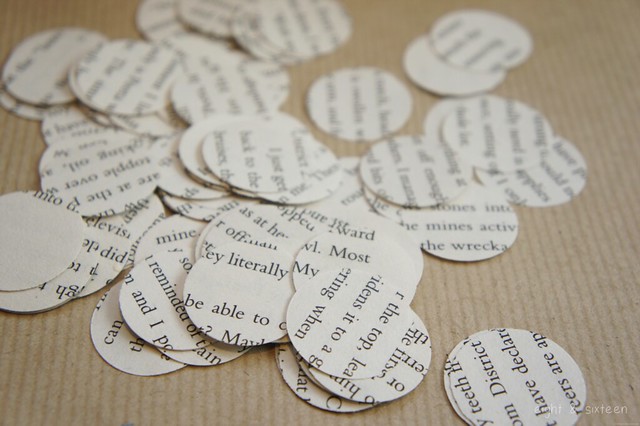
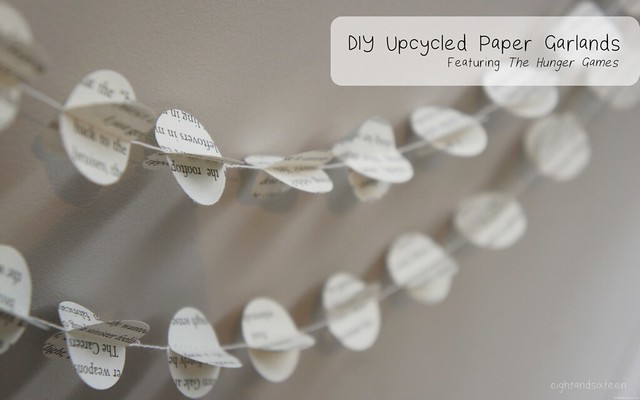
Today's very simple DIY project shows you how to make your own upcycled paper garland and in honour of Mockingjay's release I have used the better looking pages from an old battered copy of The Hunger Games for this tutorial. I know everyone won't have a falling apart copy to hand so as an alternative you can pick up bags of book confetti on Etsy, use photocopies or type out some text including key words, places and your favourite character's names.

If you're as excited about the film's release as we are why not whip yourself up one of these cute garlands to celebrate? If not, they can easily be customised - try using old magazines, newspapers, maps or pretty scrapbooking papers to make this project perfectly fit the decor of any occasion or party!

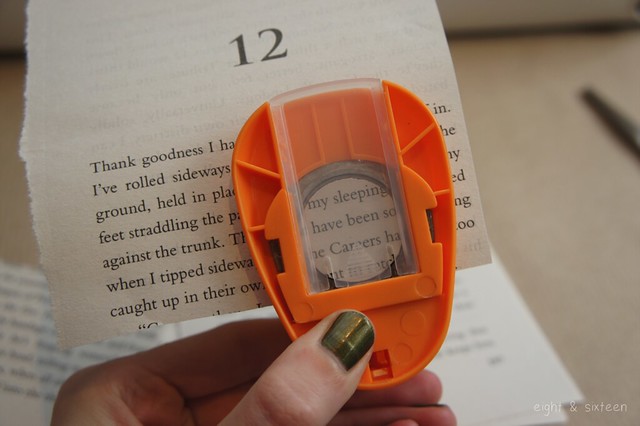
You will need: old book pages, a 1" circle punch, a sewing machine & thread
diy garland 3 diy garland 4

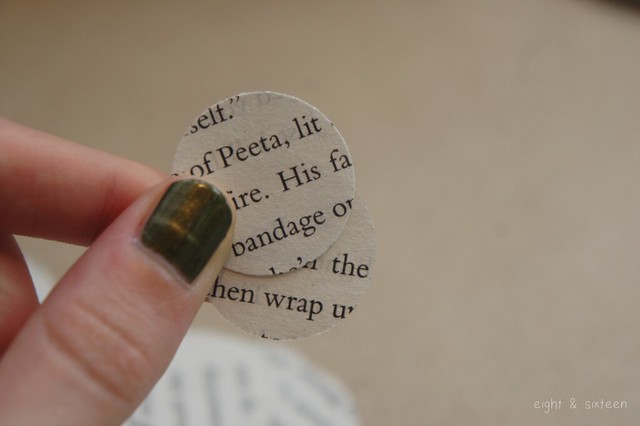
1. Start by punching out your circles until you have enough for the length garland you would like to make - I used approx 60 circles for a 50" garland

You can either punch the circles out at random (this way you can punch through multiple pages at once) or choose to frame specific words or character names within your circles
diy garland 5
diy garland 6

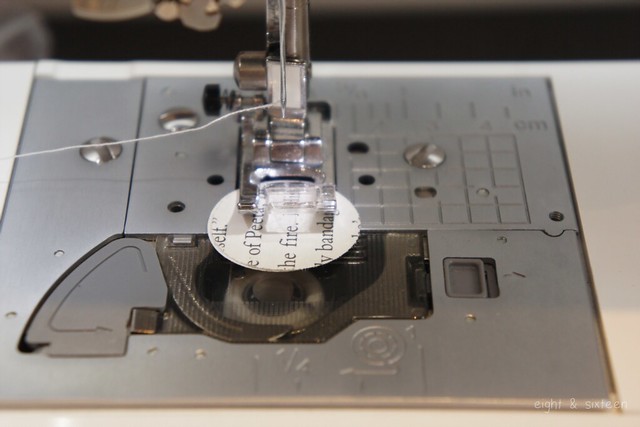
2. Pair up two of your circles and place under your sewing machine foot. Make sure that you leave a tail of thread (approx. 3") before sewing to use for hanging the garland

If you want the text to sit the correct way on your garland make sure you have the circles facing the right direction before you start to sew. Alternatively for a more random arrangement just pick up the circles as they are!
diy garland 7

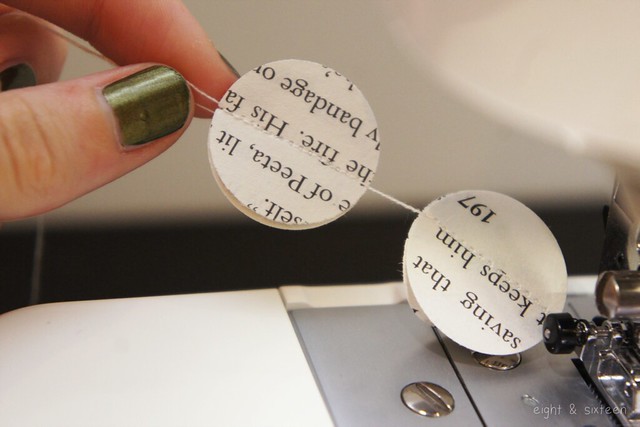
3. Sew through the centre of the circles, then continue on sewing for another 0.5-1" before placing your next set of circles under the sewing machine foot. This way you will get the gap between your circles on the finished garland

4. Continue adding on more circles in this way until you reach the desired garland length and your garland is done!
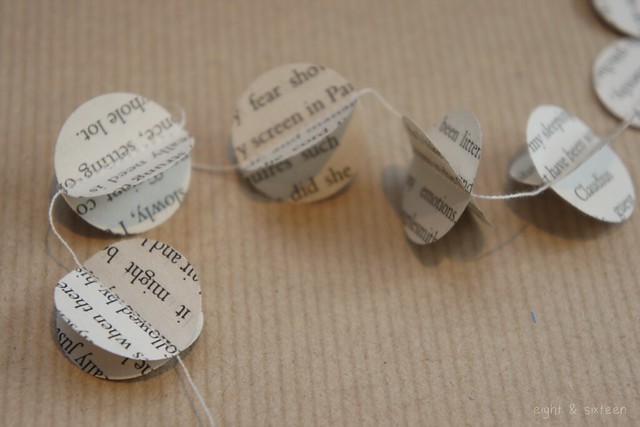
diy garland 8

You can leave your garland as is or create more of a 3D effect by carefully pressing out the circles to look like the ones shown above!

May the odds be ever in your favour...

We'd love to hear from you if you try out this DIY project - use the hashtag #eightandsixteen to share your photos with us!

Erin
Wednesday, 12 November 2014

Book Review - Glitterville's Handmade Christmas, Stephen Brown (2014)

Review copy c/o Netgalley, image via Goodreads

glitterville's handmade christmas

I’ll be honest with you, I’m much more of a Halloween person than a Christmas one but when I saw the unique cover of this new festive craft book from Glitterville I couldn’t turn down the chance to review it – any opportunity to discover new craft ideas!

Handmade Christmas features a whole host of completely unique and unusual projects all with their very own distinctive style. Every project is colourful, fun and of course glittery!

Beginning with lots of information on tools and materials as well as a rundown of basic techniques the book seems to be designed to teach methods that can be applied to other projects, encouraging reader’s personal creativity. Each handmade decoration idea that follows comes complete with good quality step-by-step photos in an easy to follow layout. In addition to the tutorials templates and patterns are included in the back section of the book and you won’t be surprised to hear that even these are colourful!

My personal favourite ideas from the book would probably have to be the Jolly Dolly Holly Wreath (made entirely from felt), and the Tiny Tannenbaums & Present Picks (decorative cake toppers that stand out beautifully against the white icing backdrop). The Glitter Village (as pictured on the bottom left of the book's cover) was also an impressive and detailed project.

The originality of the ideas found within this book really stood out to me and I loved how different it was from other Christmas craft books I’ve read. If you’re a big fan of this holiday and are looking to branch out from the average Christmas project into something a little more ambitious and bold this truly unique book could be perfect for you!

If you’re interested in finding out more about Glitterville’s other projects visit glitterville.com

Erin

Wednesday, 5 November 2014

Tea Towel Upcycle Challenge Results : Erin's DIY Apron

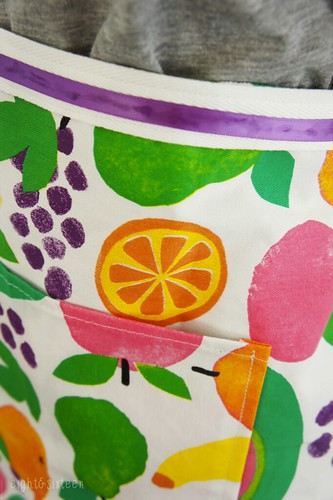
diy upcycled apron from tea towel eightandsixteen diy upcycled apron from tea towel eightandsixteen

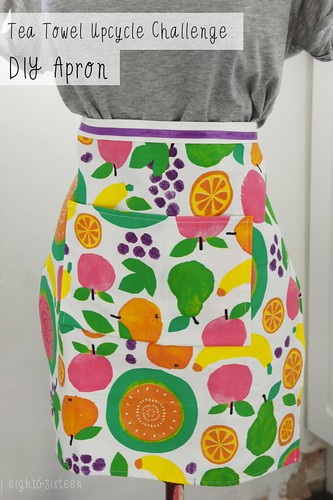
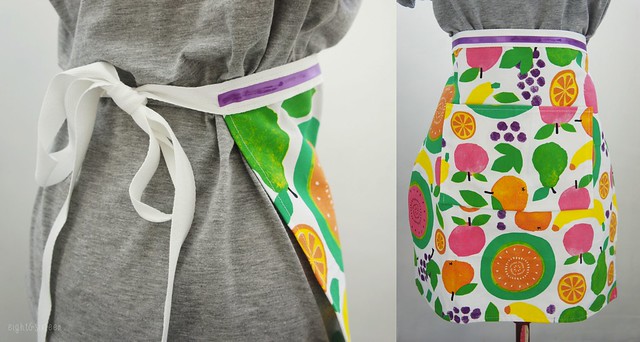
This week myself and Skye have both taken on the challenge of upcycling this fun fruit print tea towel into something new. For my project I decided to keep it in the kitchen and create a colourful apron!

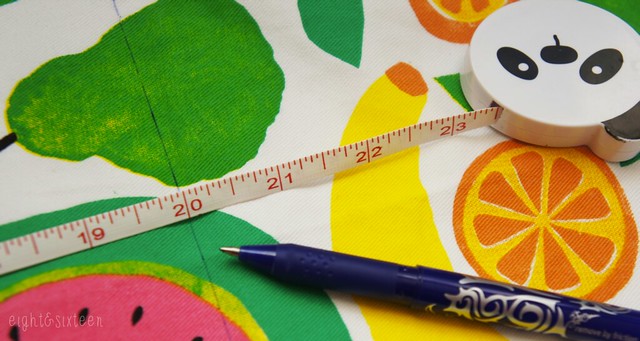
To make your own you will need: a large tea towel, cotton webbing/tape, a sewing machine, scissors, pins, a tape measure, a fabric pen/pencil + (optional) ribbon/other embellishments

diy upcycled apron from tea towel eightandsixteen

1. Measure how wide you want the apron to be, add on 1/2" to allow for neatening the edge and cut off any excess fabric.
I chose to make my apron sit flat but don’t forget to allow for gather when measuring if you want to create that vintage look!

2. Fold over the raw edge and stitch in place to make sure it won’t fray. You should now be left with a slightly smaller version of your original tea towel with no raw edges.

diy upcycled apron from tea towel eightandsixteen

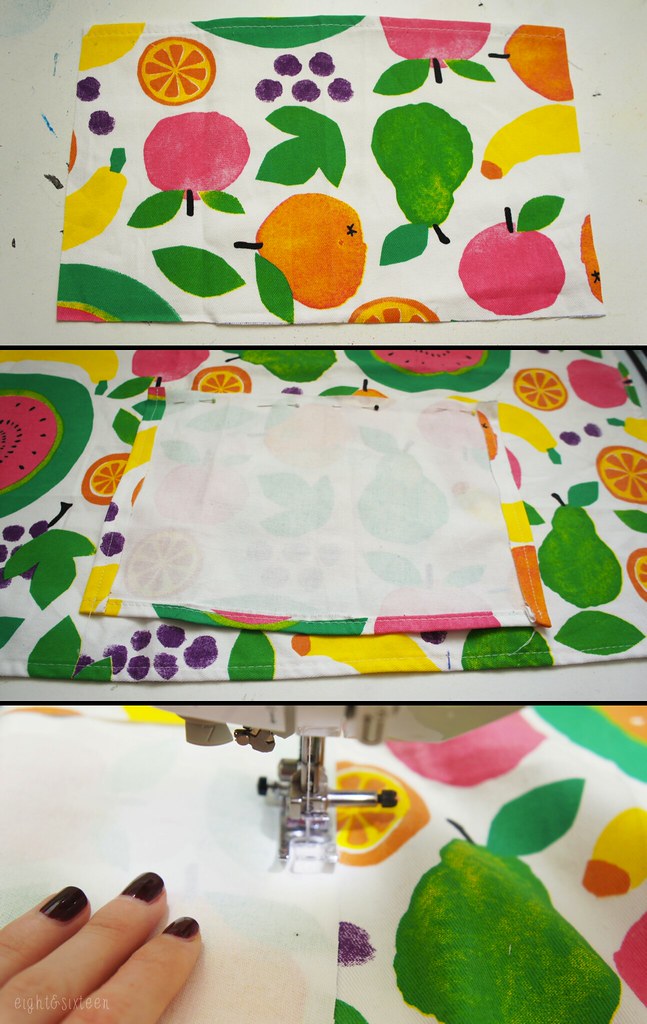
3. If you have any fabric leftover you can create a pocket on the front of the apron. I cut the two side edges off of my leftover fabric then turned over and stitched the raw edges as the original tea towel was quite wonky but you can leave the piece as is and create a pocket that stretches across the whole of the apron instead if you'd like.

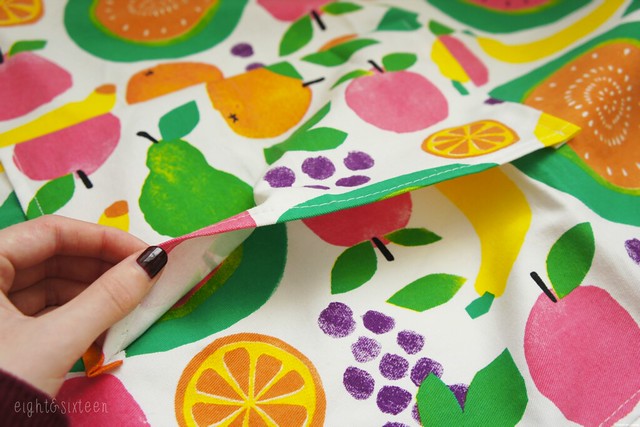
4. Decide where you want the pocket to sit, lay it face up onto the front of the apron then flip it downwards so it is upside down on the front of the apron. Stitch in place then flip the pocket back up and sew along the two side edges to create the pocket shape.

diy upcycled apron from tea towel eightandsixteen

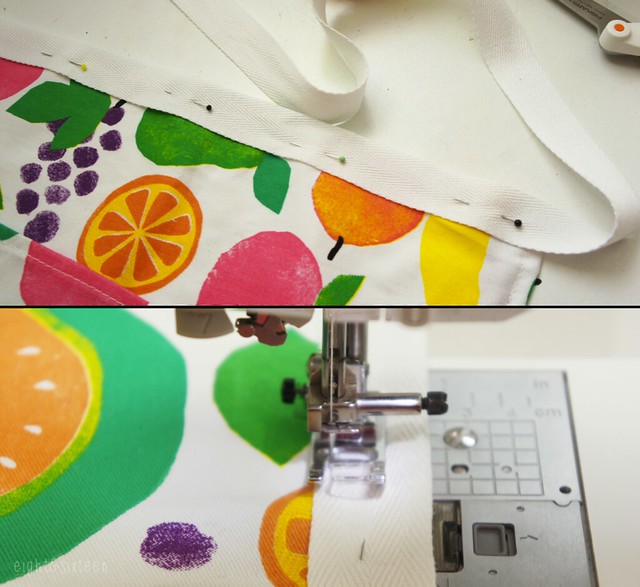
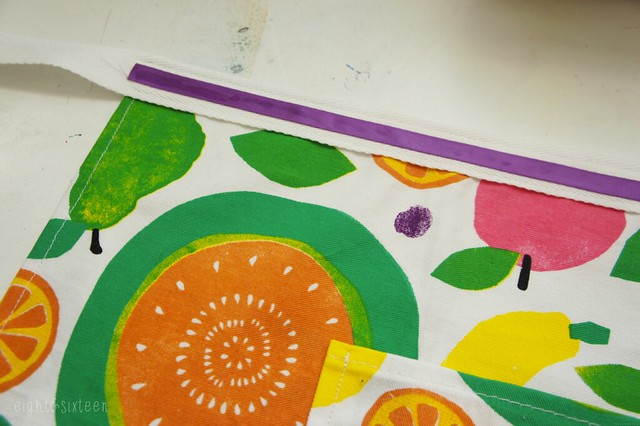
5. Take your strip of cotton tape (making sure it's long enough to tie around your waist) find the centre of the apron front and pin along the top edge. Stitch in place along both edges so it is secure.

diy upcycled apron from tea towel eightandsixteen

6. The final step is optional but if you wish to decorate your apron you can stitch, glue or iron on embellishments such as buttons, bows or ribbon as shown in my example.

diy upcycled apron from tea towel eightandsixteen

We'd love to hear from you if you try out this or any of our other DIY projects - use the hashtag #eightandsixteen to share your photos with us!

Don't forget to check back on Friday to see Skye's project!

Erin

Wednesday, 29 October 2014

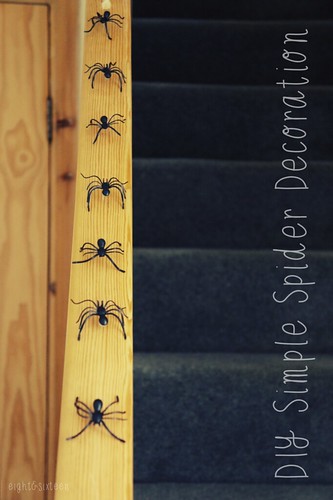
DIY Simple Spider Decoration

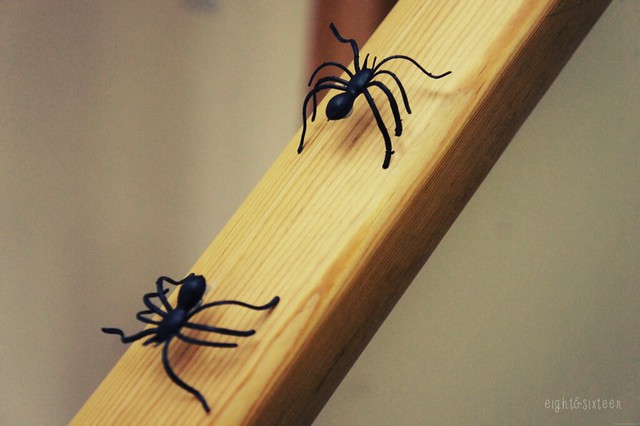
diy simple spider decoration for halloween eightandsixteen diy simple spider decoration for halloween eightandsixteen

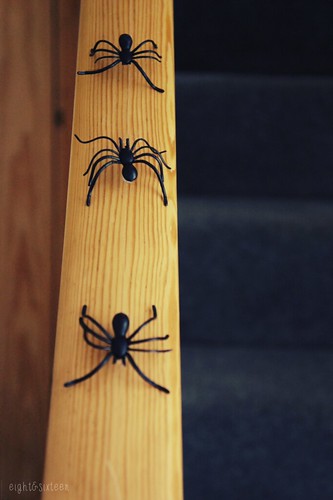
If you're looking for a quick and easy last minute Halloween project today's DIY could be perfect for you! This creepy spider garland is really simple to make, takes no time at all and is a great way to surprise your guests as they arrive.

To make your own you will need: clear beading thread, plastic spiders (I picked up a pack of 72 from Pound World) & a glue gun

Simply use a hot glue gun to apply a line of glue to the underside of the first spider and lay on your clear thread to secure it in place. Repeat this process until you reach the desired length & you're done!

As you can see I've chosen to display my spider decoration along a banister but you can also use them on doors, across fireplaces, on tabletops, windows - wherever you like!

diy simple spider decoration for halloween eightandsixteen

We'd love to hear from you if you try out this or any of our other DIY projects - use the hashtag #eightandsixteen to share your photos with us!

Erin
Wednesday, 22 October 2014

Erin's Pumpkin Decorating Challenge Results

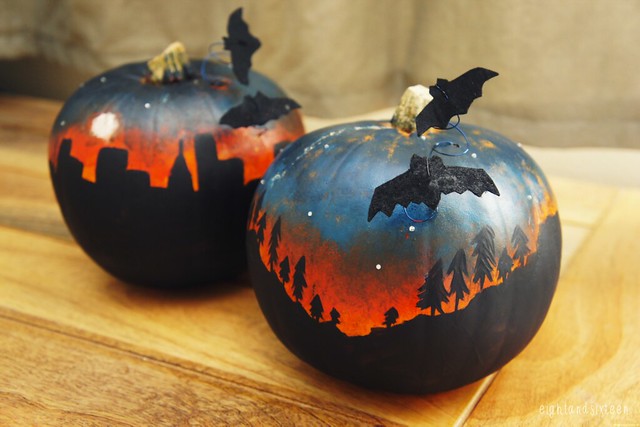
halloween pumpkin decorating diy eightandsixteen

On Monday we introduced our Halloween inspired pumpkin decorating challenge and today I get to share my results! Right from the start I knew I wanted to try and use items that I already had in my craft stash to decorate the pumpkins, unintentionally making an extra challenge for myself. In the end I managed to do this using paints, felt, jewellery wire, Mod Podge and even nail art gems!

My pumpkin design was initially inspired by various Pins featuring bats and other animals attached onto the surface of plain coloured pumpkins to create a 3D effect. As someone who is terrible at pumpkin carving I loved the idea of being able to create something 3D without having to cut into the pumpkin at all.

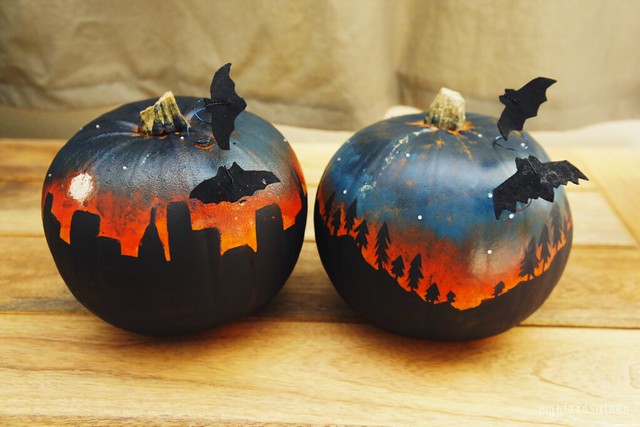
Next came the idea to not just leave the pumpkins one colour but to create a backdrop for the bats to fly against. I had decided I didn't want to completely cover up the natural orange of the pumpkin and so settled on a sunset and contrasting silhouette background which allowed me to incorporate it.

Overall I'm really pleased with how the pumpkins turned out and think they would be perfect for indoor display on windowsills, by fireplaces or as table centrepieces at your Halloween party, however I wouldn't recommend placing them outside in bad weather! Here's a little bit more about how I achieved the final designs...

halloween pumpkin decorating diy eightandsixteen

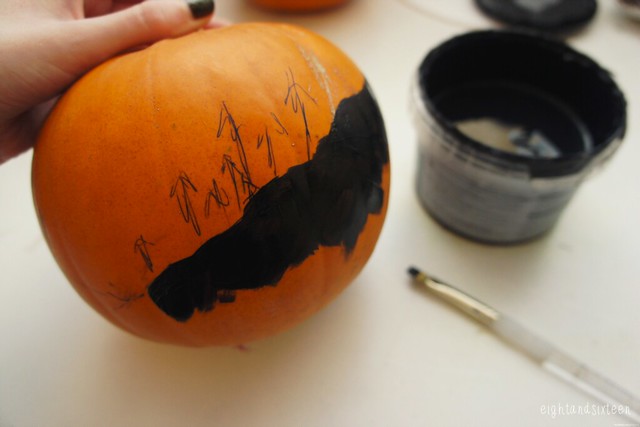
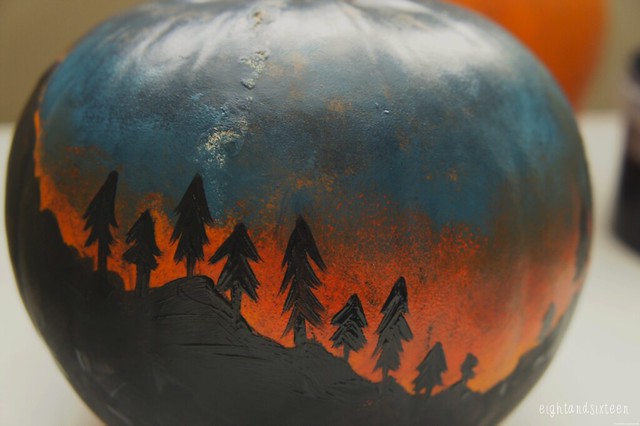
I started off by mapping out the landscape design onto the surface of the pumpkin using a trusty FriXion pen. I then used chalkboard paint to black out these areas, choosing this type of paint as I thought it would adhere best to the surface. It also gave a nice matte finish once dried, adding to the final effect of the design.

halloween pumpkin decorating diy eightandsixteen

Next I used acrylic paints mixed with Mod Podge (to help them stick to the surface) and sponge brushes to create a sunset effect on the top half of the pumpkin. As I mentioned above I wanted to try and include the bright natural orange tones of the pumpkin's skin so a sunset seemed like the perfect way to do this.

halloween pumpkin decorating diy eightandsixteen

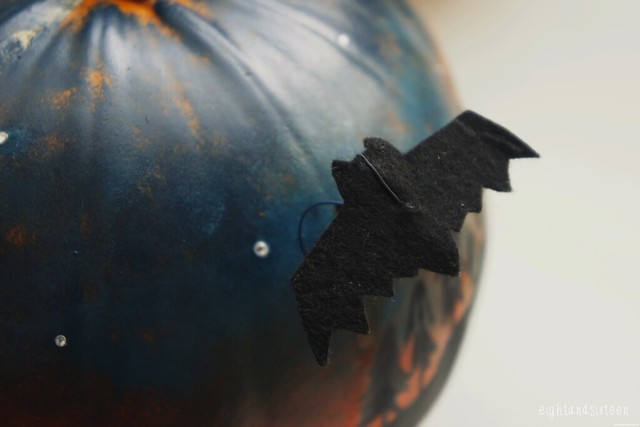
For an extra final touch I used Mod Podge to stick on a few tiny nail art gems to represent stars in the evening sky. Then finally I added on the felt bats that had originally inspired the whole idea. After cutting out the bats I used jewellery wire to attach them onto the pumpkin. To make sure they were secure I used a wooden skewer to first pierce holes into the pumpkin's surface then threaded the wires through these and the outer layer of the pumpkin.

For my second pumpkin the process was exactly the same except this time I opted for a cityscape style silhouette, which with the bats I think feels very Gotham!

halloween pumpkin decorating diy eightandsixteen

We'd love to hear from you if you try out this or any of our other DIY projects - use the hashtag #eightandsixteen to share your photos with us!

Erin
Related Posts Plugin for WordPress, Blogger...