tabs

es about us es contact es archive es challenge es we love 9 es recipes es pintests es links
Showing posts with label challenge. Show all posts

Friday, 7 November 2014

Tea Towel Upcycle Challenge Results: Skye's DIY Lunch Bags


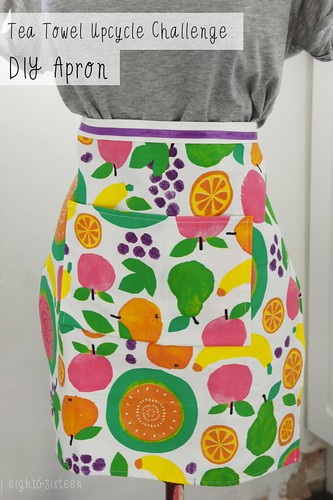
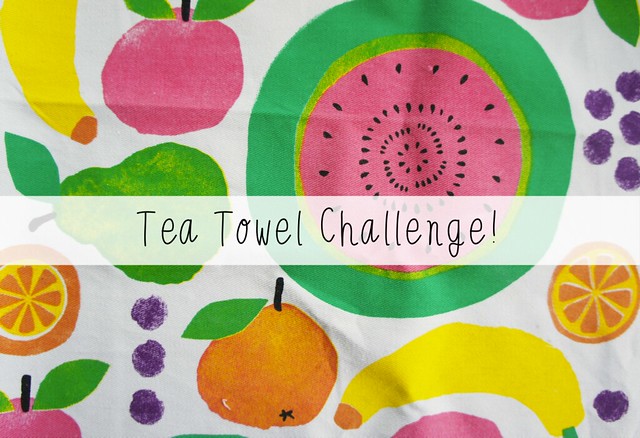
I've always loved the idea of reusable lunch bags, so for my tea towel upcycling challenge I decided to create a set perfect for lunch on the go!

To make your own you will need: a large tea towel, a sewing machine, 1 pair of sew in magnetic snaps, fabric pen, pins, scissors and a ruler.
Optional: bias binding to finish edges, and velcro for the extra sandwich bags.


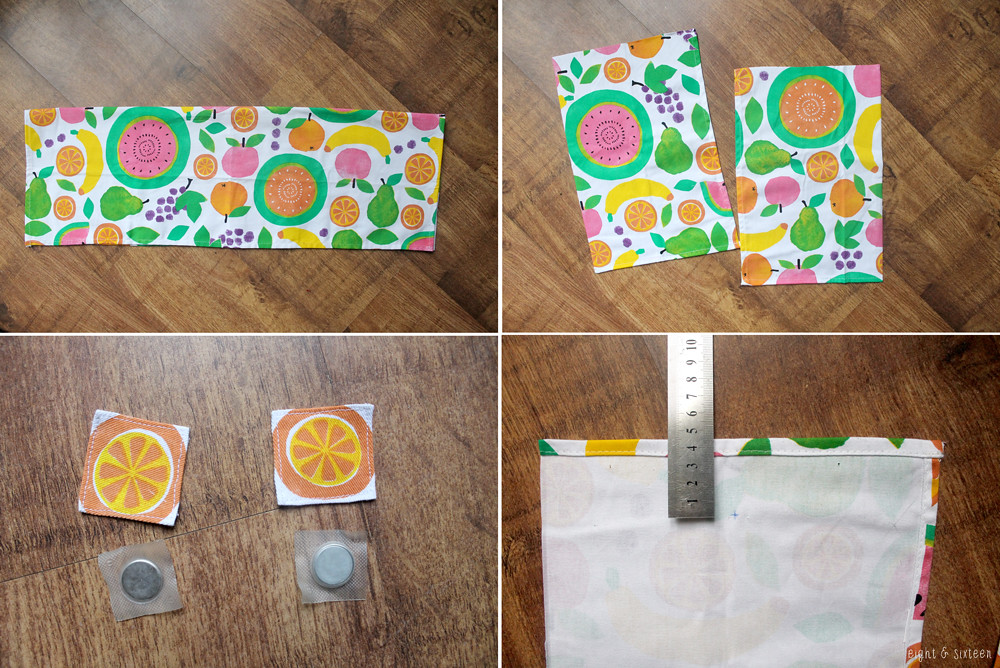
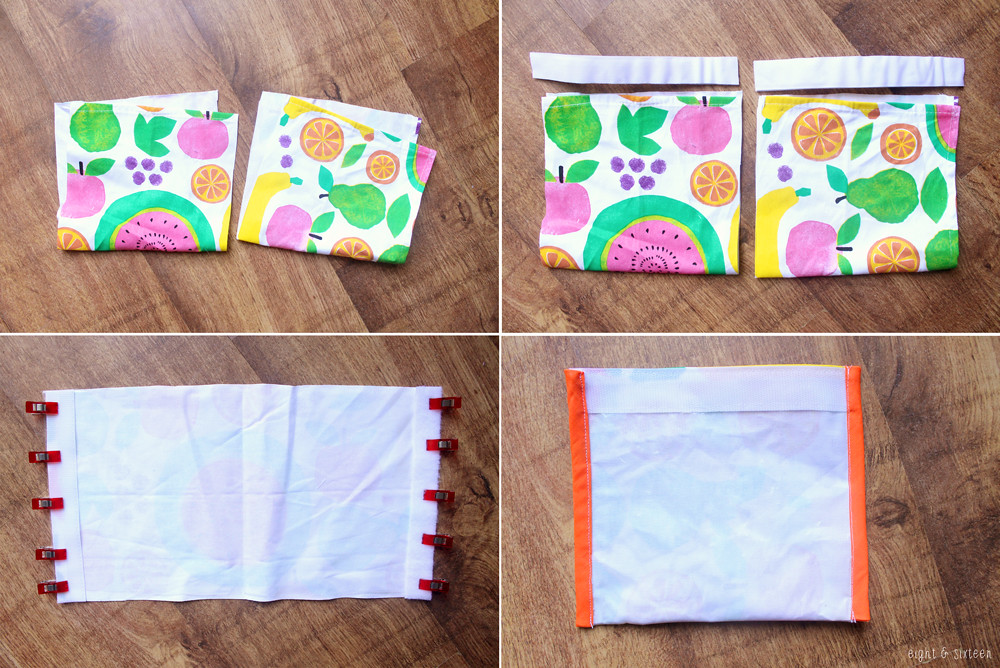
Fold your tea towel in half lengthways and cut in half, placing one half to the side for later. Cut your remaining piece in half again. The two short edges that are already hemmed will be the top of your lunch bag.
To create tabs to cover up the magnetic snaps on the inside of the bag, cut a strip from the piece you put to one side that is 5cm wide. Cut two 5cm x 5cm squares from this strip, and sew under the edges with a 2mm seam allowance.
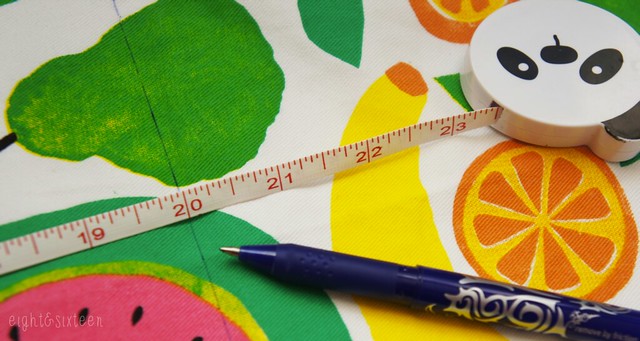
Take your two main fabric pieces, and mark the placement for your magnetic snaps and tabs. I marked 4.5cm down on one, and 10.5cm on the other. These placements will determine the front and back of your lunch bag - the lower magnetic snap being the front. This is so that when the bag is finished you can roll the fabric down and the snaps will lock into place keeping the bag secure.


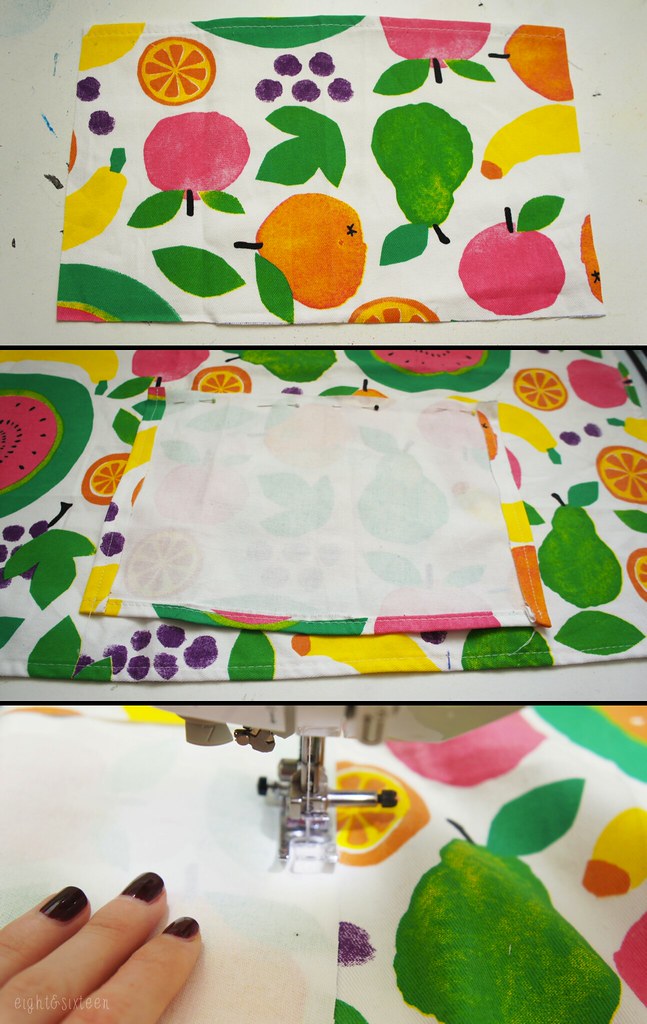
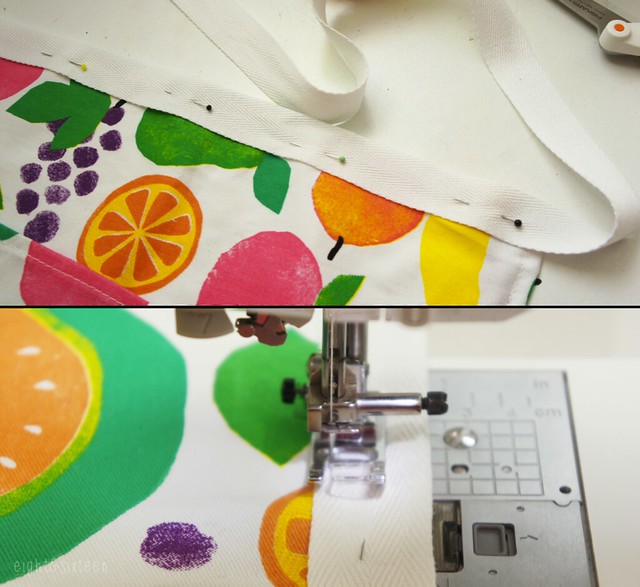
Place your magnetic snaps onto these markings on the wrong side of the main fabric, cover with the tabs and sew into place. Note: Make sure that your magnetic snaps are facing the right way so that they don't repel each other!
Place your main fabric pieces right sides together, pin and sew around the sides and bottom edge with a 1cm seam allowance.
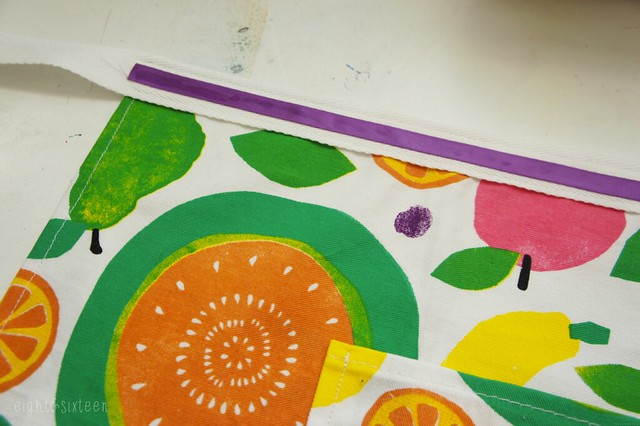
Optional: You can choose to leave the edges raw, or use bias binding to cover them as shown.


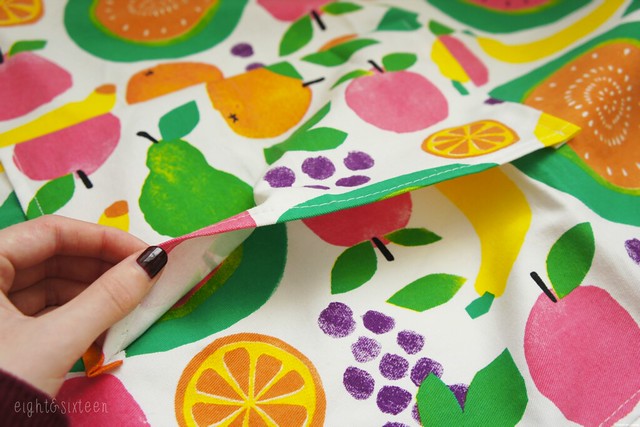
Create a flat bottom for your bag by flattening one of the bottom corners so that the side seam meets the bottom seam and you create a triangle as shown.
Measure 5cm in from the point of this triangle, and draw a line that measures 9cm across. Stitch across this line and then cut off the excess with a 1cm seam allowance. Repeat with the other bottom corner.
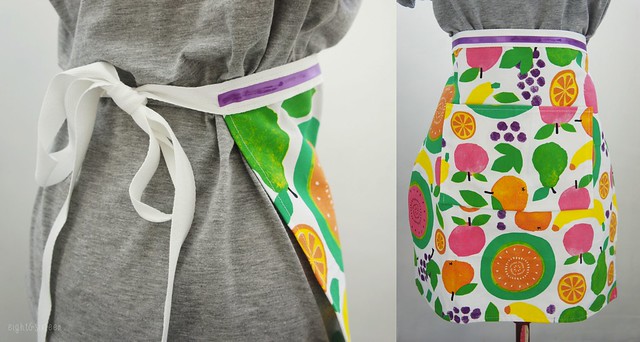
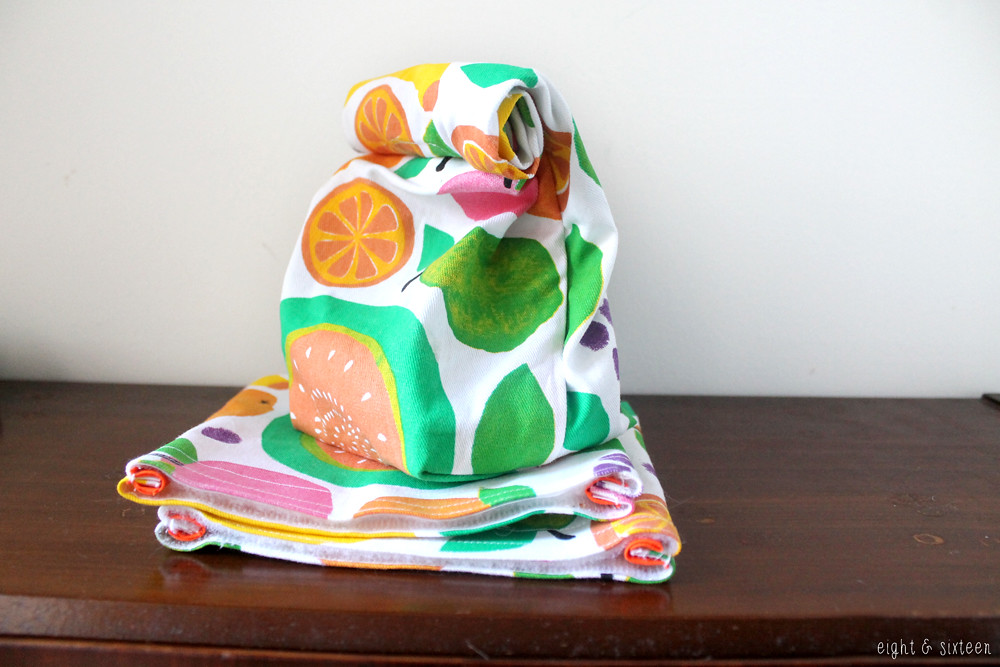
Turn the lunch bag right side out, and iron. You can press the fabric into place to mimic brown paper bag style folds. Fill with snacks and thanks to the magnetic snaps, simply roll the top of your bag down to secure!


With the remaining tea towel fabric that you put to one side at the beginning, you can either create a second lunch bag as above, or create two small sandwich bags to create a set.
To make the sandwich bags, simply cut your remaining fabric into two pieces. Measure two lengths of sew in velcro the width of the short edges and pin to the fabric. Stitch into place.
Fold the fabric in half right sides together, sew the side seams with a 1cm seam allowance, and as before, binding the raw edges is optional.
Turn right sides out, and you have two reusable and sealable sandwich bags!


We'd love to hear from you if you give this DIY a go - use the hash tag #eightandsixteen to share your photos with us!

Skye


Wednesday, 5 November 2014

Tea Towel Upcycle Challenge Results : Erin's DIY Apron

diy upcycled apron from tea towel eightandsixteen diy upcycled apron from tea towel eightandsixteen

This week myself and Skye have both taken on the challenge of upcycling this fun fruit print tea towel into something new. For my project I decided to keep it in the kitchen and create a colourful apron!

To make your own you will need: a large tea towel, cotton webbing/tape, a sewing machine, scissors, pins, a tape measure, a fabric pen/pencil + (optional) ribbon/other embellishments

diy upcycled apron from tea towel eightandsixteen

1. Measure how wide you want the apron to be, add on 1/2" to allow for neatening the edge and cut off any excess fabric.
I chose to make my apron sit flat but don’t forget to allow for gather when measuring if you want to create that vintage look!

2. Fold over the raw edge and stitch in place to make sure it won’t fray. You should now be left with a slightly smaller version of your original tea towel with no raw edges.

diy upcycled apron from tea towel eightandsixteen

3. If you have any fabric leftover you can create a pocket on the front of the apron. I cut the two side edges off of my leftover fabric then turned over and stitched the raw edges as the original tea towel was quite wonky but you can leave the piece as is and create a pocket that stretches across the whole of the apron instead if you'd like.

4. Decide where you want the pocket to sit, lay it face up onto the front of the apron then flip it downwards so it is upside down on the front of the apron. Stitch in place then flip the pocket back up and sew along the two side edges to create the pocket shape.

diy upcycled apron from tea towel eightandsixteen

5. Take your strip of cotton tape (making sure it's long enough to tie around your waist) find the centre of the apron front and pin along the top edge. Stitch in place along both edges so it is secure.

diy upcycled apron from tea towel eightandsixteen

6. The final step is optional but if you wish to decorate your apron you can stitch, glue or iron on embellishments such as buttons, bows or ribbon as shown in my example.

diy upcycled apron from tea towel eightandsixteen

We'd love to hear from you if you try out this or any of our other DIY projects - use the hashtag #eightandsixteen to share your photos with us!

Don't forget to check back on Friday to see Skye's project!

Erin

Monday, 3 November 2014

Tea Towel Challenge!

tea towel challenge

This week we're taking on another challenge, this time the idea is to upcycle this cute and colourful fruit print tea towel from Tiger into something completely different!

We each have the exact same tea towel and have been working away in secret on our projects ready for the big reveals. Be sure to check back on Wednesday & Friday to see the results!

In the meantime we'd love to hear your ideas, what would you turn this colourful tea towel into?

Skye & Erin


Friday, 24 October 2014

Skye's Pumpkin Decorating Challenge Results


Pumpkin decorating without the mess of carving seems to be a popular approach for Halloween this year; Erin and I hadn't discussed our challenge plans but we clearly think along the same lines!
It's easy to see why this is a popular alternative to pumpkin carving as it's much easier and holds so many possibilities.

I wanted to try and create a more subtle Halloween theme with my pumpkins - think The Night Circus - and I also wanted to keep the budget to a minimum.


Luckily, I found these spray paints in Poundland, and they're great! I picked up silver, gold and copper but my local shop had black and white too. I'd definitely recommend them as spray paint is usually expensive, and these have held up brilliantly.
I fully sprayed a few of the pumpkins, and then also tried spraying just the top of one so that the paint dropped down the sides of the pumpkin for a splattered effect. I also tried a two tone combination of gold spray paint on the bottom half of one pumpkin, and then copper covering and dripping down the top. This didn't work quite as well as I'd hoped, but I think it has a Snow White poisoned apple vibe about it!


Once the spray paint had dried, I used black and white paints and a black sharpie marker to decorate the pumpkins. I went with bold polka dots, subtle dots on the dripping pumpkin, and then black and white stripes on the smaller pumpkins.

I love the look of these pumpkins clustered together, and even better when draped with my Ping Pong Ball Pumpkin Lights; they definitely make the flat feel ready for Halloween :)


We'd love to hear from you if you give this DIY a go - use the hash tag #eightandsixteen to share your photos with us!

Skye


Wednesday, 22 October 2014

Erin's Pumpkin Decorating Challenge Results

halloween pumpkin decorating diy eightandsixteen

On Monday we introduced our Halloween inspired pumpkin decorating challenge and today I get to share my results! Right from the start I knew I wanted to try and use items that I already had in my craft stash to decorate the pumpkins, unintentionally making an extra challenge for myself. In the end I managed to do this using paints, felt, jewellery wire, Mod Podge and even nail art gems!

My pumpkin design was initially inspired by various Pins featuring bats and other animals attached onto the surface of plain coloured pumpkins to create a 3D effect. As someone who is terrible at pumpkin carving I loved the idea of being able to create something 3D without having to cut into the pumpkin at all.

Next came the idea to not just leave the pumpkins one colour but to create a backdrop for the bats to fly against. I had decided I didn't want to completely cover up the natural orange of the pumpkin and so settled on a sunset and contrasting silhouette background which allowed me to incorporate it.

Overall I'm really pleased with how the pumpkins turned out and think they would be perfect for indoor display on windowsills, by fireplaces or as table centrepieces at your Halloween party, however I wouldn't recommend placing them outside in bad weather! Here's a little bit more about how I achieved the final designs...

halloween pumpkin decorating diy eightandsixteen

I started off by mapping out the landscape design onto the surface of the pumpkin using a trusty FriXion pen. I then used chalkboard paint to black out these areas, choosing this type of paint as I thought it would adhere best to the surface. It also gave a nice matte finish once dried, adding to the final effect of the design.

halloween pumpkin decorating diy eightandsixteen

Next I used acrylic paints mixed with Mod Podge (to help them stick to the surface) and sponge brushes to create a sunset effect on the top half of the pumpkin. As I mentioned above I wanted to try and include the bright natural orange tones of the pumpkin's skin so a sunset seemed like the perfect way to do this.

halloween pumpkin decorating diy eightandsixteen

For an extra final touch I used Mod Podge to stick on a few tiny nail art gems to represent stars in the evening sky. Then finally I added on the felt bats that had originally inspired the whole idea. After cutting out the bats I used jewellery wire to attach them onto the pumpkin. To make sure they were secure I used a wooden skewer to first pierce holes into the pumpkin's surface then threaded the wires through these and the outer layer of the pumpkin.

For my second pumpkin the process was exactly the same except this time I opted for a cityscape style silhouette, which with the bats I think feels very Gotham!

halloween pumpkin decorating diy eightandsixteen

We'd love to hear from you if you try out this or any of our other DIY projects - use the hashtag #eightandsixteen to share your photos with us!

Erin

Monday, 20 October 2014

Pumpkin Decorating Challenge Week!

diy-challenge-pumpkins

What would an October full of Halloween inspired projects be without pumpkins? This week we'll be introducing our new 'challenge week' format and will each be sharing our own pumpkin decorating ideas. Look out for Erin's finished pumpkins on Wednesday followed by Skye's on Friday!

We'd love to hear how you're planning to decorate yours this year - use the hash tag #eightandsixteen to share your photos with us!

Skye & Erin

Monday, 21 July 2014

DIY Challenge: Storage Bowls

bowls challenge title

Today we have our second DIY challenge - storage bowls! We both liked the idea of creating bowls for storing our craft supplies, and decided to take on different materials to create them: fabric and paper mache.

Here's what we came up with....

Erin's Storage Bowl
diy challenge fabric bowls

For my project I chose to make a bowl using fabric. I'd already seen a few of these around on Pinterest and thought it looked like a great idea! To create it I covered a china bowl with clingfilm (to use for shaping), cut strips of fabric, coated them in a mixture of Mod Podge and water and layered them onto the bowl. I wanted the inside to be floral so I layered these strips on first face down, then added a layer of blue strips for the outside of the bowl and left to dry overnight. After removing it from the china bowl and peeling away the clingfilm the last step was to trim the edges and cover them with a strip of bias binding for a neater finish.

To be honest I'm not that pleased with how my bowl project turned out. Although the method works well I don't think the fabrics that I chose gave the best results. If I were to have a second attempt at this project I would definitely stay away from fabrics with white backgrounds. As the Mod Podge/water mixture means that the fabrics dry to a slightly transparent finish you can see the colour of the second fabric through any white sections. Perhaps two layers of each fabric would also give a nicer finish however it took long enough to dry with just the two layers!

Skye's Storage Bowls

Making paper mache bowls definitely felt like a trip down memory lane for me; Art Attack anyone?! Although this method is pretty easy, it does take a long time as there is a lot of waiting around for glue to dry.

I used 4 different shaped and sized balloons and set to work covering them in strips of newspaper and PVA glue (If you have some old bowls or glasses, these come in handy to prop your balloons in whilst waiting for the layers to dry). In the end I did three newspaper layers, and then added a final kitchen towel layer which gives the textured finish.
I also added bases to the bowls by cutting a cardboard tube into 4 pieces, and attaching it to the bottom of the bowls with more newspaper and PVA glue.
Once the paper mache was completely dry, I burst the balloons and trimmed the top edges to neaten. Then I simply painted each one and added a coat of varnish once the paint had dried to seal everything.

I definitely had fun making these bowls, but I think if I made them again I would be more patient and add a few more layers of paper mache for strength. I have filled each bowl with various supplies, but they are a little flimsy and I think that some extra strength would help them to stand the test of time.

We'd love to hear from you if you try out this DIY project - use the hashtag #eightandsixteen to share your photos with us!

Erin & Skye

email | twitter | facebook | pinterest | bloglovin'

Monday, 23 June 2014

DIY Challenge: Upcycled Terrariums

terrariums challenge title

Today we have the first post in another regular feature here at Eight & Sixteen - DIY challenges!
In these posts we will both be taking on the same, or similar, projects based around a theme and sharing the results with you in a collaborative post!

As we are both fans of terrariums for the first challenge we decided to create our own using upcycled containers. Here's what we came up with....

Erin's Terrarium
before terrarium
terrarium after 4

Although I had originally hoped to find the perfect glass bowl in a charity shop or at a car boot sale I didn't manage to track one down as I was looking for quite a specific shape - one that would fit on my windowsill. Then, on a recent trip to IKEA I found this one tucked away in 'Bargain Corner' for £3 and snapped it up! As you can see from the 'before' photo the container was an ex-display item filled with a variety of rocks, soil, and a few not-so-healthy looking plants.
I emptied out the container completely to create my terrarium but did manage to salvage a few of the decorative shiny grey pebbles which I mixed in with the other pebbles on the top layer for an extra bit of interest.

Overall I'm really pleased with how it turned out and how perfectly it fits on my windowsill. I'm already planning to make another one!

Skye's Terrarium
I spent a good few hours hunting around charity shops to try and find the perfect bowl for my terrarium. I came across so many different glass bowls, and although I didn't find exactly what I was looking for, this one ticked most of the boxes for me.
I love the shape and that it has a base to slightly raise it up. The only problem is that it's quite shallow, so I can't have any more than 4 cacti in there. It's worth noting that I think the photo is a little deceiving - the cacti aren't squished too closely together, and definitely have enough breathing room :)

I'm really happy with the finished result, and can see myself making more of these in the future when I stumble across another bowl that fits the bill!


We'd love to hear from you if you try out this DIY project - use the hashtag #eightandsixteen to share your photos with us!

Erin & Skye

Related Posts Plugin for WordPress, Blogger...