tabs

es about us es contact es archive es challenge es we love 9 es recipes es pintests es links
Showing posts with label pintest. Show all posts

Wednesday, 24 December 2014

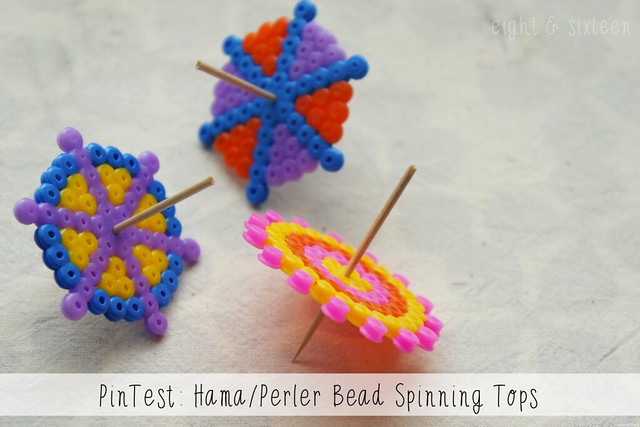
PinTest: Hama/Perler Bead Spinning Tops

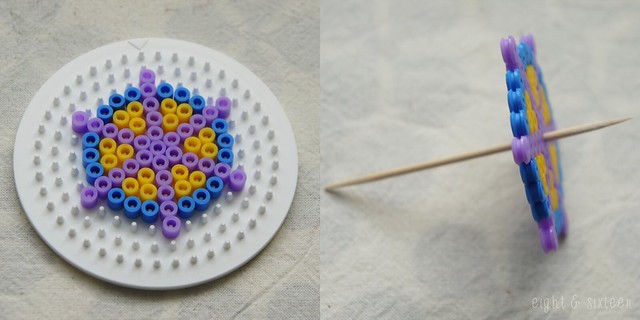
diy pinterest test spinning tops from hama perler beads

The inspiration for today's PinTest came from various Pins including this one which show how you can easily make your own colourful spinning tops with just a few Hama beads and a cocktail stick - perfect for a Christmas Eve crafting session! I love using these beads as there's so many great little projects you can create with them from simple toys like this to jewellery, decorations and more - the possibilities are endless!

All you need to do to make your own spinning tops is create your design on a circular peg board, cover with ironing paper and iron to fuse the beads together. Whilst still warm, carefully push a cocktail stick through the centre of your beads and trim down the other end to use as a handle.

This quick project is not just simple but is also a lot of fun to make and would be perfect for a rainy day!

We'd love to hear from you if you try out this or any of our other DIY projects - use the hashtag #eightandsixteen to share your photos with us.

Erin

Friday, 5 December 2014

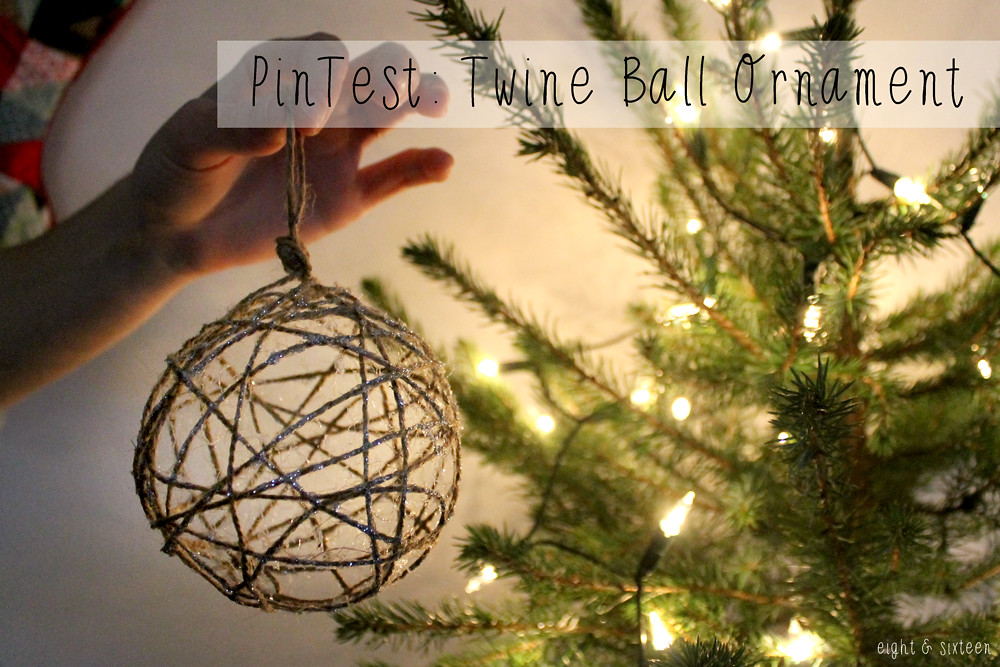
PinTest: Twine Ball Ornament


We have another festive PinTest for you today, and this is another great idea for Christmas tree decorations or decor around the home.
I love the idea of twine decorations and think that the natural look and colour works really well against a Christmas tree draped in fairy lights.

You can find the original Pin here, and here's how I made mine...


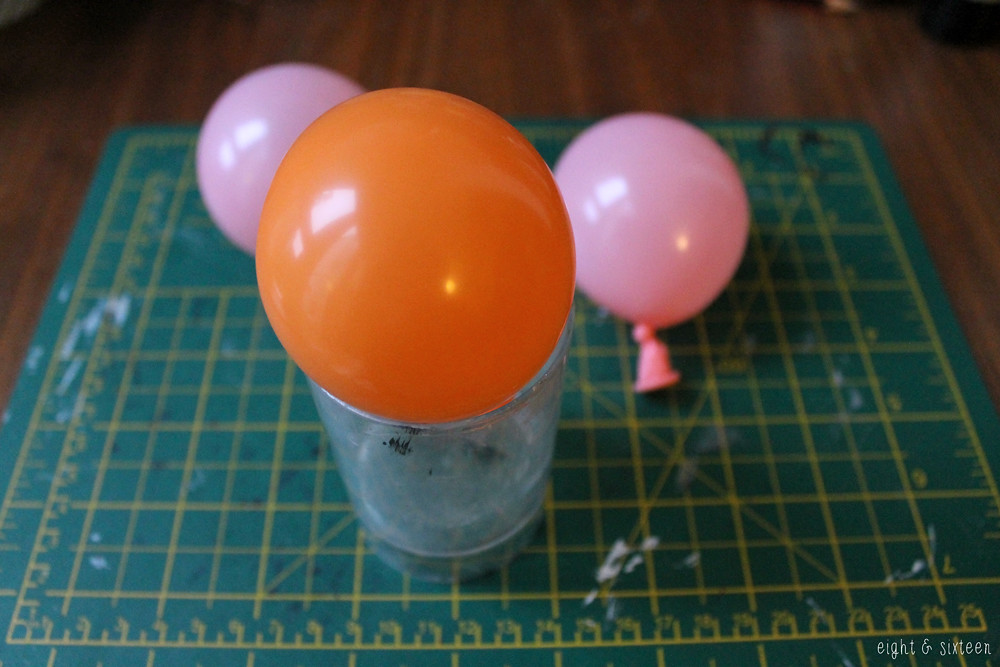
Blow up a balloon to the size you'd like your ornament to be - try and keep it small if you plan to hang them on a tree, but you could also try an oversized one to hang from a door frame or lots of little ones to make a garland.


Cover the balloon in cling film - the original pin says that this step is essential, so I didn't take any chances!


Cover the balloon in a layer of PVA glue, and then start winding twine around it to create a criss cross pattern.


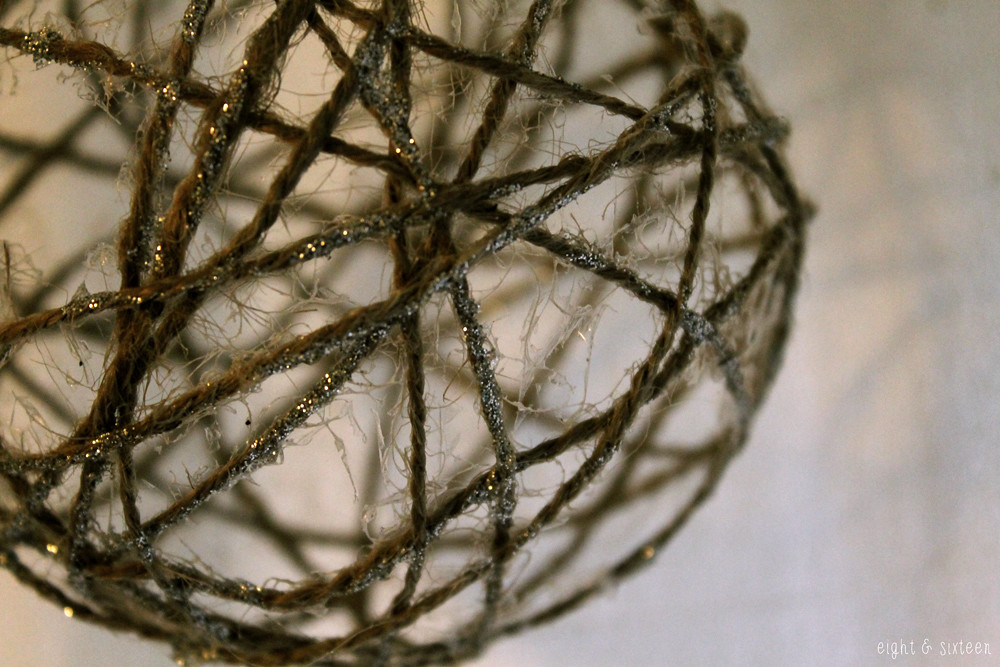
Optional: I used glitter glue to cover several areas of the string, but you can leave it plain.

I used excess twine to create a loop at the top of my decoration, but you could also add some ribbon afterwards.
Leave the ornament to dry overnight somewhere secure - I hung mine on the washing line!
Once dry, pierce the balloon and pull it out of a gap in the twine being careful not to squish the ornament out of shape.

This has been a great PinTest for me and one that I can see myself trying again. It's a little messy but the simplicity of it is so worth it for the outcome, and I think that these would be great fun to spend an afternoon making.


We'd love to hear from you if you give this DIY a go - use the hash tag #eightandsixteen to share your photos with us!

Skye


Wednesday, 3 December 2014

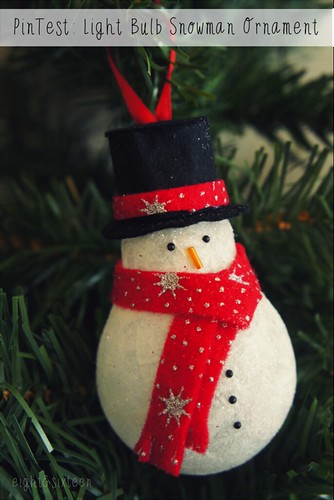
PinTest: Light Bulb Snowman Ornament

diy upcycled light bulb snowman ornament by eight & sixteen diy upcycled snowman ornament eight and sixteen

Welcome to a festive edition of PinTest, this week featuring a popular light bulb ornament idea I originally came across last year. This one caught my eye as I loved the idea of upcycling a simple everyday object into something festive - it's perfect for those on a budget! Of course there are lots of different versions of this idea out there already but here's my take on the project...

pinterest test light bulb snowman ornament eightandsixteen

The Base
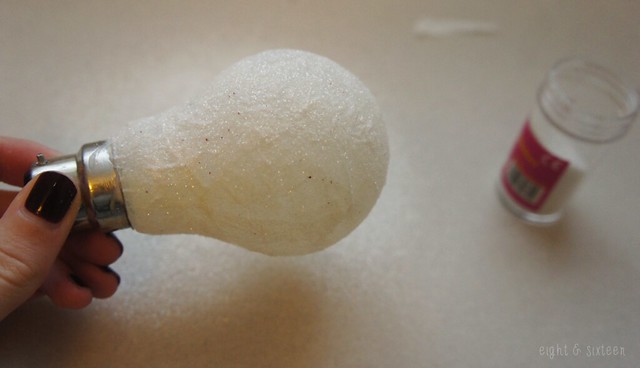
As I wasn't able to get hold of a white bulb I used Mod Podge and tissue paper to create a white base on a clear bulb then sprinkled on white glitter to give both texture and sparkle. There are also ways to colour the bulb with paints but as I had used this method for jars & tea light holders in the past I knew it would work well for this project too. I'd recommend more than one layer of tissue paper if you want to create a fairly opaque finish once the glue has dried.

pinterest test light bulb snowman ornament eightandsixteen

Adding The Details
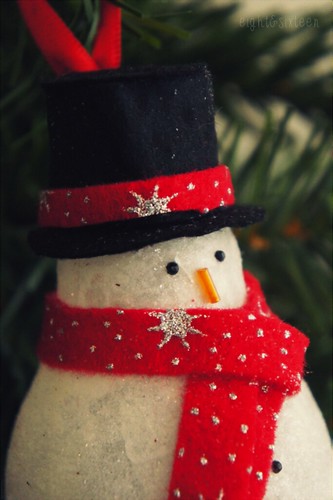
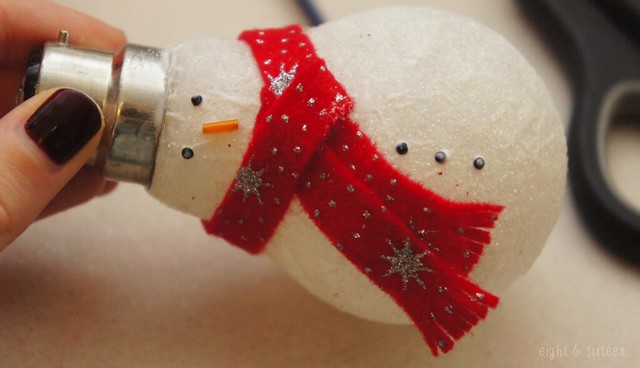
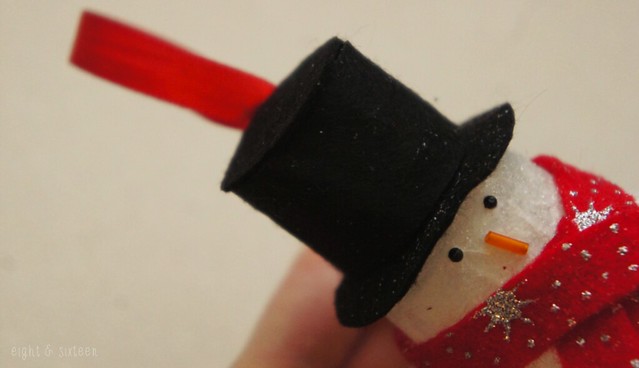
Next up I created a scarf using some festive print felt I had leftover from another project. I cut a thin strip and tied it around the bulb then snipped into the ends to create a tassel look. For the other features I used black nail art gems as coal and an orange bugle bead to represent a classic carrot nose. Again these were both items I already had in my craft stash but you could also use paint, buttons, sequins, paper or felt to add on the features.

pinterest test light bulb snowman ornament eightandsixteen

Finishing touches
Although a lot of versions of this project seem to leave the silver top of the bulb on show I decided to give the snowman a top hat using black felt. First I cut a circle of the felt that would be big enough to slide over the metal then I cut another circle in the centre of it creating a ring that would fit snugly around the base of the bulb. To make the ornament suitable for hanging I created a loop in a piece of red ribbon then tied it around the metal part of the bulb and used a glue gun to secure it in place - this is where you have to be careful as you don't want it to fall and smash! Finally I covered up the whole thing with a long rectangle of black felt wrapped around the metal and a circle on top, both nicely held in place using hot glue.

The Verdict
For me this is one of the better Christmas ideas out there on Pinterest as it's so easy to do as well as being thrifty and completely customisable! I'm really happy with how my version turned out however if I were to make another one I would definitely try and find a screw top light bulb so that I could hollow it first to make it safer, but overall I think this is definitely one to pop on your to-do lists this year!

We'd love to hear from you if you try out this or any of our other DIY projects - use the hashtag #eightandsixteen to share your photos with us!

Erin

Friday, 17 October 2014

PinTest: Ping Pong Ball Pumpkin Lights


Today's PinTest has been one of my favourite so far, and is based on a simple Christmas fairy lights hack that you can see here.
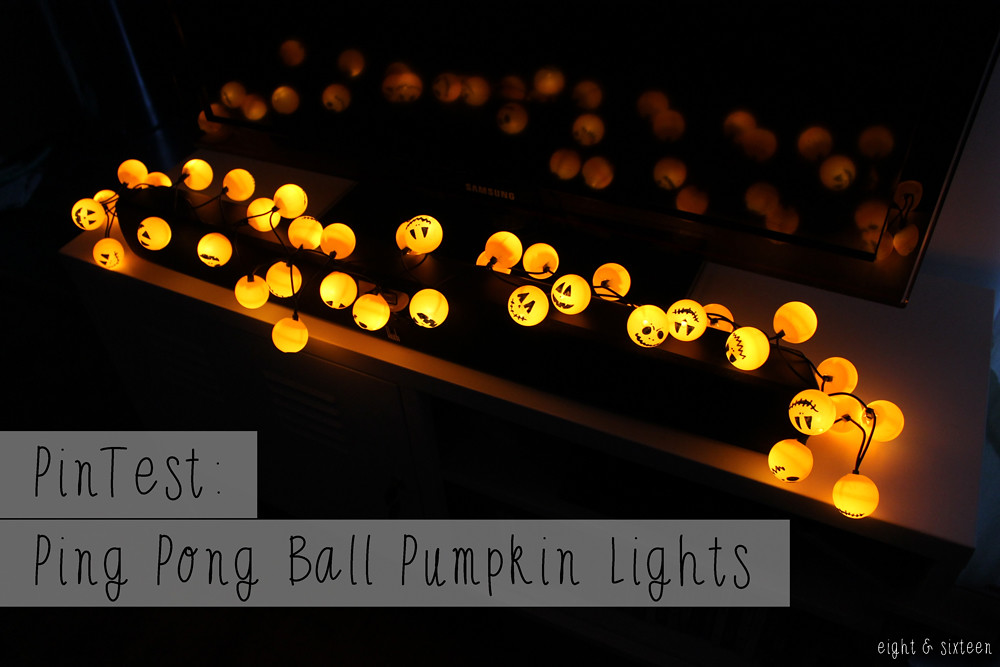
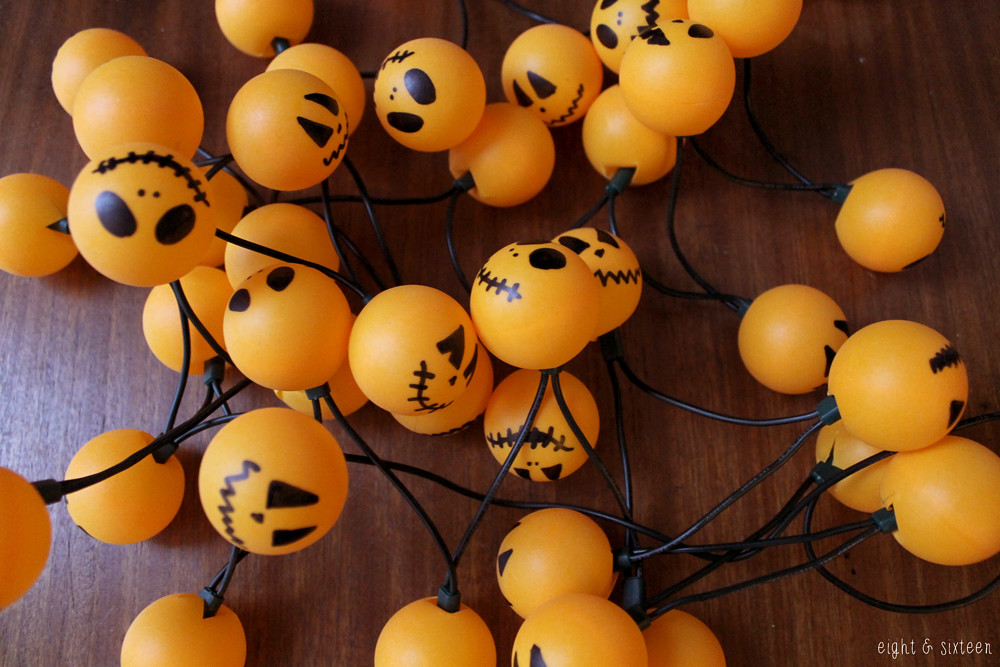
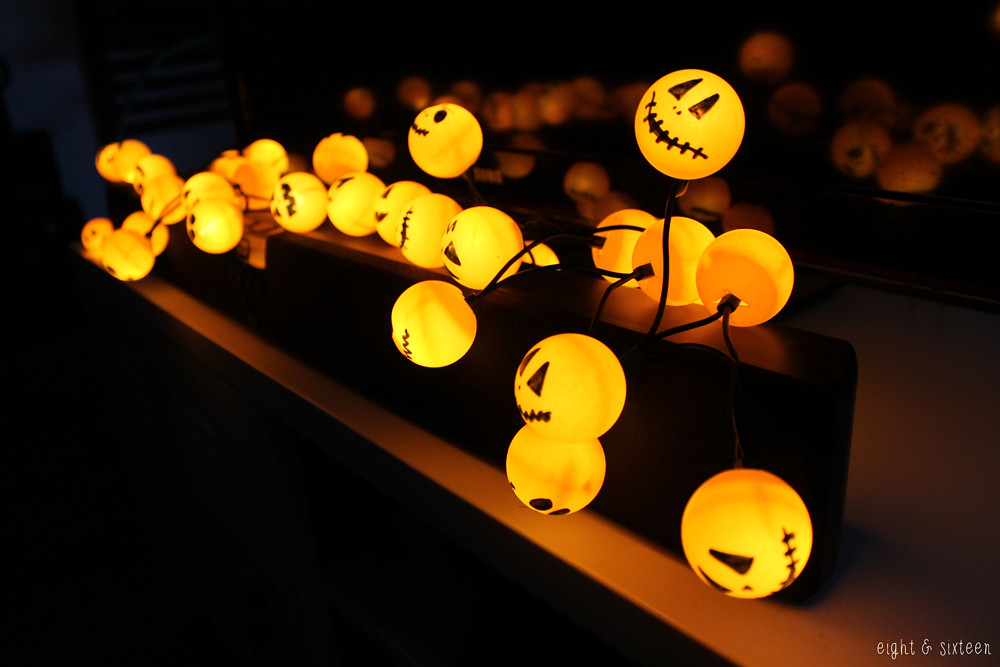
I decided to use this method to create some super cute pumpkin Halloween lights; this is a cheap and relatively quick project and is a great way to add some spooky decor to your home!

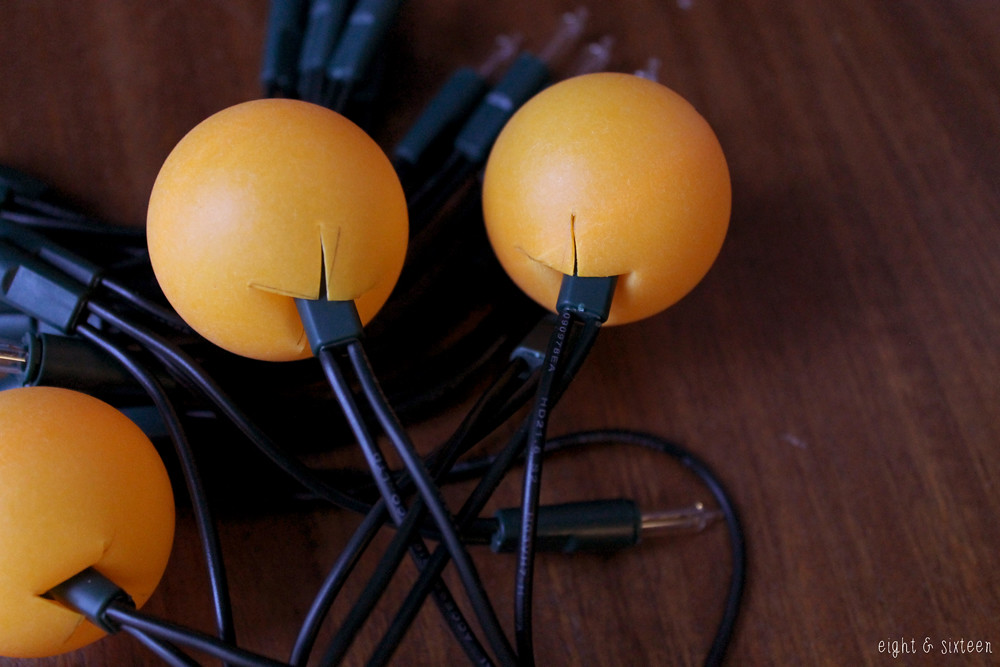
All you need to recreate this DIY are some fairy lights, enough ping pong balls to cover the lights (I needed 40), a black sharpie marker and a scalpel.


First, mark a small cross on your ping pong balls with a pencil. Then using a scalpel, very carefully cut through the ping pong ball over the cross. Note: Use some blu tack to hold your ping pong ball in place whilst you are cutting.


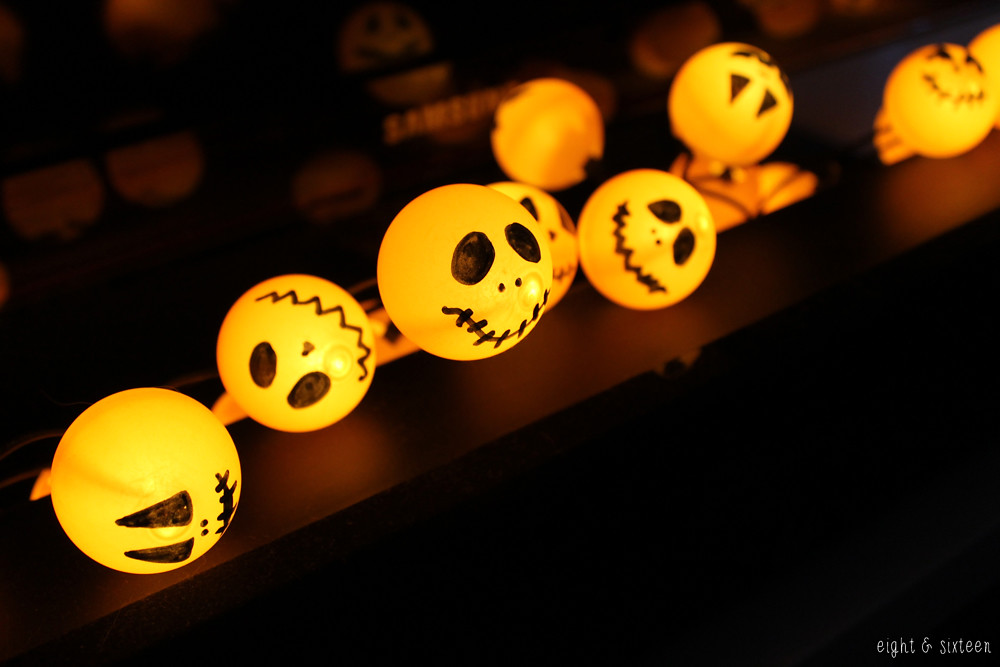
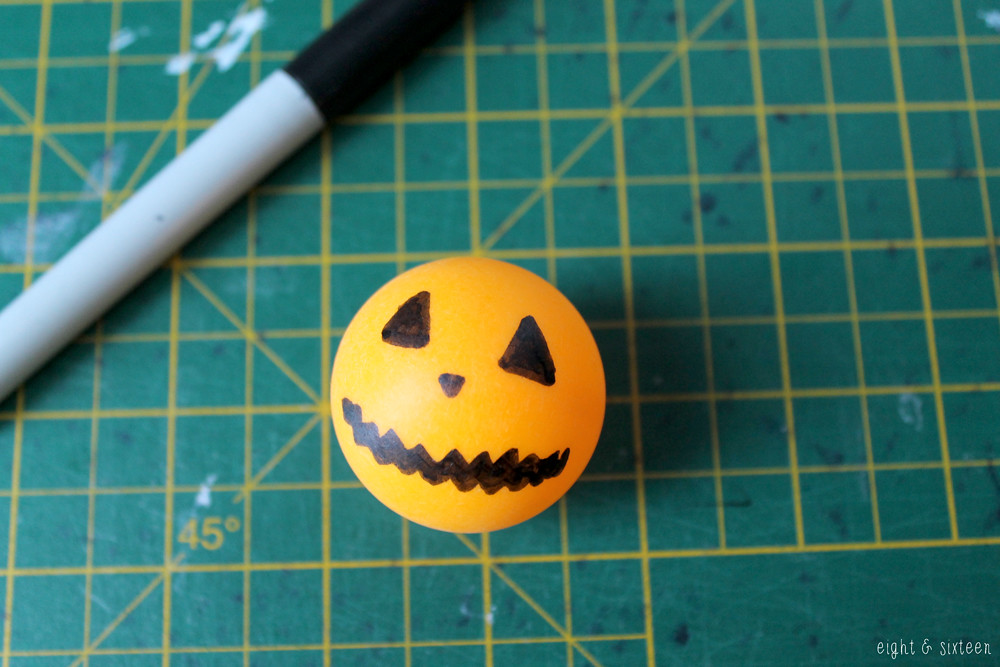
Next, take your sharpie marker and get drawing on the opposite side of your ping pong balls to the crosses you have just made. I went for classic pumpkin designs but you could draw anything spooky!


Carefully push your ping pong balls onto your fairy lights through the crosses you made earlier.


Repeat until all of the fairy lights are covered - and you're all done!


We'd love to hear from you if you give this DIY a go - use the hash tag #eightandsixteen to share your photos with us!

Skye


Wednesday, 8 October 2014

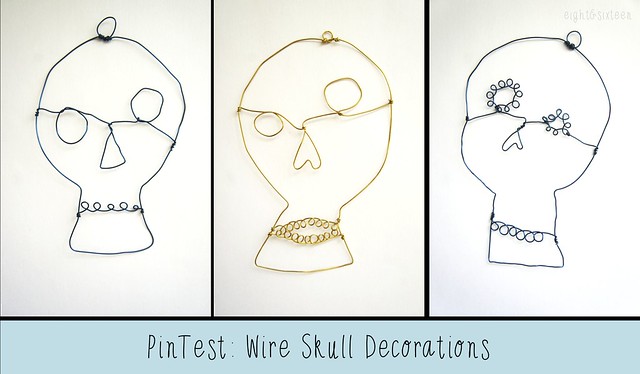
PinTest: Wire Skull Decorations

pintest wire skulls

When I saw this Pin I knew I had to try it out and what better time of year than Halloween! These would make awesome decorations for a party both alone or grouped together to create a mobile and as it turns out they aren’t too tricky to DIY. Here’s a little more about how I got on with this Pin…

I started out by drawing my designs onto a sheet of paper so I’d know what final look I was aiming for as well as what different pieces I needed to make for each one. The designs I drew were mixtures of various parts I liked from the skulls in the original Pin but I tried to keep them fairly simple as I had no idea how well I was going to get on with the making process, but you can make them as complicated as you like.

I decided that it would be best to create the outline of the skull first and then add on the extra pieces. The skull outlines themselves were quite easy to make especially as they didn’t have to be spot on and I made sure I created a loop at the top of each one for hanging. I then made the eyes/nose section and the mouth section, leaving a length of wire at each end to attach them onto the outline frame.

For the first two skulls I worked with the blue wire which turned out to be more difficult to use than the gold due to how bendy it was! Although it was easy to manipulate the wire into the right shapes at times it proved difficult to keep them in place. The gold wire was slightly thicker and less flexible so the pieces kept their shape better whilst I was attaching them together.

I had a lot of fun making these skulls and I’m pretty pleased with how they turned out even though the wire I used wasn’t ideal. If you want to make your own I’d advise picking up a thicker wire that’s flexible but will hold it’s shape whilst you’re trying to add on the facial feature pieces.

We'd love to hear from you if you try out this Pin - use the hash tag #eightandsixteen to share your photos with us. If there are any particular Pins you'd like to see us test out let us know in the comments!

Erin

Wednesday, 24 September 2014

PinTest: Simple Screen Print

pintest screen print diy

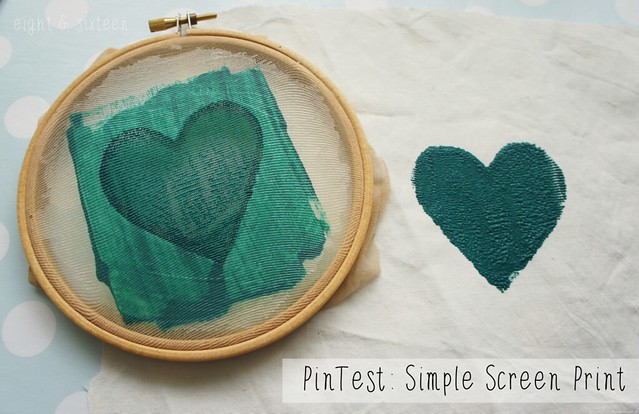
Today's PinTest is based on a popular project that shows how to make your own screen prints at home with just a few supplies including a pair of tights!

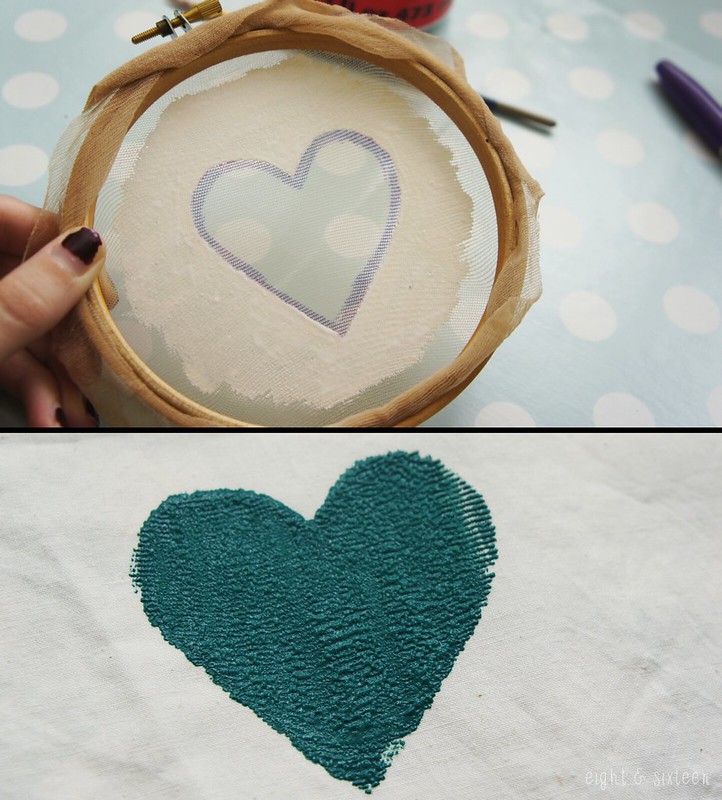
To create the 'screen' I cut a square from a pair of nylon tights and stretched it out over the embroidery hoop. I then used a Sharpie to draw on my design and kept it simple for this test with a heart shape. To mask off the areas I didn’t want to print I applied a layer of Mod Podge (Glossy) and left to dry, then applied a second layer just to make sure there were no gaps and again left it to dry. To create the print I used acrylic paint and a scrap of cardboard to drag it across the screen making sure to cover the whole design as best I could.

As you can see from the close-up photograph below my print didn't come out as sharp as I was hoping. I'm not sure if this was due to the loose weave of the tights, the type fabric I printed onto, the method I used to distribute the paint or something else entirely. I have however seen other tutorials using sheer materials such as those used for net curtains in place of the nylon tights so perhaps that may give a better finish!

pintest screen print diy

Have you tried out this technique? If so we’d love to hear about your results - use the hash tag #eightandsixteen to share your photos with us!

If there are any particular Pins you'd like to see us test out let us know in the comments!

Erin 

Monday, 8 September 2014

PinTest: Shaped Pom Poms


For today's PinTest we're trying out some awesome creative pom pom ideas from Mr Printables! From fruity pom poms to letter filled pom poms, there are tons of designs to choose from. Here's how we got on...

Erin's Pom Poms
pom pom erin

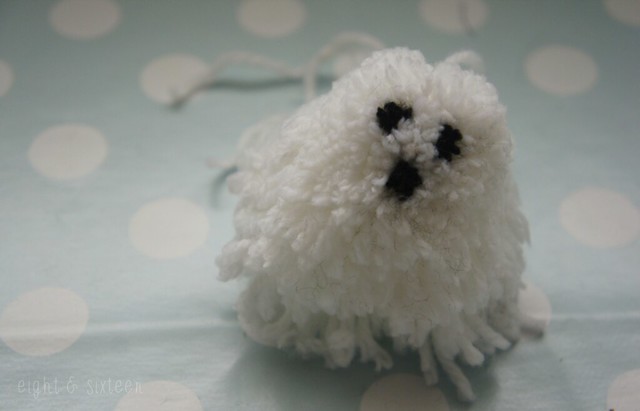
As you can probably tell from the picture above I struggled with this project and quickly discovered that these shaped pom poms are pretty tricky to master! As someone who loves Halloween crafts I was drawn straight to the skull design but after looking through the instructions I realised it would be a difficult one to start with and instead opted for the ghost.
I had pretty much given up hope of it turning out well but after revisiting the original tutorial a few days later I realised that I needed to trim it down much more than I already had, and once I did this it looked much more ghost-like.

As much as I love the idea and admire the beautiful original ones shown over at Mr Printables it’s safe to say I don’t have a talent for making them! I do however think that if you can master this clever craft they would make adorable Halloween decorations!

Skye's Pom Poms

When Erin suggested these shaped pom poms for our next PinTest, I was pretty excited - the originals are so cute! However, I really struggled with the DIY and got pretty frustrated trying to replicate them.
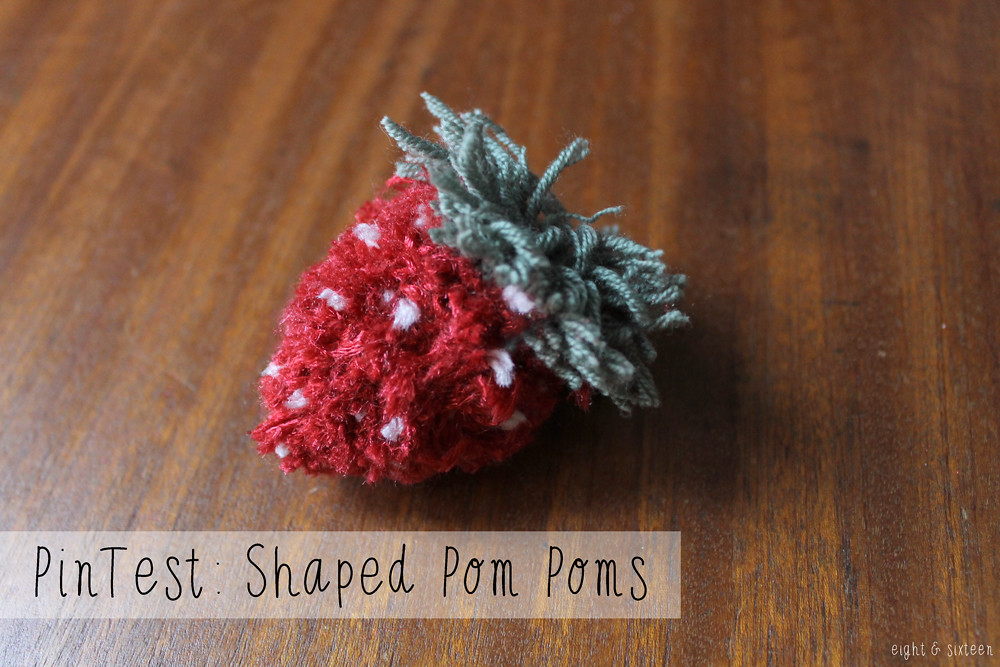
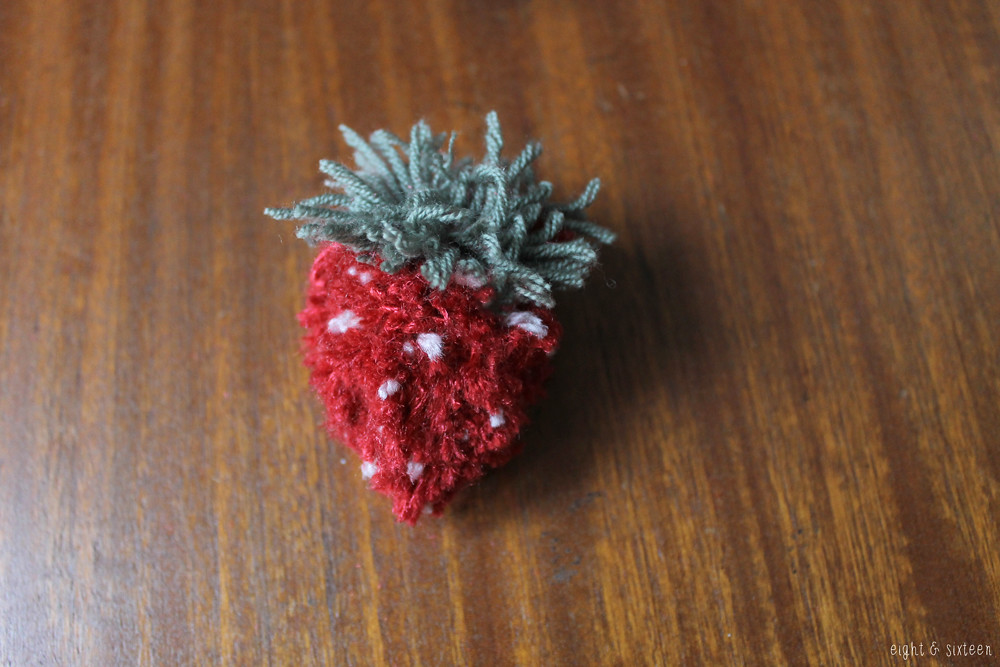
I decided to try the strawberry pom pom as I thought it looked relatively simple in comparison to the other designs. I found that once I had wrapped my wool around the template, cutting the wool free without losing any strands was quite fiddly, but I don't know if my technique was just wrong.
I then spent a long time snipping away at my pom pom trying to shape it into a strawberry which took ages. I'm still not very happy with the finished result, and I'm baffled by how great all the other amazing designs look since my attempt.
As cute as the originals are, and as much as I hate to say it, unfortunately I don't think this DIY is for me!


We'd love to hear from you if you give this PinTest a go - use the hash tag #eightandsixteen to share your photos with us! If there are any particular Pins you'd like to see us test out let us know in the comments!

Erin & Skye

Monday, 4 August 2014

PinTest: Nail Polish Flowers

pintest nail polish flowers pinterest diy

Today I'm testing out one of the most popular and unbelievable DIY Pins out there! The Pin, which has no instructions, shows how to make wire flowers, colour them with nail polish and turn them into a pretty flower crown.

Click here to see the original Pin!

pintest nail polish flowers pinterest diy

Working With Wire
First up was creating the wire flowers which although not the trickiest part of the DIY was still pretty fiddly! Creating the petals themselves individually wasn't too tricky but getting them to come together to look like a flower was more difficult.

To make them I used a thin jewellery wire which I wrapped around a Sharpie to create the petal shapes. As per the pin I created several shapes around in a circle then gently curved them to look more like petals. Remember to keep some jewellery pliers on hand to manipulate the wire where necessary - I used mine to pinch the ends slightly to give them more of a classic petal shape.

pintest nail polish flowers pinterest diy

Adding Colour
Next up it finally came to the main part of the pin that people are interested in - using nail polish to add colour to the wire outlines. It took me a while to get the technique right and I did get rather frustrated when I swept the brush across the wire and it was filled with colour only for the bubble to pop just a second later!

The thin layer of polish is so delicate just like blowing bubbles so even once you think you've mastered the technique they can still be unpredictable. My second attempt (pictured above) although it looks fairly neat still took a long while to get right. I learnt that painting one petal at a time and letting it dry for a minute or so holding the flower still before moving onto the next one meant a much lower rate of disasters!

I also revisited my first flower, now fully dried and tried out adding a second layer of colour. It did work but took away from that pretty stained glass style, slightly transparent finish created with just one layer.

If you're curious about how the polish dries I found that the texture was rubbery, and flexible almost like a thin layer of PVA glue would be.

pintest nail polish flowers pinterest diy

Here are some tips I would advise if you want to try out this Pin...

- Put down some newspaper! This Pin can get very messy if you're not careful. Each time you sweep your brush across the wire and it doesn't end up working the polish gathers at either end and will drip everywhere, so make sure you're prepared for mess!

- Open a window! It may seem obvious but you're going to be working with nail polish (perhaps for quite some time if you find the painting process as frustrating as I did!) so make sure there's some fresh air in the room too... especially if you plan to make enough for a crown!

- Make your sizes match! You need to make sure that your polish brush is the right size to sweep across the whole of your petal in one go otherwise you'll have a lot of trouble trying to fill in the colour.

- Use cheap polish! Although the quality of the nail polish doesn't seem to make a difference I would advise using cheaper brands or unwanted polishes as you may end up wasting quite a lot whilst you're practising the painting technique.

- Load up your brush! You will need a nice big blob of polish to fill the whole of petal. Start with a big blob at the end of the petal nearest the centre of the flower and sweep outwards towards the outside edge of the petal.

- Drying time is important! Whilst the polish is still liquidy it will move around within the wire frame and if it gathers in the wrong place it will put pressure on that section causing the layer to pop. I found that once I had successfully applied the colour to one petal if I waited, holding the flower still for a minute or so, giving a chance to settle it was less likely to pop later.

So, does this Pin really work? Well, yes it does... but it sure is a bit of a pain to master! Although I think with a bit of practise I could create enough flowers to make a crown like the one shown in the Pin I definitely wasn't keen to sit and make 30 of them. Amazingly though, it can be done!

We'd love to hear from you if you give this DIY a go - use the hash tag #eightandsixteen to share your photos with us! If there are any particular Pins you'd like to see us test out let us know in the comments!

Erin
Monday, 14 July 2014

PinTest: Juice Carton Coin Purse

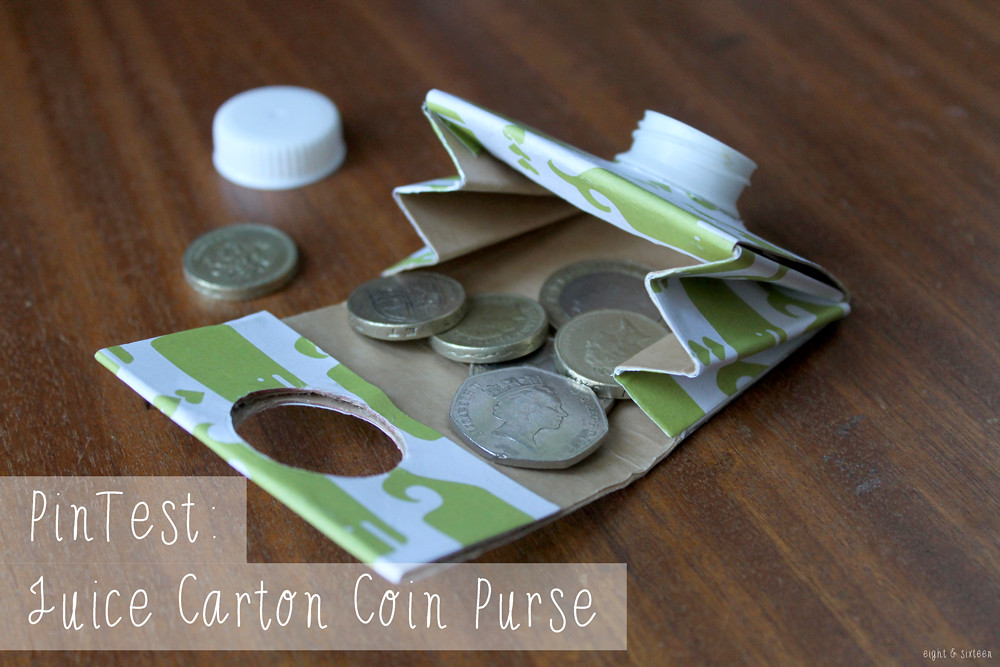
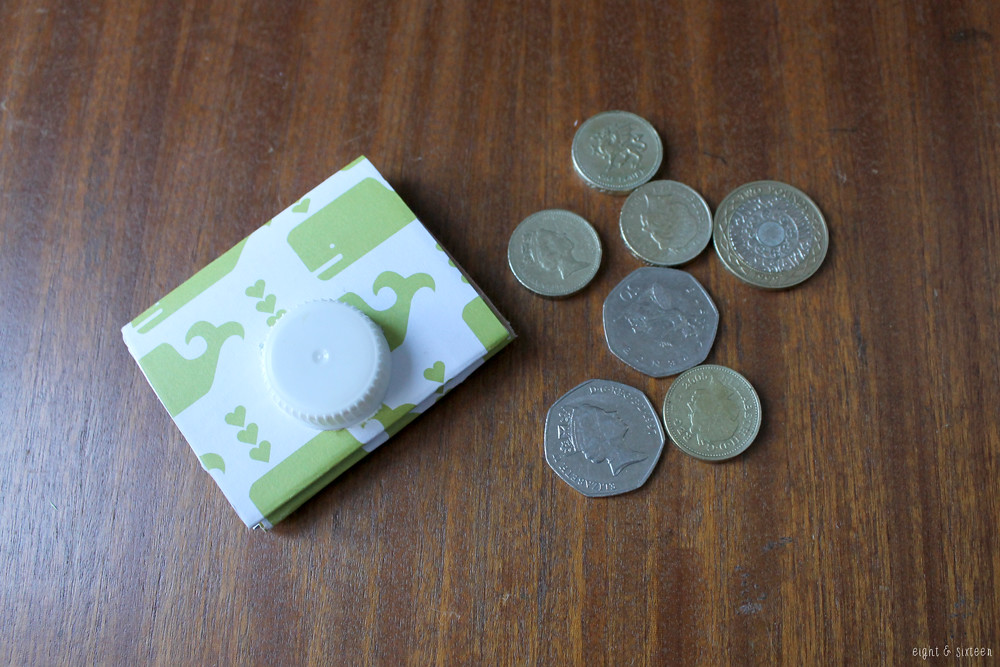
Welcome to our first PinTest post! When browsing for DIY's on Pinterest, you'll almost always see a Juice Carton Coin Purse somewhere along the way - they seem super popular!
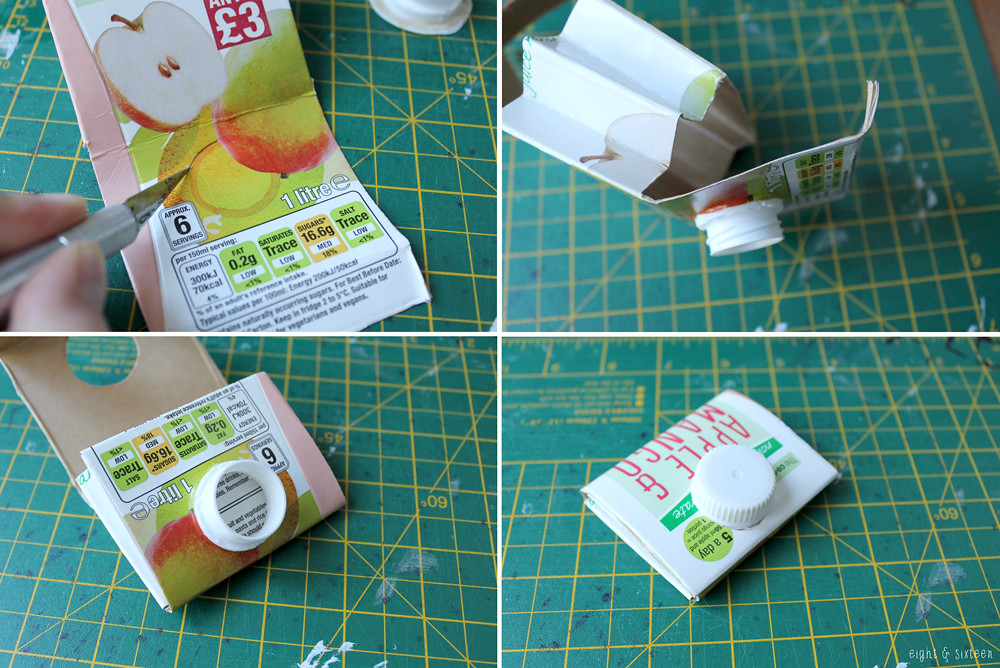
There are lots of tutorials and variations on ways to make them (Click here to see the original Pin!) but here's the method I went with:


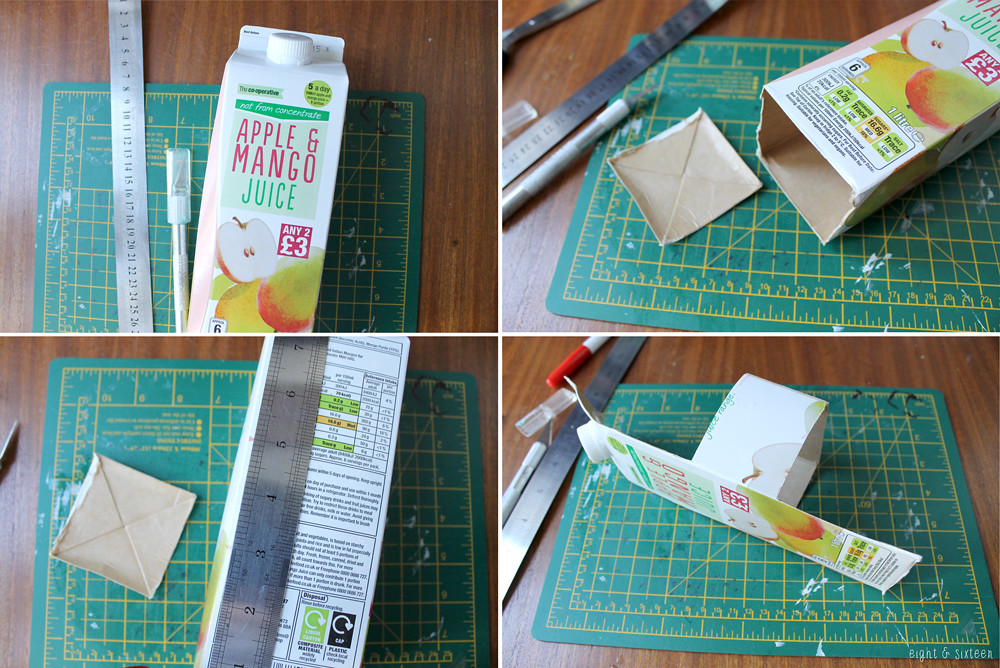
1. You will need a juice carton, a scalpel, a ruler, scissors and a pen.
2. First, remove the square bottom of the juice carton.
3. From the bottom edge, measure and mark at 3" and 5" - connect these marks around the side and back edges of the carton, but not the front.
4. Cut away the excess carton either side of those lines, leaving the front in tact as shown.


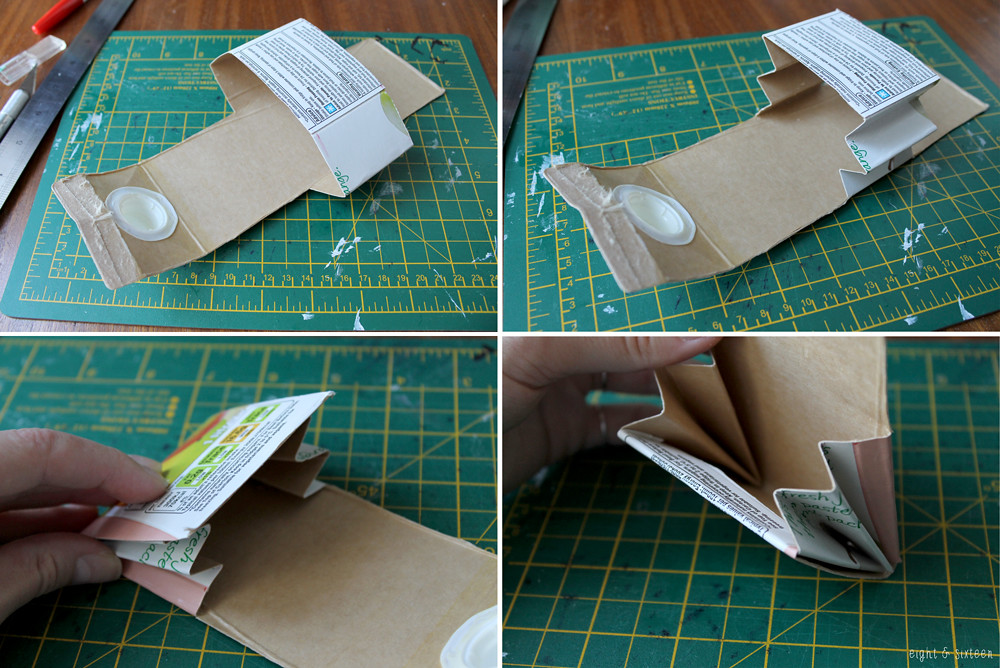
5. Flatten the back and side pieces down to create to folds at the centre side pieces.
6. Create two more alternate folds within the side pieces to create concertina pleats. These are the purse gussets.
7. Fold up the bottom of the front carton piece and fold into place.
8. Fold the excess edge under and tuck it into the concertina pleats. This is the front body of your purse.


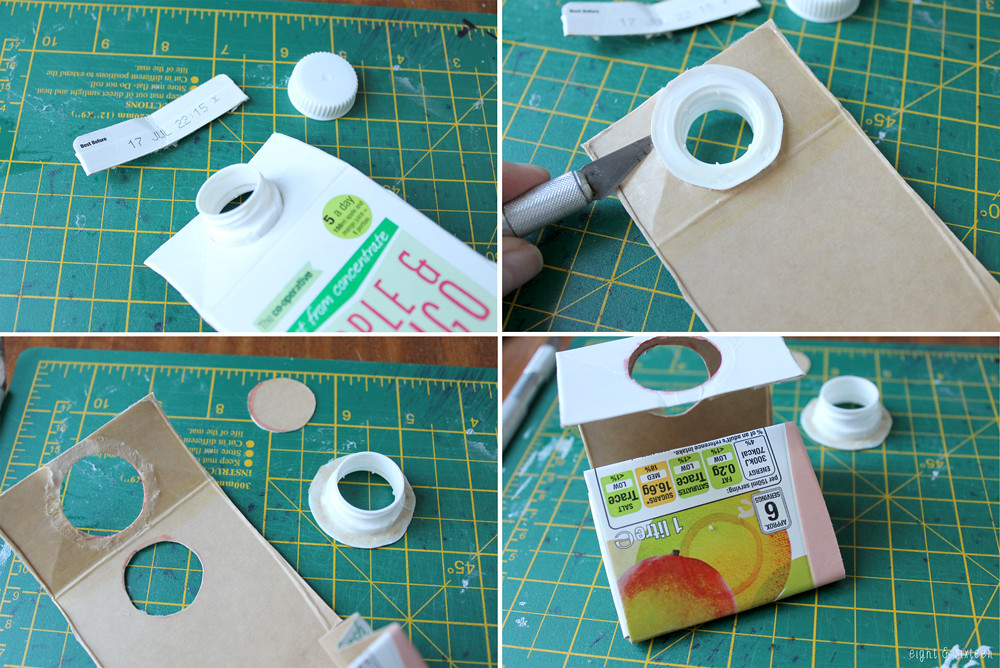
9. On the front of the carton, remove the top flap piece (this bit usually has the date on it). Take off the lid. This top piece will become the purse flap.
10. Using a scalpel, remove the twist cap from the carton.
11. Using the fold already in place underneath the hole, fold the top piece of card down onto the main carton piece, draw around the hole and cut out.
12. Fold the top into place and then fold down onto the front body of the purse. Draw around the hole on the front body.


13. Unfold the front body from the side gussets and cut the hole out.
14. Take the twist cap that you removed earlier, and push it through the hole on the front body.
15. Fold the front body back into place as shown.
16. Bring the purse flap down and over the twist cap, screw on the lid, and that's the purse all finished!

Although the juice carton packaging is enough of a statement for these purses, I decided to cover mine in some cute craft paper to take it a step further.
If you want to do this, I would suggest covering the carton with your chosen paper (or paint!) before you start making the purse (it's a little fiddly otherwise!).

I think these coin purses have been a great first PinTest. They don't just have to be for loose change either - the screw on lid makes them pretty secure so you could try using one as a medicine purse or a mini sewing case!


We'd love to hear from you if you give this DIY a go - use the hash tag #eightandsixteen to share your photos with us!

Skye


Related Posts Plugin for WordPress, Blogger...