tabs

es about us es contact es archive es challenge es we love 9 es recipes es pintests es links
Showing posts with label jewellery. Show all posts

Wednesday, 7 January 2015

DIY Paper Flower Earrings

diy paper flower earrings diy flower earrings by eight and sixteen

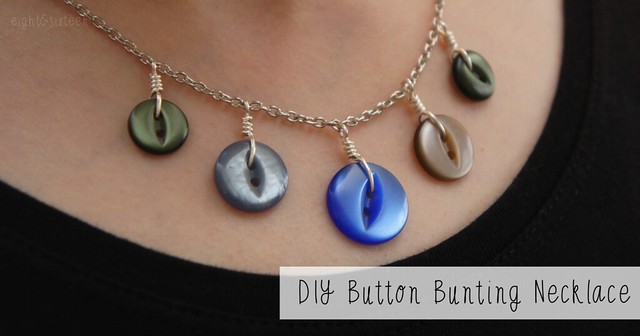
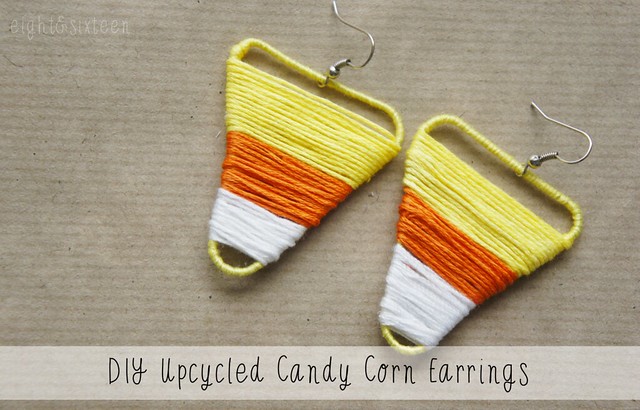
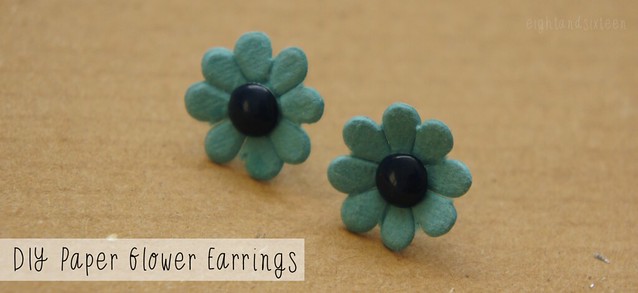
Today's project is a quick and simple statement jewellery DIY perfect for adding a pop of colour to your outfit. Don't fancy paper jewellery? Upgrade this project by using leather scraps for the flowers instead!

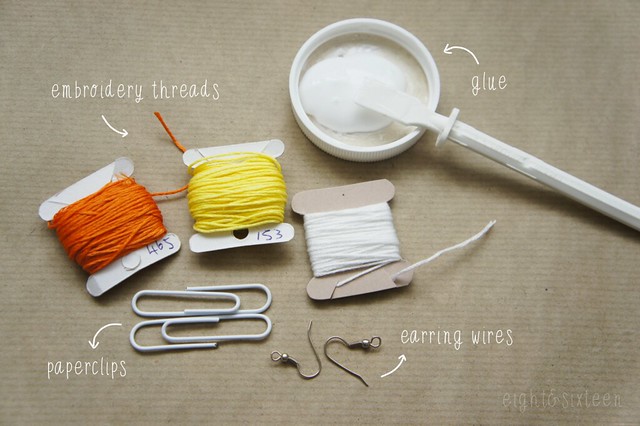
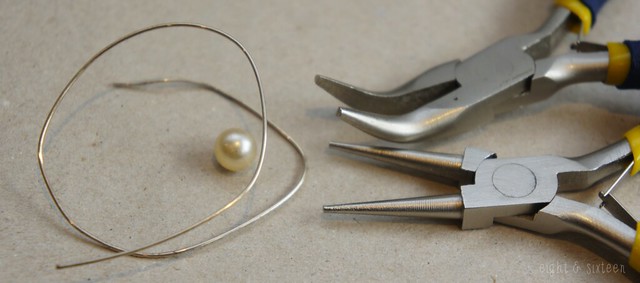
You will need: 'paper blossoms' or a flower paper punch, two earring posts, matte Mod Podge, coloured nail polish, glaze, a blob of blu tack

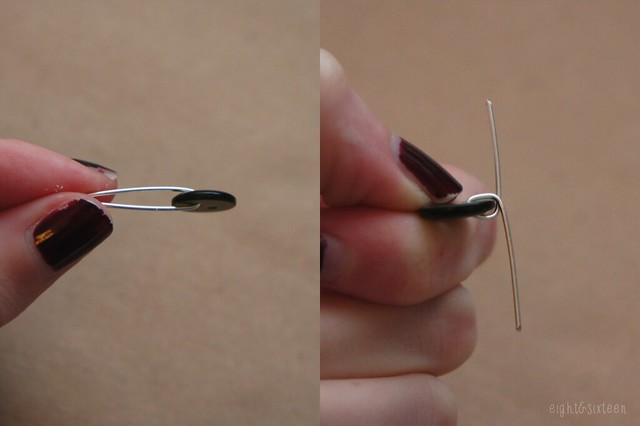
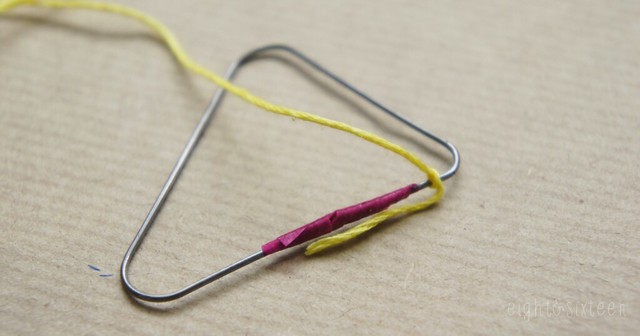
1. Start by adding a little glue or matte Mod Podge to the back of your earring posts, then push on the paper flowers

2. Set aside to dry by standing up the posts in a blob of the blu tack or a piece of polystyrene packaging

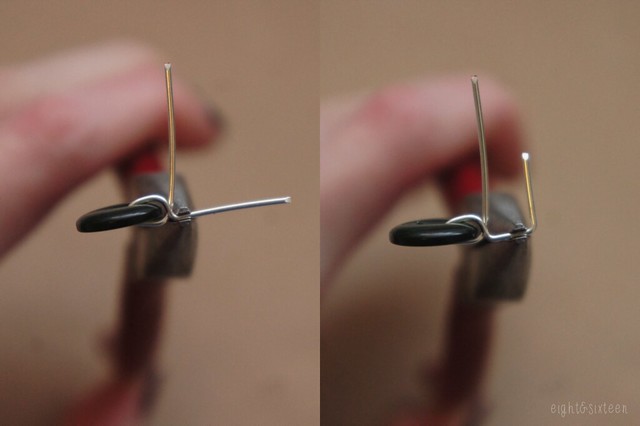
3. Once dry I would advise coating the flowers with a layer or two of your matte Mod Podge to make them a little more durable

4. When the Mod Podge has dried use nail polish to colour the flat tops of the earring posts - these will be the centre of flowers

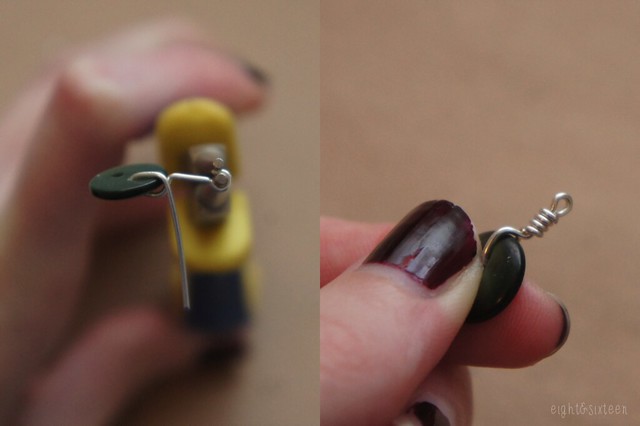
5. Once the polish is dry add layer of glaze and again leave to dry. Add on an additional layer of glaze if necessary and once dry they'll be ready to wear!

We'd love to hear from you if you try out this or any of our other DIY projects - use the hashtag #eightandsixteen to share your photos with us!

Erin

Monday, 15 December 2014

DIY Button Bunting Necklace

diy button bunting necklace tutorial by eight & sixteen

With Christmas fast approaching we've decided to share four button projects including gifts and decorations! For the first project of the week I wanted to share this necklace design that I think could be the perfect DIY for anyone looking to give unique handmade gifts this year!

To make your own you will need: buttons, jewellery wire, wire cutters, flat and round nose pliers, an assembled chain (or supplies to make your own)

diy button bunting necklace tutorial by eight & sixteen

1. To make your bunting necklace you will need to turn each of your chosen buttons into a charm. Start with a piece of wire approx. 2" long, thread it through one of the holes in your button and bend in half

2. Use your flat nose pliers to bend out the lengths of wire in the opposite directions, creating a loop around the edge of the button

diy button bunting necklace tutorial by eight & sixteen

3. Take your pliers and bend the wire that sits on the front side of the button up at a right angle - this will be the piece you turn into the loop

4. Move a little way along the wire then add a second bend in the opposite direction

diy button bunting necklace tutorial by eight & sixteen

5. Switch to your round nose pliers and bend the end of the wire around them to create a loop

6. Finally, wrap the other length of the wire around it securing it in place and adding a decorative finish

diy button bunting necklace tutorial by eight & sixteen

7. Once you have all of your button charms, find the centre of your necklace chain and attach on your middle charm. To do this use pliers to gently open up the hanging loop you created, thread through the chain link and close.

8. Repeat this process to add on the remaining button charms making sure to space them apart evenly, and your necklace is done!

We'd love to hear from you if you try out this DIY project - use the hashtag #eightandsixteen to share your photos with us!

Erin

Wednesday, 15 October 2014

DIY Upcycled Candy Corn Earrings

diy upcycled candy corn earrings using paperclips halloween

Being a big fan of all things Halloween it seems that every time I see triangles I see candy corn... and that's how today's DIY came about! Upcycled paperclip earrings like these are a really popular project on sites like Pinterest but for today's post I've put my own spin on the idea by using the candy corn trio of colours just in time for Halloween!
Here's what you'll need to make your own pair of Candy Corn earrings...

diy upcycled candy corn earrings using paperclips halloween

1. Start by bending out your paperclip into a triangle shape. If there is a gap between the two ends of wire use masking or washi tape to secure your triangle in place

If you're working with coated paperclips you can choose to remove the plastic coating or leave it on - it's up to you!

diy upcycled candy corn earrings using paperclips halloween

2. Tie on a long length of yellow thread and tightly wrap all the way around the triangle, when you reach the end knot the thread in place and add a dab of glue if needed

diy upcycled candy corn earrings using paperclips halloween

3. Tie on another length of yellow thread a little way down from the base of the triangle and wrap across approx. one third of the way down the triangle

diy upcycled candy corn earrings using paperclips halloween

4. Once you have finished wrapping the first section tie your orange thread onto the end of the yellow one and continue wrapping across. Make sure the knot is on what will become the back of the earring and don't worry about it showing - it will be wrapped between the layers of thread!

diy upcycled candy corn earrings using paperclips halloween

5. Once you've wrapped the orange section repeat the process for the white section. When you reach the end secure the thread in place with a knot and some glue if needed

6. Finish up by adding on an earring wire - you can either add it onto the base of the triangle or the point depending on which way you want the earrings to hang!

7. Repeat the process to create a second earring and your new earrings are ready to wear!

diy upcycled candy corn earrings using paperclips halloween

We'd love to hear from you if you try out this or any of our other DIY projects - use the hashtag #eightandsixteen to share your photos with us!

Erin

Friday, 8 August 2014

Jewellery 101 - Turn Eyepins & Headpins Into Earring Wires

jewellery 101 turn eyepins headpins into earring wires

There are lots of different styles of earrings you can create using jewellery wire but for today’s tutorial I’m going to show how you can quickly and easily use eyepins or headpins, which you may already have in your craft stash. All you’ll need to do this is a pair of pliers and a Sharpie!

jewellery 101 turn eyepins headpins into earring wires

Headpins are lengths of wire with some sort of stopper at the end, usually a flat circle or ball of metal. They are often used to turn beads into charms as the small base keeps the bead in place however if you choose headpins with a ball on the end they can also look decorative and are perfect for creating earring wires.

Eyepins are similar pieces of wire but instead of a ball or circle of metal they have a loop at one end. The loop allows you to turn beads into connectors but again, they are also perfect for earring wires.

jewellery 101 turn eyepins headpins into earring wires

Bail making pliers are perfect for getting the curve into the wire however you don't need to splash out on them as a Sharpie will work just fine!

To turn the eyepins or headpins into earring wires simply wrap around a Sharpie to create a curve, trim off any excess wire then use pliers to slightly bend out the end.

If you're using a headpin finish off by using pliers to bend the end of the wire upwards creating a loop to hang your beads or charms.

For an example of a pair of earrings made using this technique check out my American Eagle Inspired DIY!

We'd love to hear from you if you try out this project - use the hashtag #eightandsixteen to share your photos with us & we may feature them in a future post!

Erin


Monday, 7 July 2014

Jewellery 101 - DIY Wire Bead Cage

bead cage 0

Today's post is the first in what we hope will be an ongoing series here at Eight & Sixteen - 101s!  In these posts we plan to share basic techniques, tips and tricks for crafts such as jewellery making and sewing.

For today's instalment of Jewellery 101 I'm going to show you how to make your own wire bead cage. You only need a few basic supplies and they are perfect for pendants and earrings! Here's how it's done...

bead cage 1

You will need: jewellery wire, a bead, round & flat nosed pliers, wire cutters

bead cage 2

1. Cut a length of wire and create a loop at one end using your round-nosed pliers

bead cage 3

2. Clamp the loop and hold it in place using your flat-nosed pliers. Begin wrapping the length of wire around the central loop creating a spiral

bead cage 4

3. Once you have wrapped a small spiral, or have reached halfway along the length of wire, place your bead onto the spiral to make sure it is the correct size

bead cage 5

4. Take the other end of the wire and repeat the steps but this time roll the spiral in the opposite direction so that when you reach the centre you are left with an S shape

bead cage 6

5. Slowly start to pull apart the rings of one spiral to create the spherical shape. You can do this using pliers if you want to, however you may find it easier to use your fingers

bead cage 7

6. Place your bead inside the wire every now and again as you adjust the spiral to check how the shape is looking. Once you are happy with the first half, repeat the process for the second spiral

bead cage 8

7. Bring the two spirals together around the bead to create the cage. Continue adjusting the wire until you are happy with the final shape

bead cage 9

8. Finally, take your pliers and bend out the loop/s you created at the beginning of each spiral (depending on how you want to hang the cage/what it will be used for) - these will act as the hanging loops to attach the wire cage onto your necklace or earring hook


We'd love to hear from you if you try out this DIY project - use the hashtag #eightandsixteen to share your photos with us!

Erin

Wednesday, 4 June 2014

DIY Stamped Monogram Necklace

monogram necklace diy 3

For my first tutorial here at Eight & Sixteen I'll be showing you how to make this simple personalised necklace design - a pretty project to make for yourself or to give as gifts! It's also a great way to practise your basic metal stamping technique before moving on to more ambitious projects.

You will need: metal alphabet stamps, a stamping block, a hammer, a small blank metal charm (I used a 15mm circle), a black Sharpie, a necklace chain, a small jump ring, jewellery pliers, washi/masking tape
+ optional: a bead, a headpin, round nose pliers


monogram necklace diy 5

1. Use washi tape to secure your metal disc in place on a stamping block and mark out where you want the letter to sit

2. Take your metal stamp, line up with the tape and tap the end with a hammer to stamp on the design. Be careful to keep the stamp upright and still to get a clean stamp and not a wobbly one!

monogram necklace diy 6

3. To help the stamped letter stand out more use a black Sharpie to colour over it and then gently rub away the excess colour with a cloth. Repeat this step a few times until you are happy with the colour

monogram necklace diy 7

4. If you want to add on a pretty bead embellishment take a headpin, thread on a bead, use jewellery pliers to create a hanging loop and cut off any excess wire

5. Use pliers to open up a jump ring and thread on both the stamped charm and bead charm plus a necklace chain. Carefully use pliers to close up the jump ring and you're done!

monogram necklace diy 8

We'd love to hear from you if you try out this DIY project - use the hashtag #eightandsixteen to share your photos with us!

Erin


Related Posts Plugin for WordPress, Blogger...