tabs

es about us es contact es archive es challenge es we love 9 es recipes es pintests es links
Showing posts with label sewing. Show all posts

Wednesday, 5 November 2014

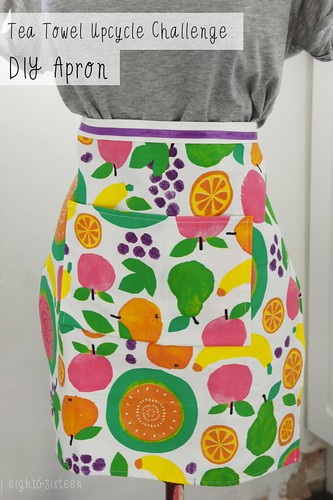
Tea Towel Upcycle Challenge Results : Erin's DIY Apron

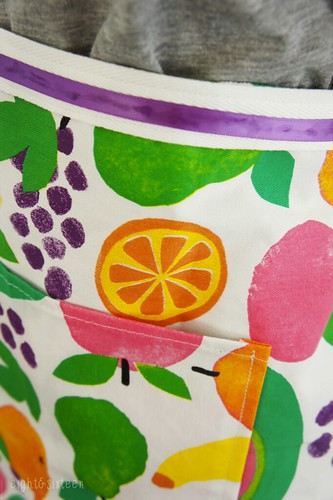
diy upcycled apron from tea towel eightandsixteen diy upcycled apron from tea towel eightandsixteen

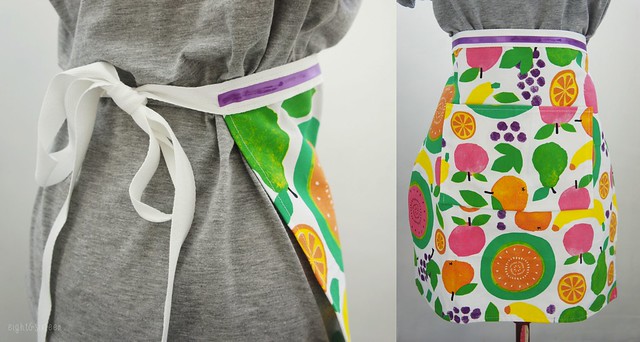
This week myself and Skye have both taken on the challenge of upcycling this fun fruit print tea towel into something new. For my project I decided to keep it in the kitchen and create a colourful apron!

To make your own you will need: a large tea towel, cotton webbing/tape, a sewing machine, scissors, pins, a tape measure, a fabric pen/pencil + (optional) ribbon/other embellishments

diy upcycled apron from tea towel eightandsixteen

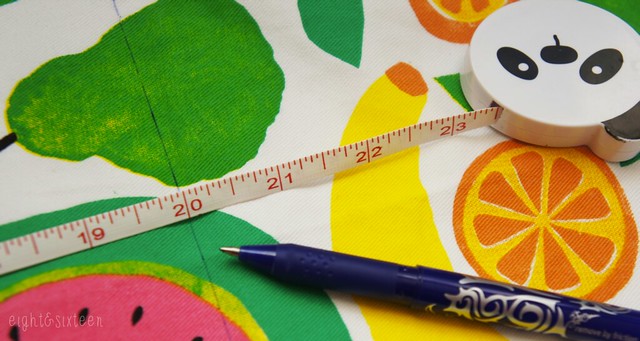
1. Measure how wide you want the apron to be, add on 1/2" to allow for neatening the edge and cut off any excess fabric.
I chose to make my apron sit flat but don’t forget to allow for gather when measuring if you want to create that vintage look!

2. Fold over the raw edge and stitch in place to make sure it won’t fray. You should now be left with a slightly smaller version of your original tea towel with no raw edges.

diy upcycled apron from tea towel eightandsixteen

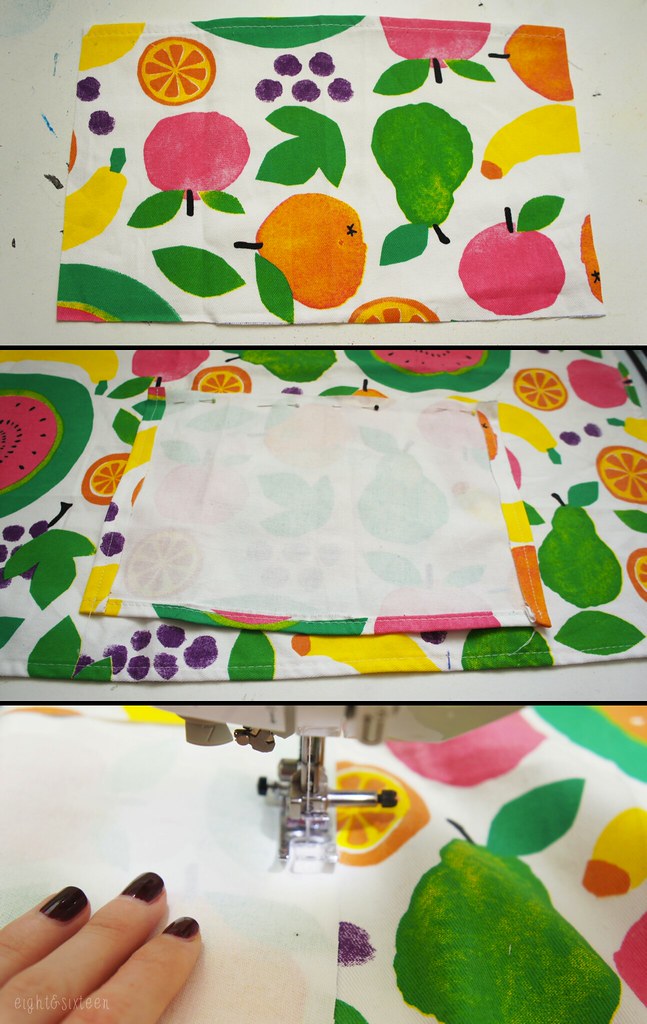
3. If you have any fabric leftover you can create a pocket on the front of the apron. I cut the two side edges off of my leftover fabric then turned over and stitched the raw edges as the original tea towel was quite wonky but you can leave the piece as is and create a pocket that stretches across the whole of the apron instead if you'd like.

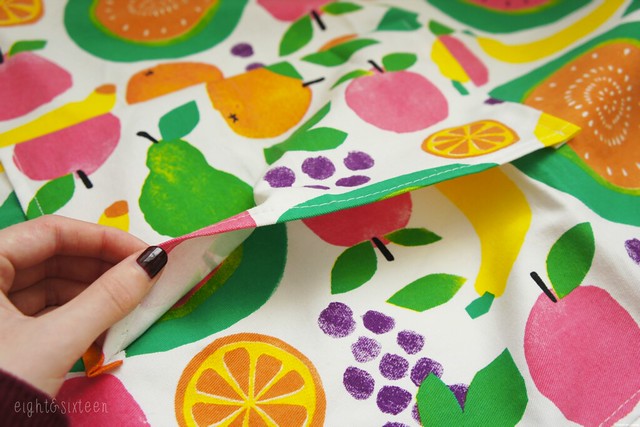
4. Decide where you want the pocket to sit, lay it face up onto the front of the apron then flip it downwards so it is upside down on the front of the apron. Stitch in place then flip the pocket back up and sew along the two side edges to create the pocket shape.

diy upcycled apron from tea towel eightandsixteen

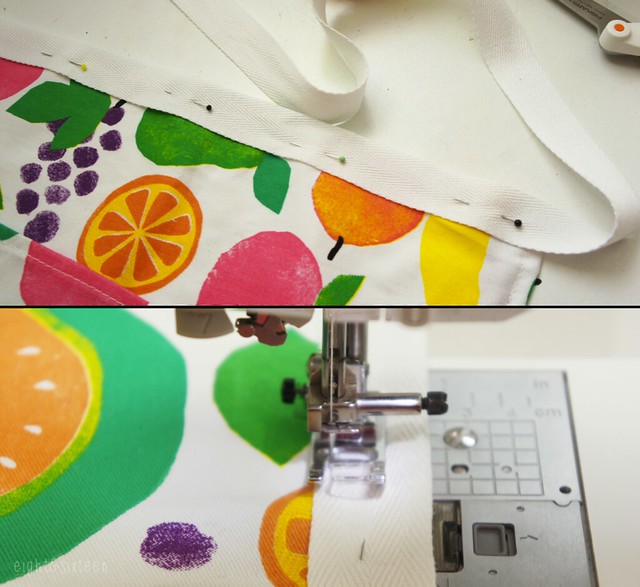
5. Take your strip of cotton tape (making sure it's long enough to tie around your waist) find the centre of the apron front and pin along the top edge. Stitch in place along both edges so it is secure.

diy upcycled apron from tea towel eightandsixteen

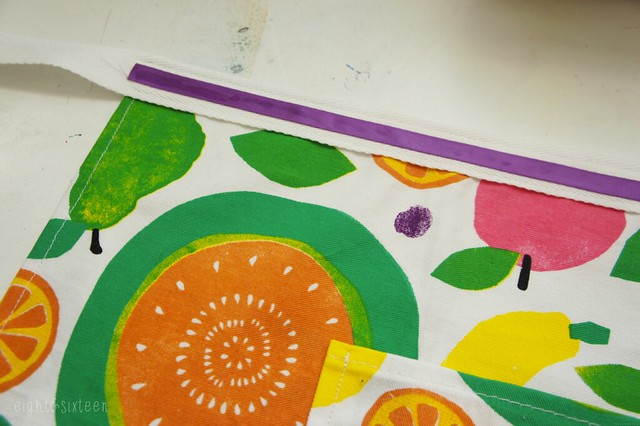
6. The final step is optional but if you wish to decorate your apron you can stitch, glue or iron on embellishments such as buttons, bows or ribbon as shown in my example.

diy upcycled apron from tea towel eightandsixteen

We'd love to hear from you if you try out this or any of our other DIY projects - use the hashtag #eightandsixteen to share your photos with us!

Don't forget to check back on Friday to see Skye's project!

Erin

Wednesday, 1 October 2014

DIY Quilted Cobweb Coasters

diy quilted cobweb coasters halloween crafts

Coasters are a great beginner quilting project as you get to learn all the basic techniques but on a small, more manageable scale. I made these cobweb coasters back in the summer and they were actually my first ever completed quilting and binding project, so if you're a beginner this could be the perfect Halloween project for you!

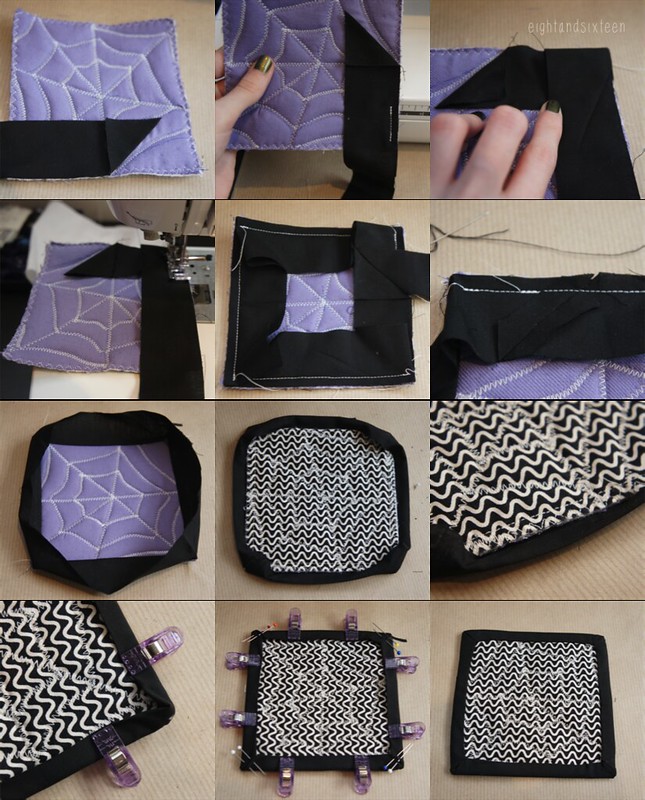
Below I will take you through a step-by-step of how to get your coaster ready for binding but as the binding process itself takes a little bit of explaining and I'm no expert I have linked to a great tutorial which will show you how to finish off the project.

To make your own cobweb coaster you will need: a 5x5" plain coloured fabric square, a 5x5" patterned fabric square, a 5x5" square of wadding/batting, a sewing machine, an erasable pen, pins/clover clips, strips of fabric for binding, an iron, a needle and thread, a ruler

cobweb coasters diy halloween crafts sewing quilting spiderwebcobweb coasters diy halloween crafts sewing quilting spiderweb

1. Take an erasable pen (we recommend Frixion pens) and draw out a cobweb design onto your plain coloured square. Start by plotting out the diagonal lines using a ruler then go back and fill in the curved lines

2. Next layer up your fabric "sandwich" ready to sew. Place the patterned fabric face down on your work surface, followed by your square of batting and finally your plain fabric face up - pin in place if necessary

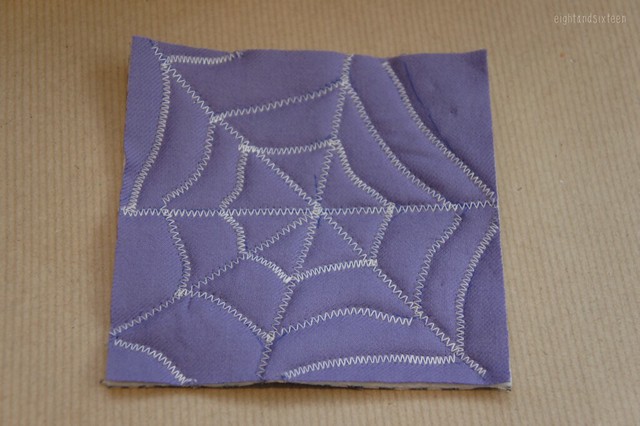
3. Choose your preferred quilting stitch and sew over the cobweb design, joining all of the layers together

4. Trim off any excess threads and neaten off the edges of your fabric making sure it is still square. Use a zig zag stitch to go around the edges just to keep them flat ready for the binding process

cobweb coasters binding tutorial halloween spiderweb quilting

5. To bind the coaster I would recommend using the 'one piece' or single binding method, finishing off with a ladder stitch. If you are a beginner here is great tutorial to get you started - http://verykerryberry.blogspot.co.uk/2011/01/single-binding-tutorial.html - however if you already have a preferred method of binding then of course you can use that instead!

We'd love to hear from you if you try out this spooky DIY project - use the hashtag #eightandsixteen to share your photos with us!

Erin

Friday, 19 September 2014

Book Review: Stitch It Simple, Beth Sheard (2014)

*Review copy c/o Netgalley, image via Goodreads

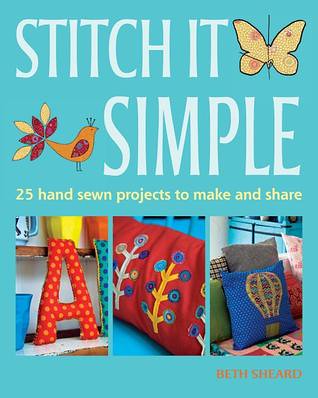
stitch it simple


Stitch It Simple is a cute and colourful sewing book featuring 25 beginner projects which can also be customised or built upon for those with more sewing experience.

Most of the ideas included are projects for the home such as cushions, a lampshade, mobiles, a doorstop and bunting. However there are also a few accessory and gift ideas such as slippers, tote bags and even an apron with a cute cupcake design! My personal favourite ideas included Fabric Letters, the Balloon Cushion and the Stylized Tree Cushion (obviously someone else agrees as they are the three projects featured on the cover!).

Alongside the tutorials themselves is a section of information on some of the basics such as how to do simple stitches, appliqué, binding edges etc which is perfect for beginners or to use for reference. There's even a few tips dotted here and there along the way too!

The projects found within this title were all created using fabric collections designed by Kaffe Fassett who also penned the forward to the book. The use of one designer’s collection means that the projects all compliment each other well in terms of colour and style and gives an overall coherent theme to the book.

Stitch It Simple is full of cute ideas and would make a nice gift for a beginner wanting to try out some easy sewing projects.

3stars


Stitch It Simple is released on October 14th & you can pre-order it from Amazon.co.uk now!

 Have you read this book? We'd love to hear your thoughts so don't forget to use the hashtag #eightandsixteen to share them with us!

Erin

Wednesday, 10 September 2014

DIY Simple Upcycled Skirt

diy upcycled skirt tutorial eightandsixteen diy upcycled skirt tutorial eightandsixteen

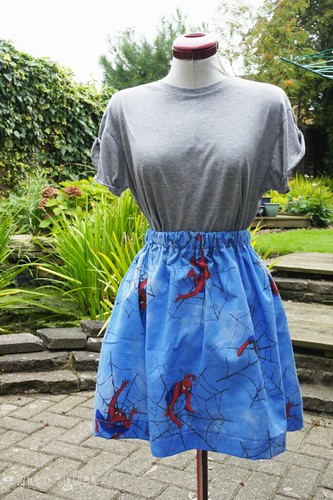
Today I have another easy upcycle project to share with you, this time venturing into the world of dressmaking. This style of skirt is simple to make as well as being thrifty so it's perfect for a beginner project!

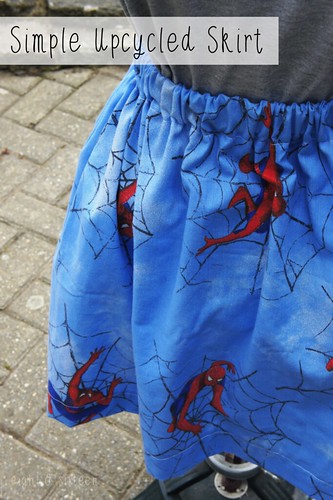
You will need: a piece of fabric (for my skirt I used a Spider-Man duvet cover but any piece of fabric will work!), a sewing machine, an iron, pins, 1" wide elastic, a tape measure & a safety pin

1. First up you'll need to cut your fabric to size, start by measuring around your waist. Next decide on what length you want your skirt to be, remember you'll need to add on extra to allow for hemming. If you're not sure what length you want measure from your waist to knee and use this measurement as a starting point.
To calculate the size of your fabric double your waist measurement - if you want a fuller skirt triple it!

For example, if your waist measurement is 27" and your waist to knee measurement is 22" your piece of fabric should measure 54 x 22"

Cut your piece of elastic to your waist measurement plus 1" - so in our example the elastic would be 28" long

diy simple upcycled skirt sewing spider-man

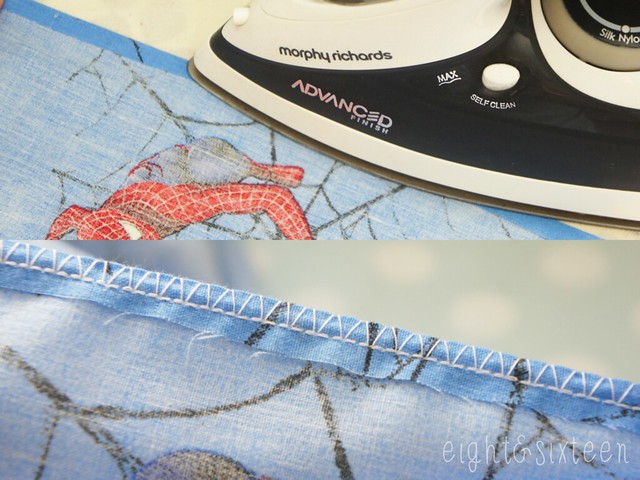
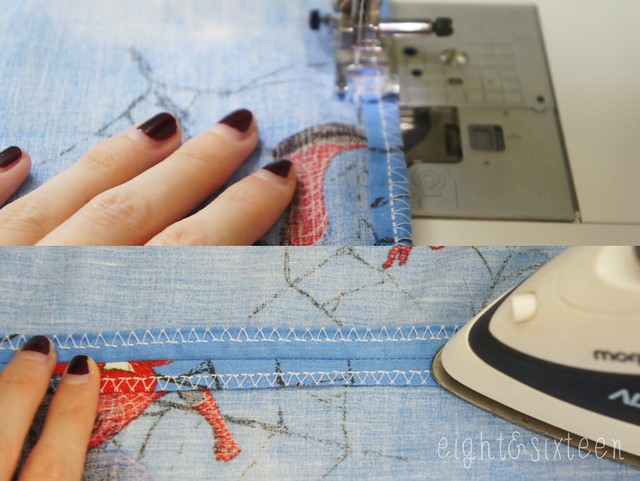
2. Next up we need to turn the strip of fabric into a tube by joining together the two ends. To achieve a neat finish without an overlocker, fold over and iron the edges of your fabric then use a zig zag or similar stitch to secure in place.

diy simple upcycled skirt sewing spider-man

3. Next, place your edges of fabric right sides facing and stitch together about 1/2" from the edge. Press out your seam so it's nice and flat.

diy simple upcycled skirt sewing spider-man

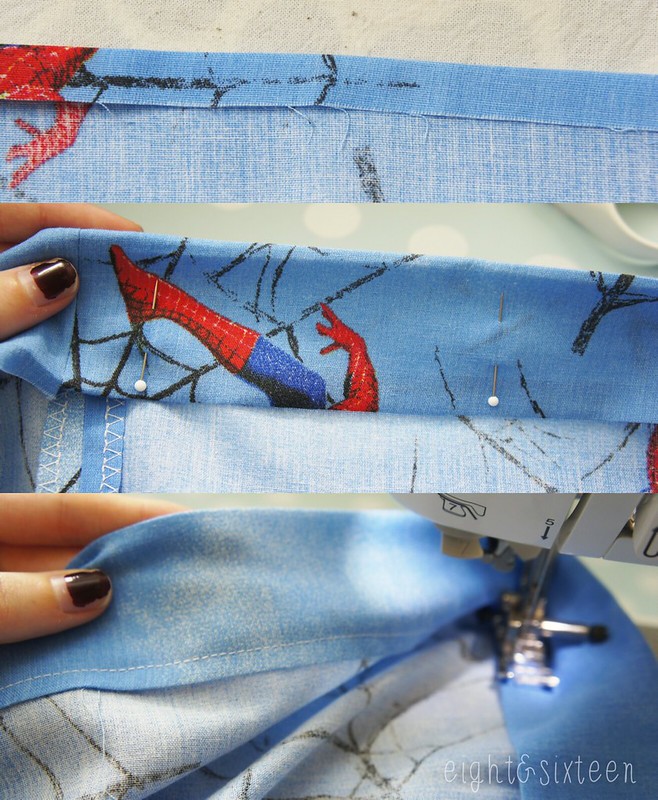
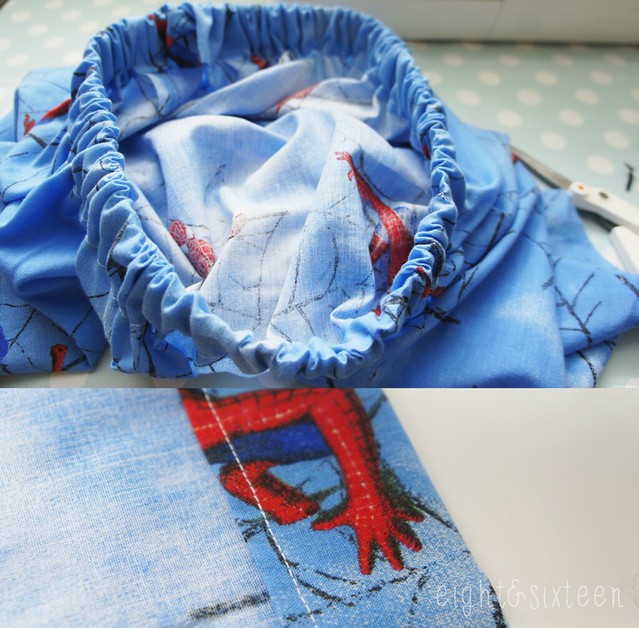
4. Now we're going to work on creating the waist of the skirt. As before fold over about 1/4" and iron the top edge of your fabric, then fold over again this time just over an inch to allow space for your elastic to be threaded through and again iron in place.

5. Next you'll need to stitch this in place and sew all the way around the fabric approx. 1/4 away from the edge. Before you start to sew make sure you have left a gap of around 2" so that you have space to thread the elastic.

diy simple upcycled skirt sewing spider-man

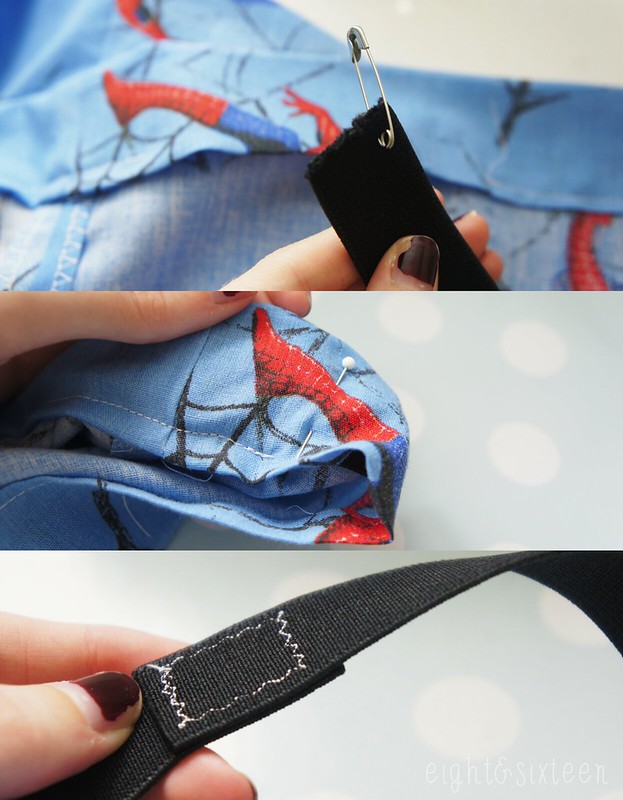
6. Attach a safety pin to the end of your length of elastic and thread through the channel you just created to make the waist of the skirt. When you reach the other end pull your elastic through enough so that you can fit it under your sewing machine

7. Overlap the two ends of elastic and stitch together - make sure you backstitch to keep it secure!

diy simple upcycled skirt sewing spider-man

8. Thread the elastic back through the skirt and place under your sewing machine foot. Stretch out the section where you left a gap earlier so that it is flat allowing you to sew it up.

9. The final step is to hem the skirt. Just as you did to create the waist fold over about 1/4" and iron in place, then fold over again to the length you want to skirt to be and stitch in place.

We'd love to hear from you if you try out this DIY project - use the hashtag #eightandsixteen to share your photos with us!

Erin

Monday, 1 September 2014

Kit Review: Hobbycraft Felt Purse

hobbycraft kit review felt coin purse citrus fruit orange

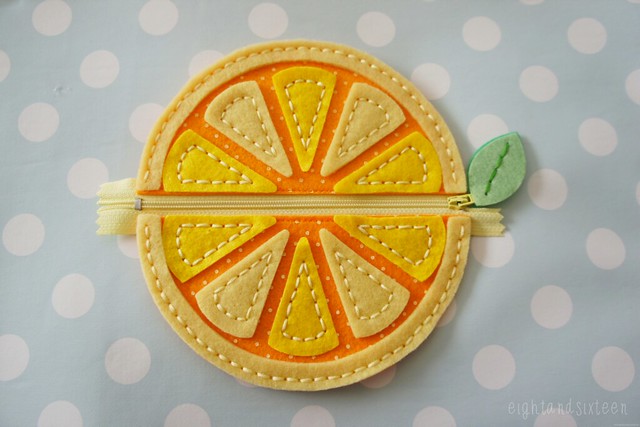
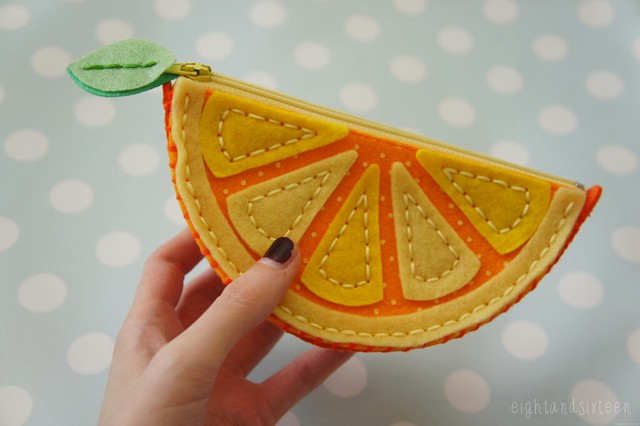
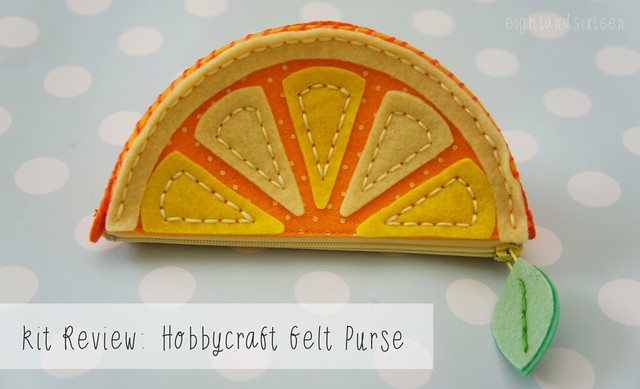
Having admired the cute range of designs in store many times in the past I recently picked up one of Hobbycraft’s felt kits. The range, designed for kids, has some lovely projects including the bold orange slice purse I’m sharing with you today.

hobbycraft kit review felt coin purse citrus fruit orange hobbycraft kit review felt coin purse citrus fruit orange

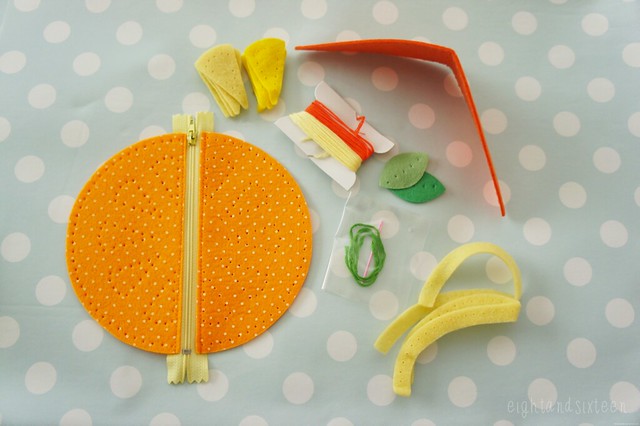
The kit came with all of the felt pieces needed to create the purse plus threads, a plastic needle and step-by-step instructions. The felt pieces had all been pre-cut with punched holes for sewing as well as the zip already attached the main body of the purse so, if you’re a beginner there’s no need to worry about any fiddly tasks! The instructions included simple diagrams of how to do the different types of stitch needed, again something that’s great for beginners.

I had a lot of fun making up the purse and I think it would make a great rainy day activity for both kids and adults!

You can find the Orange Purse Kit online for £5, or if you’re lucky and can find one in store you can pick it up on sale for just £2.50 like I did!

hobbycraft kit review felt coin purse citrus fruit orange

Have you tried any Hobbycraft kits? We'd love to hear what you think so don't forget to leave a comment or tweet us using the hashtag #eightandsixteen 

Erin
 

Friday, 29 August 2014

DIY Revamp - Check & Stripe Mix Shirt


Today I'm sharing another DIY Revamp project, this time taken from Erin's blog E-Elise Etc..
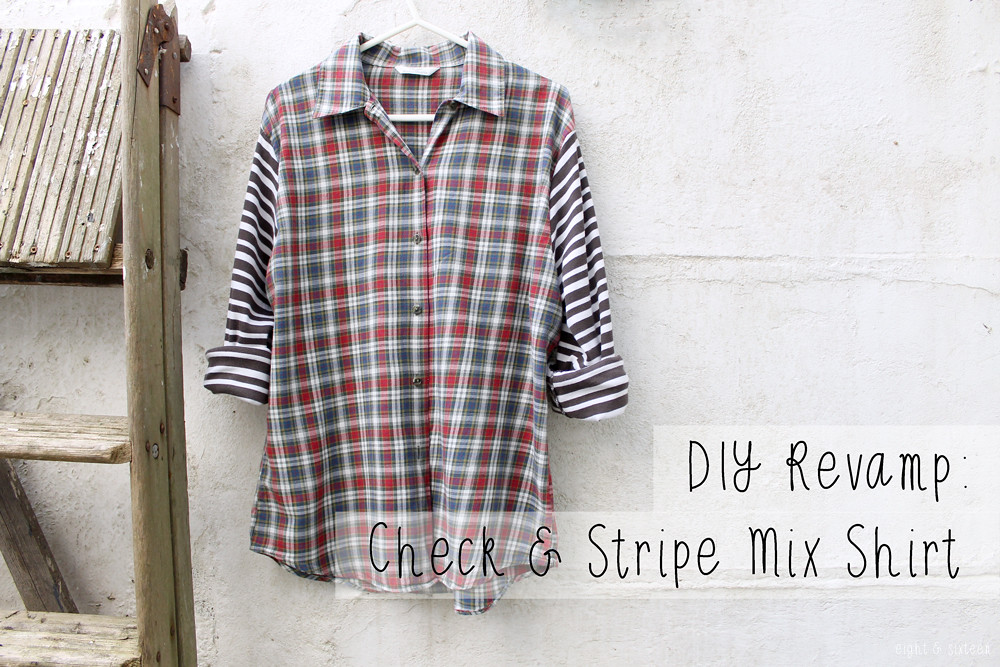
I loved Erin's Denim & Check Mix Shirt when she first posted it in 2013, and though it may not be as popular on the high street now, I decided to do a 90's spin on the idea and get pattern clashing!


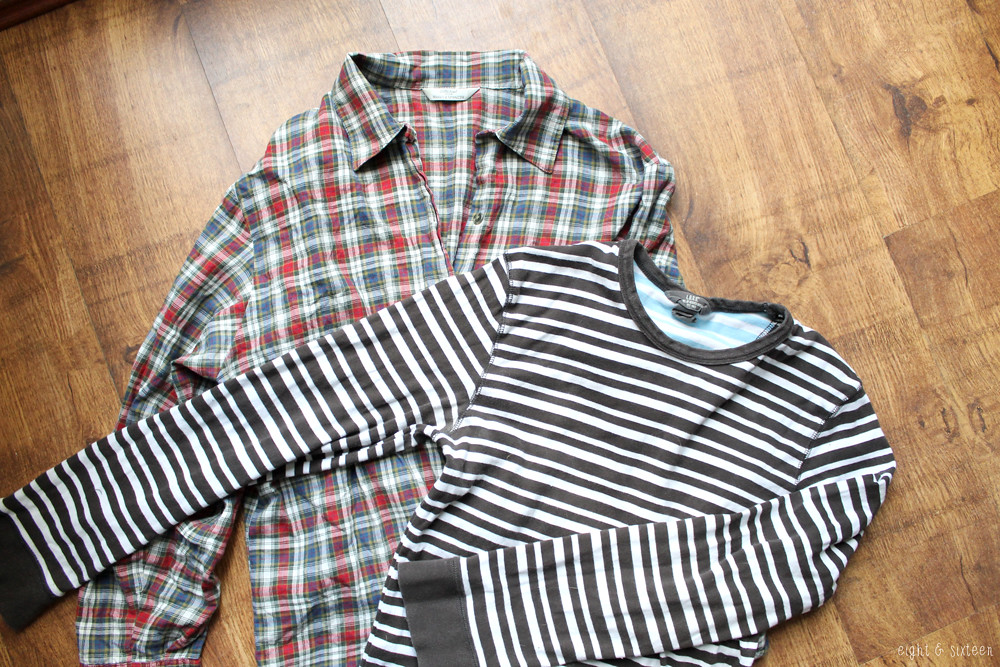
For this DIY you will need two different shirts - colour and pattern choices are up to you, but I wanted to create a grungey mix. Keep in mind the fabrics that you choose - because the striped top I used is jersey, I had to be careful when sewing to stretch the fabric into place, but if you use two cotton shirts this won't be an issue.


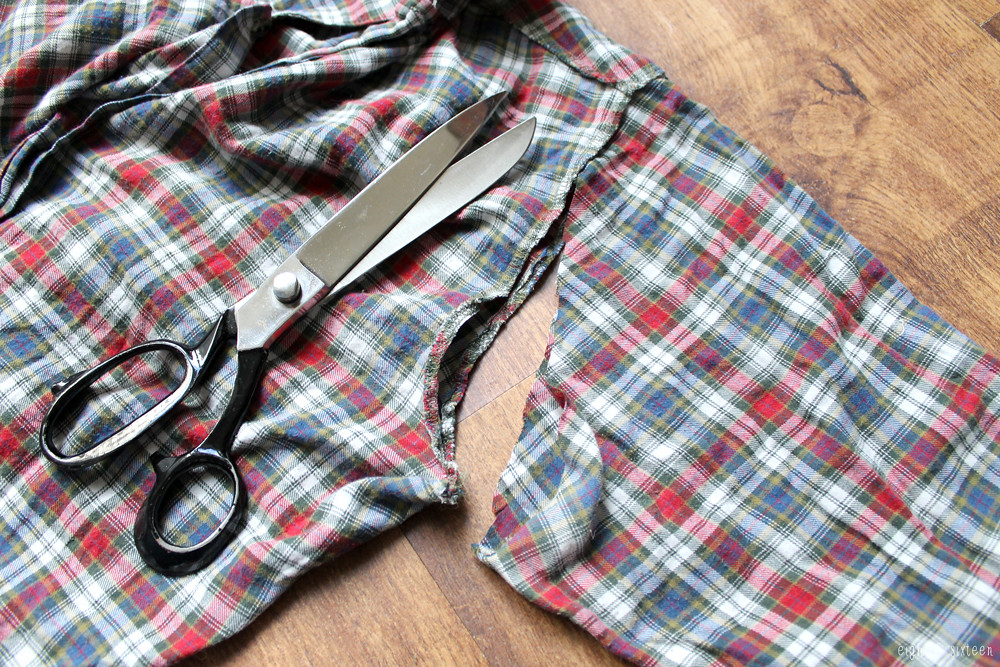
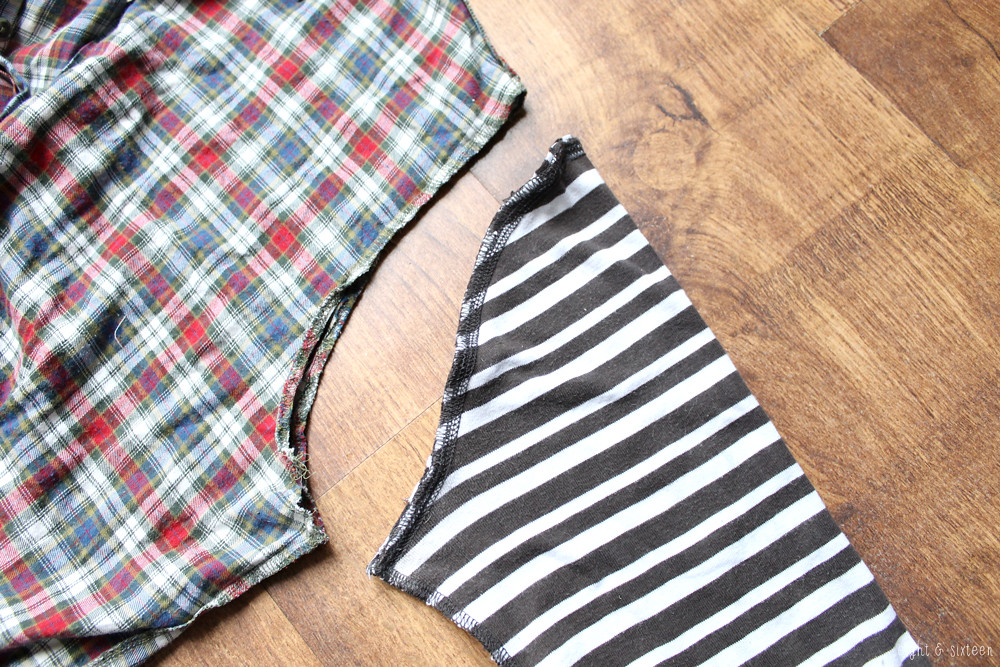
First, cut off the sleeves from both of your tops, being careful to cut as close to the stitching as possible.


Align your new sleeve pieces to the contrasting armholes and pin into place. Start pinning from the underarm side seam and match this seam to the sleeve seam.
Sew together with a 1cm seam allowance and then zig zag stitch or overlock the edges to finish.

This is a great way to breathe a new lease of life into otherwise unworn shirts - and a great way to get creative with colour and pattern blocking. There are lots of ways to personalise this DIY too, like adding a contrasting pocket as Erin did in her original post.


We'd love to hear from you if you give this DIY a go - use the hash tag #eightandsixteen to share your photos with us!

Skye

Wednesday, 30 July 2014

DIY Harry Potter Inspired Fabric Envelope Phone Pouch

harry potter pouch

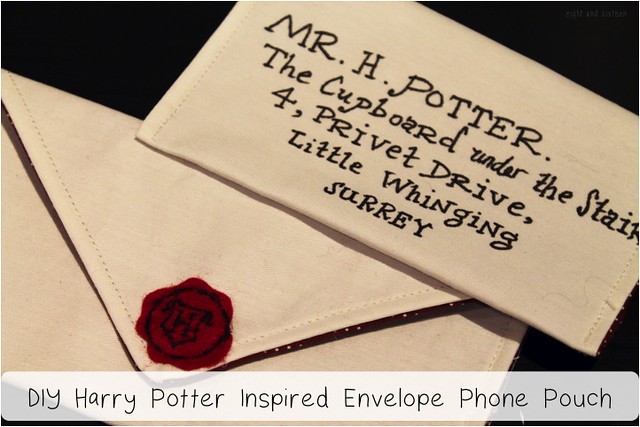
Yesterday we introduced our second 'We Love' topic; Harry Potter! Today's tutorial is the first of several Harry Potter inspired projects we'll be sharing over the next few weeks - a cute but geeky phone pouch! Just read the steps below to find out how you can make your own version :)

Before you get started here's a couple of things to keep in mind...
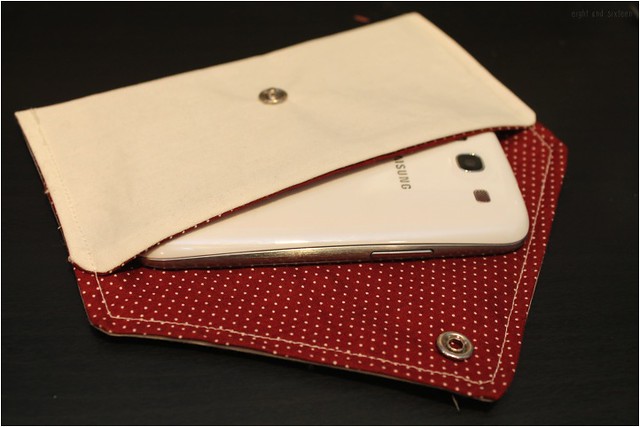
  • The size of the finished pouch using the measurements below is approx. 7 x 3.5" and will fit a Samsung Galaxy S3 or similar sized phone. Make sure you adjust the measurements before you start if you want to make the pouch fit a different phone model or other gadget
  • For this tutorial I'm going to share how to make a simple fold-over style envelope. If you would like a more classic envelope shape you can follow the same method but use a paper envelope as a template, and hand-stitch together at the end!

You will need: a plain light coloured fabric, a patterned fabric for lining, lightweight iron-on interfacing, a fabric paint pen, a sewing machine, a ruler & rotary cutter/scissors, an iron, an erasable fabric pen, a popper fastening (or alternative), a glue gun

harry potter pouch 1

Cutting The Fabrics

1. Cut three pieces of fabric all measuring 11 x 7 - one from the plain fabric, one from the patterned and one from the interfacing

2. Use your ruler to measure halfway across the top of the plain fabric and mark with your erasable pen. Make two more marks, one on each edge, 3" down from the top. Join these up with your erasable pen so that you have a triangle shape and cut away the excess fabric. Repeat for the interfacing and lining fabrics so the pieces look like the photo above

3. Iron your piece of interfacing onto the plain fabric (as per the instructions) and set aside the patterned lining fabric
harry potter pouch 2

Adding The Address

4. Take your erasable pen and draw a line across the front of the plain fabric where you previously drew the markers for creating the triangle. Take your pen and draw another line across the fabric 4" underneath the first line - the space left in between the two is where the writing will go

5. Still using your erasable pen mark out lines where each line of the address should go so that you have a guideline to follow. You'll be using a fabric pen to write the address so you don't want to make any mistakes or find that the writing doesn't fit in!
For guidance the top line of writing on my pouch measures around 4" long and the last line 1.5" long

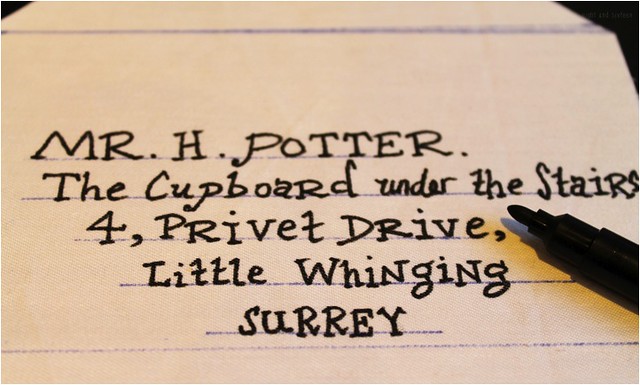
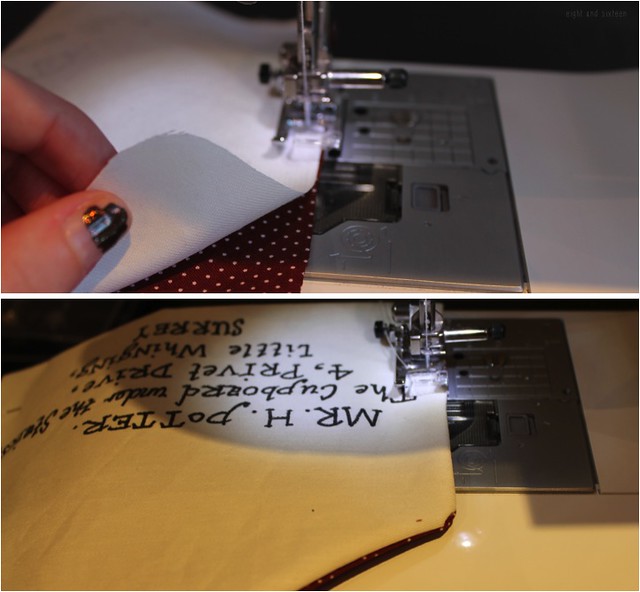
6. Swap your erasable pen for the fabric marker (I used a Fine nib Fabric Paint pen by Dylon) and add on the famous address. I chose to write it out in a similar font to the one from the films but it's up to you what style you want to write in. Set the address in place with your iron, following the instructions provided on the fabric paint pen packaging as brands may vary
harry potter pouch 3

Sewing The Pouch

7. Place your plain and patterned lining fabrics right sides together and pin in place

8. Use your sewing machine to stitch all the way around the edge with a 5mm seam allowance - don't forget to leave a small gap on one edge for turning the fabrics back the right way!

9. Trim off any corners and turn your fabrics back the right way. Press the envelope out with your iron and close up the gap. You can stitch up the gap by hand if you like but I took a short cut and used a small strip of hemming web to fuse it together

10. Fold up the bottom half of the fabric to create the pouch pocket and iron, then pin into place ready for sewing

11. Start at one of the bottom corners and stitch all the way around the pouch, round the edge of the triangle shape, to the opposite bottom corner using a 5mm seam allowance - don't forget to backstitch a little at each end to secure it
harry potter pouch 4

Adding The Fastening 'Seal'

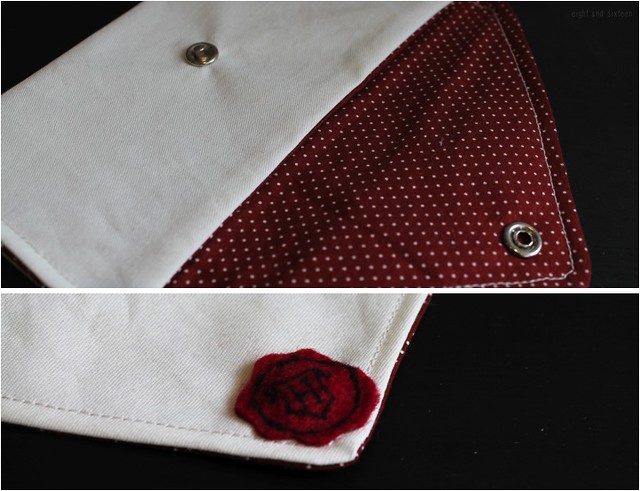
12. Add on your popper fastening as shown in the instruction leaflet - alternatively you could use a small piece of velcro

13. To create the faux Hogwarts seal cut an uneven 'wax blob' shape from a piece of dark red felt and handstitch or draw on the crest design (I used a fine nib permanant marker)

14. Use a glue gun or handstitch the felt onto the popper and your envelope pouch is finished!
harry potter pouch 5

We'd love to hear from you if you try out this DIY project - use the hashtag #eightandsixteen to share your photos with us!

Don't forget to check back next week for another Harry Potter inspired project!

Erin
Friday, 25 July 2014

DIY Revamp - Bunny Eye/Sleep Mask

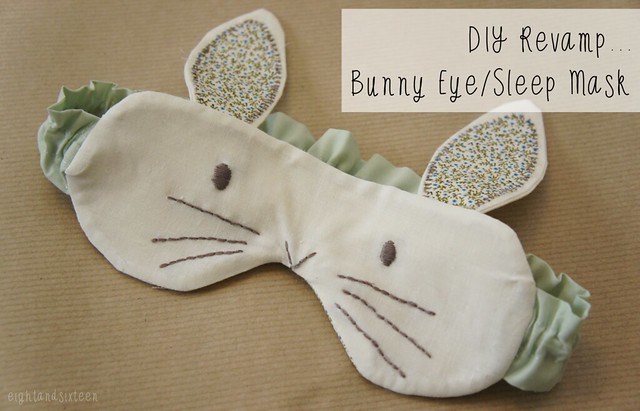
diy bunny sleep eye mask eight and sixteen

When we were throwing around ideas for features here at Eight & Sixteen one style of DIY posts we came up with was revamps. We thought it would be fun to try out some of each other's DIY projects, put our own spin on them and share our versions with you here!

Today I'm sharing my take on Skye's Eye Mask post originally created for her blog Even Artichokes Have Hearts back in 2011 (in the early days of us becoming friends!). Skye's version was reversible featuring a cute embroidery design and a pretty floral print. For my version I've decided to incorporate my love of bunnies and add on ears! Here's how I made it...

diy bunny sleep eye mask eight and sixteen

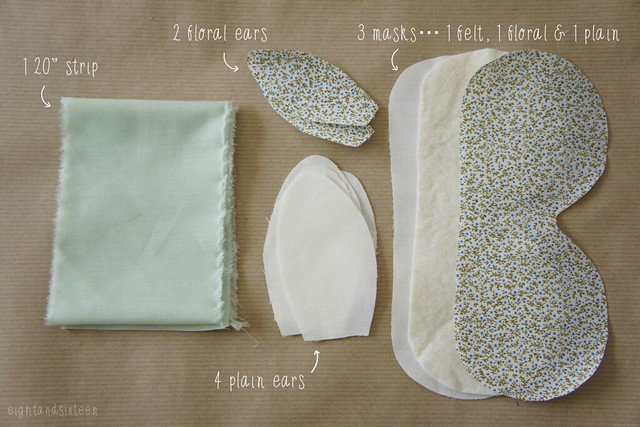
I started out by creating templates for both the main part of the mask and the bunny ears, then worked out what pieces I would need to cut. I then used my templates to cut them all out and also cut a long strip of mint green fabric to use to encase the elastic.

diy bunny sleep eye mask eight and sixteen

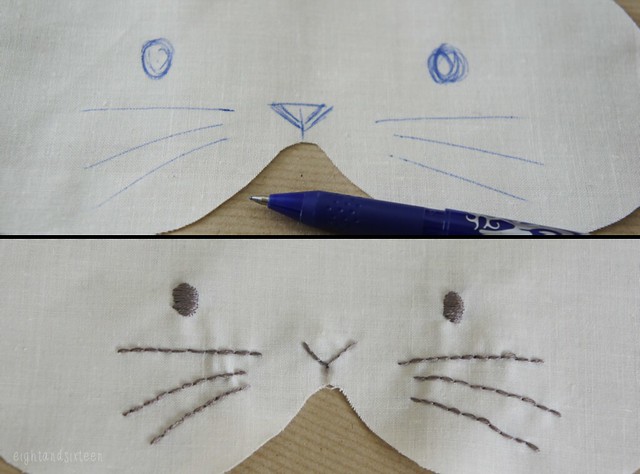
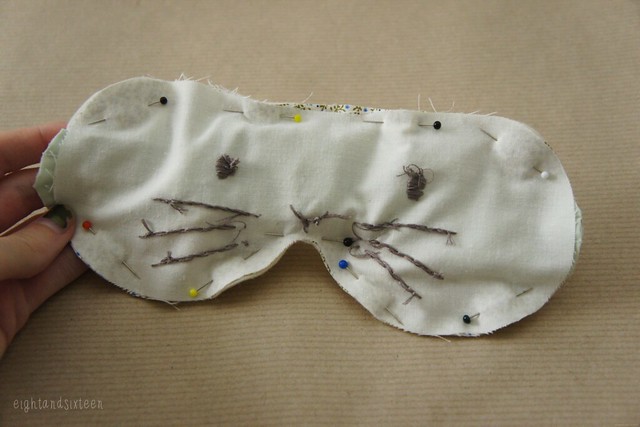
To add the bunny face onto the mask I grabbed one of my FriXion pens (these are erasable and fantastic!) and sketched on a design which I then hand stitched over using an embroidery thread.

diy bunny sleep eye mask eight and sixteen

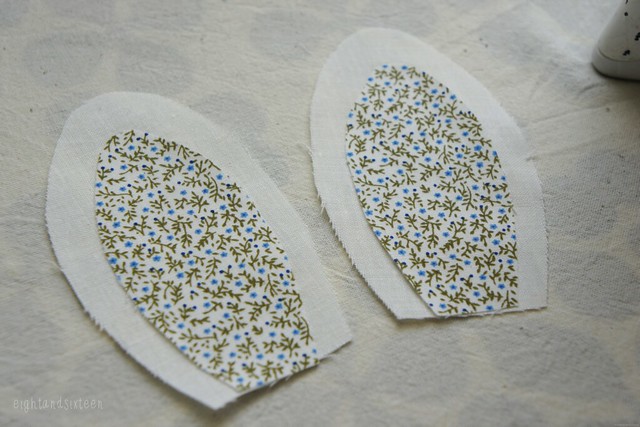
I wanted to add a little bit of colour to the front of the mask so I decided to add floral pieces as detailing on the ears. I ironed the floral fabric pieces onto the plain ones using a little bit of hemming web to fuse them together then hand stitched over the edges to keep everything in place and prevent fraying.

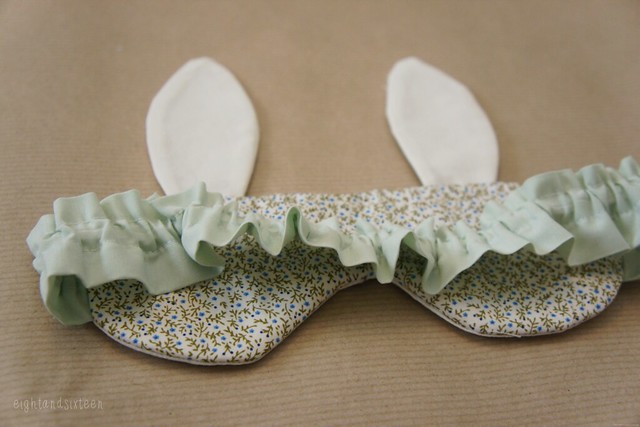
Then came the first bit of machine sewing! I stitched together the ears by sewing the front and back ear pieces together then turning inside out. Next I made a long tube with the mint green fabric, turned back the right way and stitched on two rows just a bit wider than my elastic. I used a safety pin to thread the elastic into the tube then lined up one end of the elastic with the end of the tube and stitched it place, and repeated with the other end creating a gathered effect.

diy bunny sleep eye mask eight and sixteen

Finally I put all of the layers together in the right order - felt, floral fabric face up, ears face up, elastic band, front fabric face down and stitched almost all of the way around the outside - just leaving a small gap for turning out. I used an overlock style stitch on my machine as well as using a normal straight stitch just to help prevent fraying.

I crossed my fingers that it had all worked out according to plan then turned it back the right way - luckily it had worked! I ironed it flat and lastly closed up gap using a little hemming web.

diy bunny sleep eye mask eight and sixteen

There are definitely a few tweaks I would make if I were to have a second attempt at this project, particularly the shaping around the nose, but overall I'm pleased with how it turned out! :)

We'd love to hear from you if you try out this or any of our other DIY projects - use the hashtag #eightandsixteen to share your photos with us!

Erin
Friday, 13 June 2014

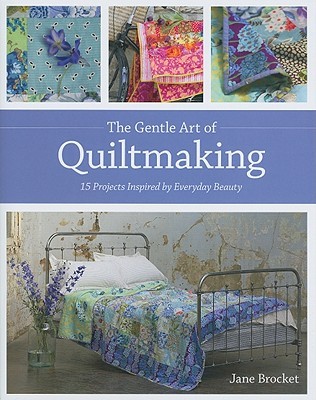
Book Review: The Gentle Art Of Quiltmaking, Jane Brocket (2014)

*Review copy c/o Netgalley, image via goodreads.com

gentle art of quiltmaking


Everyday things and sights such as fields of pretty flowers, rows of beach huts, items of clothing and even stamps inspire all the quilt designs found in this book. Each project starts with a short explanation of the idea and inspiration behind the design before moving on to the how-to for the quilt which all include colour photographs of the final piece. My personal favourite of the finished quilts was probably the stamp inspired design as the pattern and colours most suited my taste.

As well as the wide selection of designs the book is also filled with tips and advice for beginners with the final section covering the basics – from equipment to cutting, preparing fabrics as well as the binding and actual quilting. In addition there are fabric suggestions, measurements and information is given on things such as calculating fabric needs and how to choose a design. However its not just the designs and fabrics that Jane talks tips for, she also has advice on creating the right workspace, a useful addition to the book as lack of space is something that can often put people off taking the plunge and making their first quilt.

With such a variety of inspirations and patchwork designs plus all the basics covered The Gentle Art Of Quiltmaking has something for everyone and would be a good reference book to have around as well as one to look at for a little inspiration.

3stars

Have you read this book? We'd love to hear your thoughts so don't forget to leave a comment or tweet us using the hashtag #eightandsixteen 

Erin
Wednesday, 11 June 2014

DIY Tea Towel Cushions


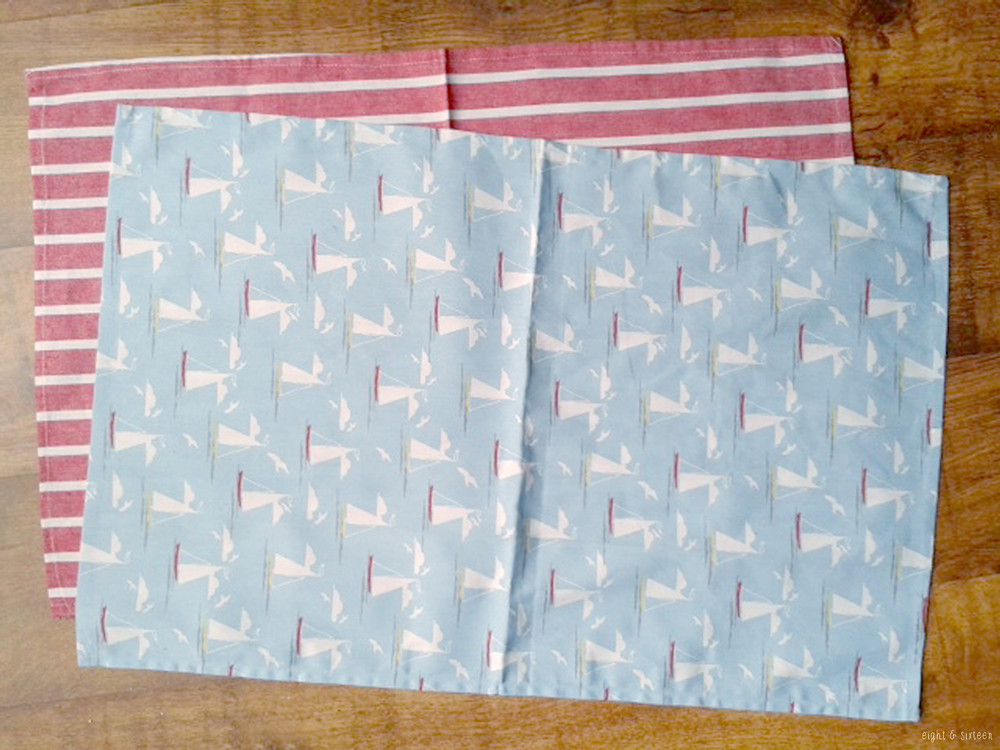
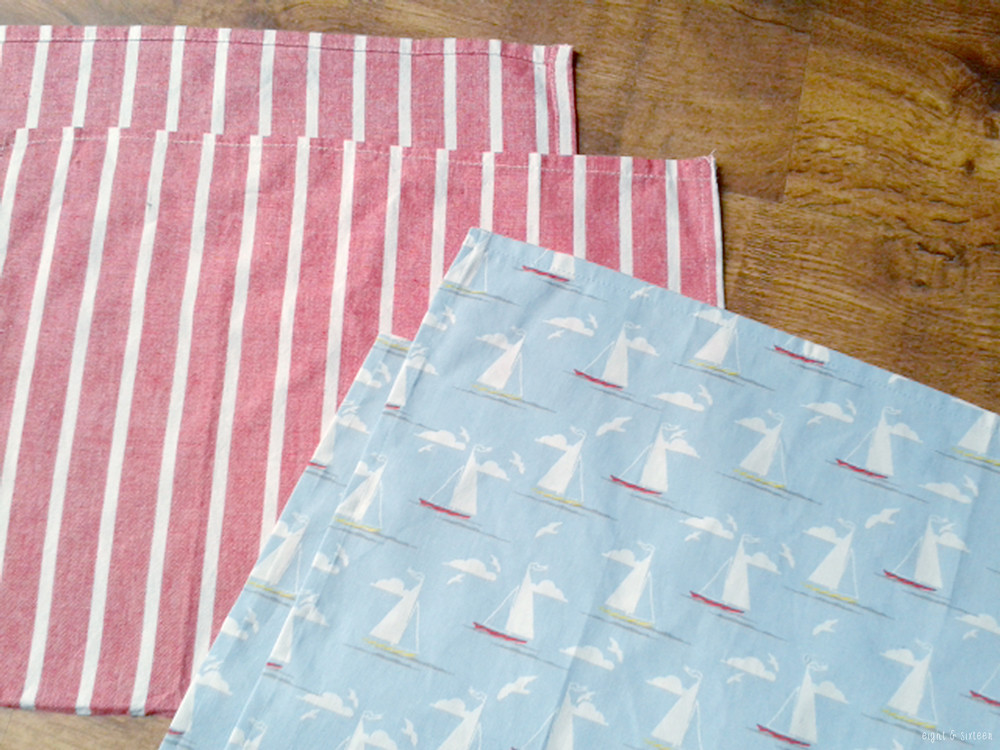
Hi guys, for my first DIY here at Eight & Sixteen I wanted to share with you a different use for tea towels.
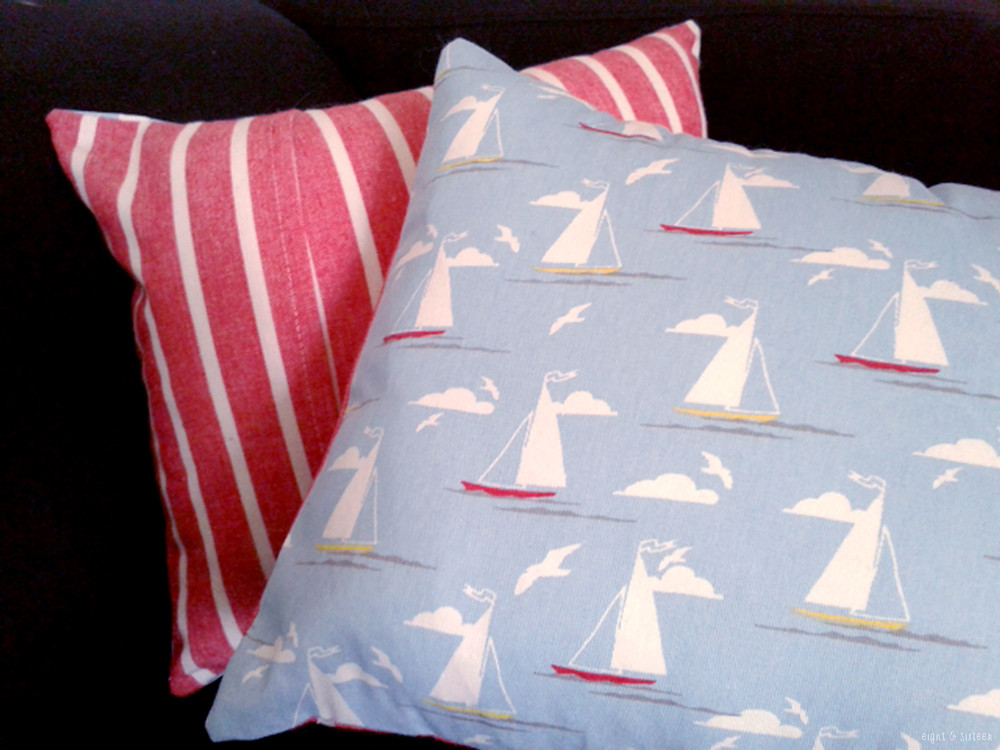
There are so many cute designs to be found on tea towels these days, it just doesn't seem right to reserve them for bubbly dishes. But, with just two tea towels you can make yourself a pair of cushions like these - here's how:


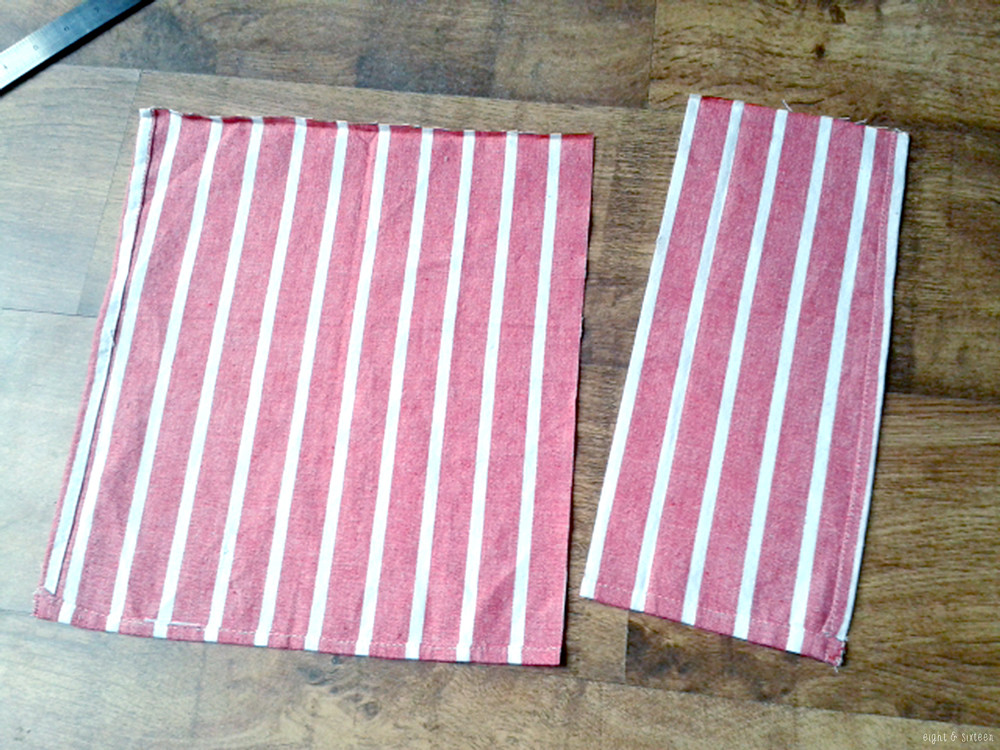
1. Take two tea towels, fold them in half lengthways and cut along the fold.

2. You now have two front and two back pieces for your cushion covers.

3. Measure the length of your back fabric piece and cut off 1/3.


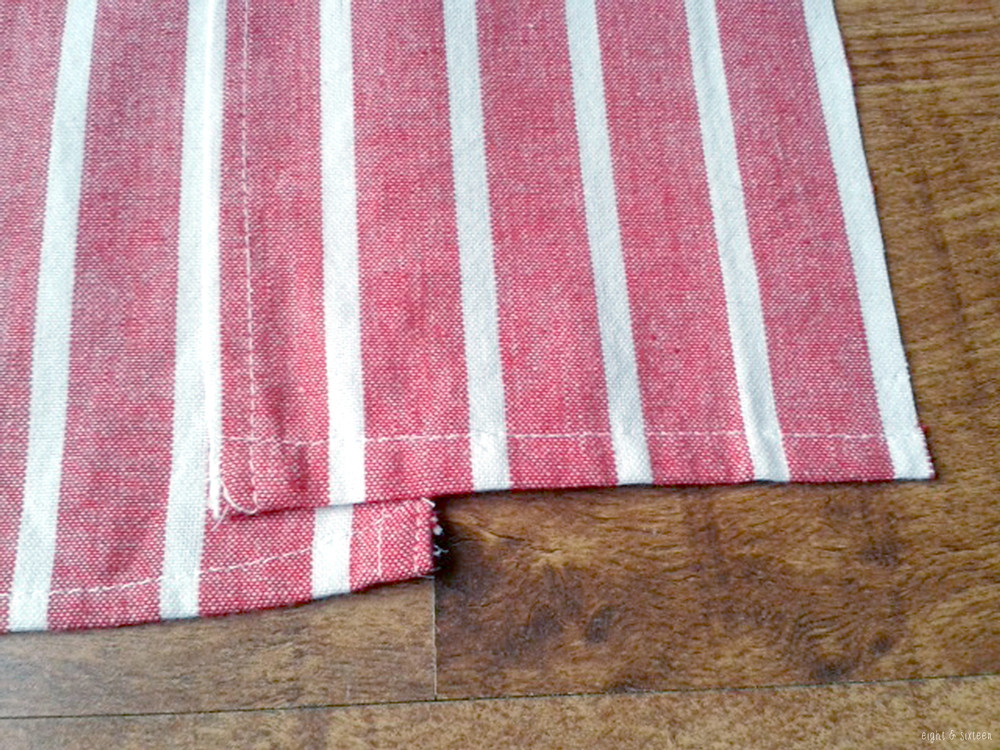
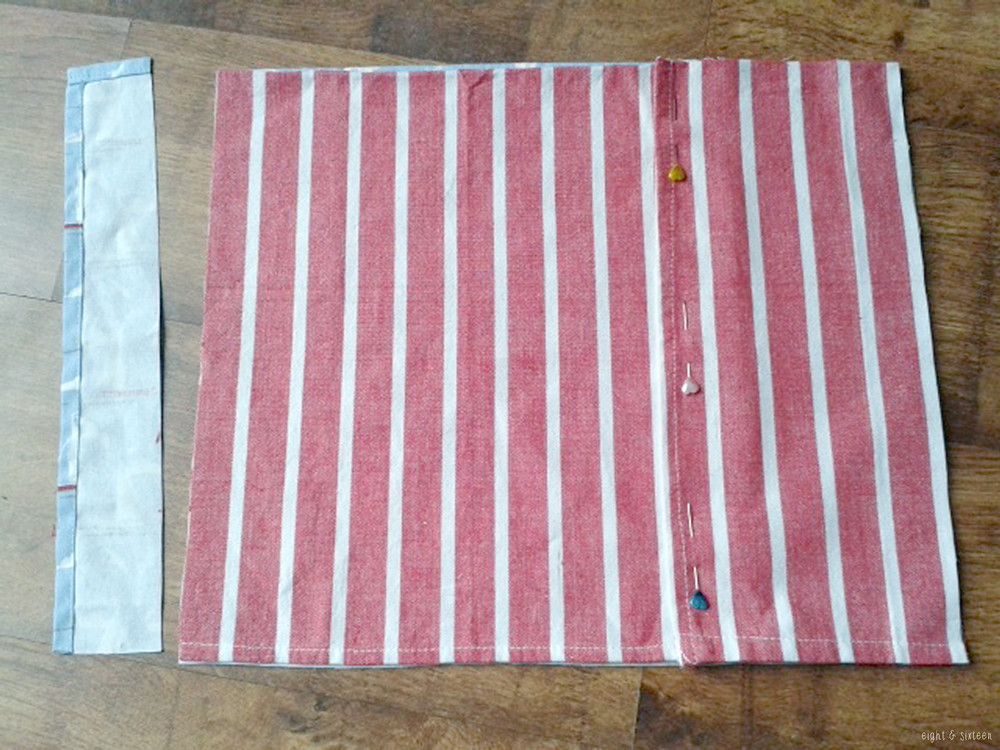
4. Flip the two back pieces so that the already hemmed edges overlap by 5cm.


5. Pin the two pieces together at the overlap and then lay them on top of the front fabric piece. Trim away any excess fabric from the front piece.


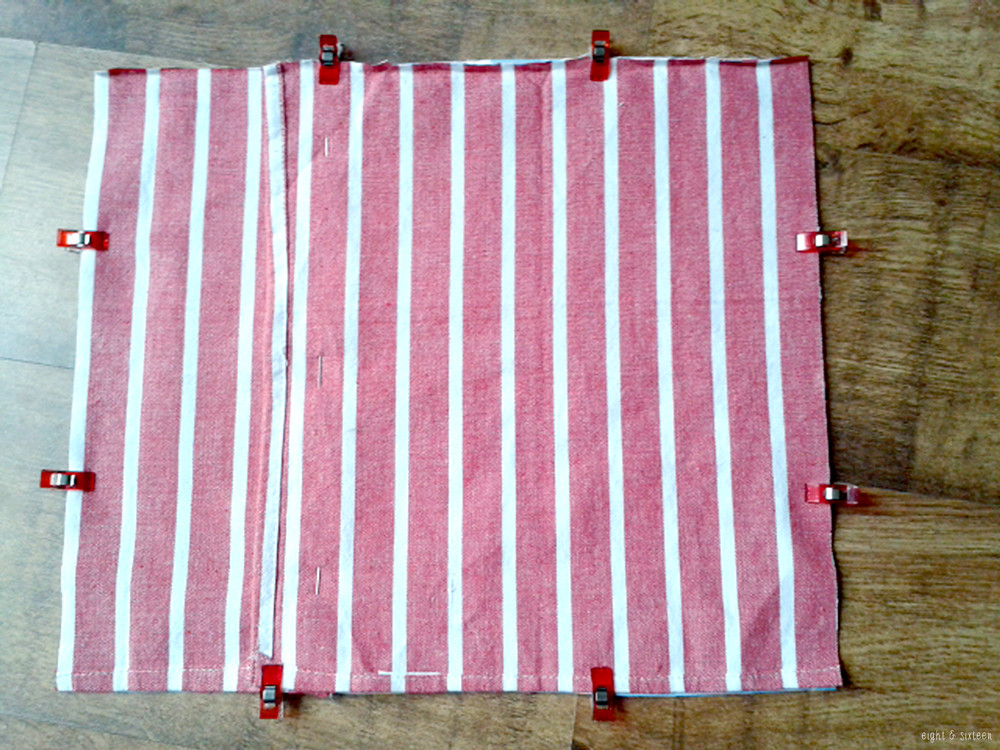
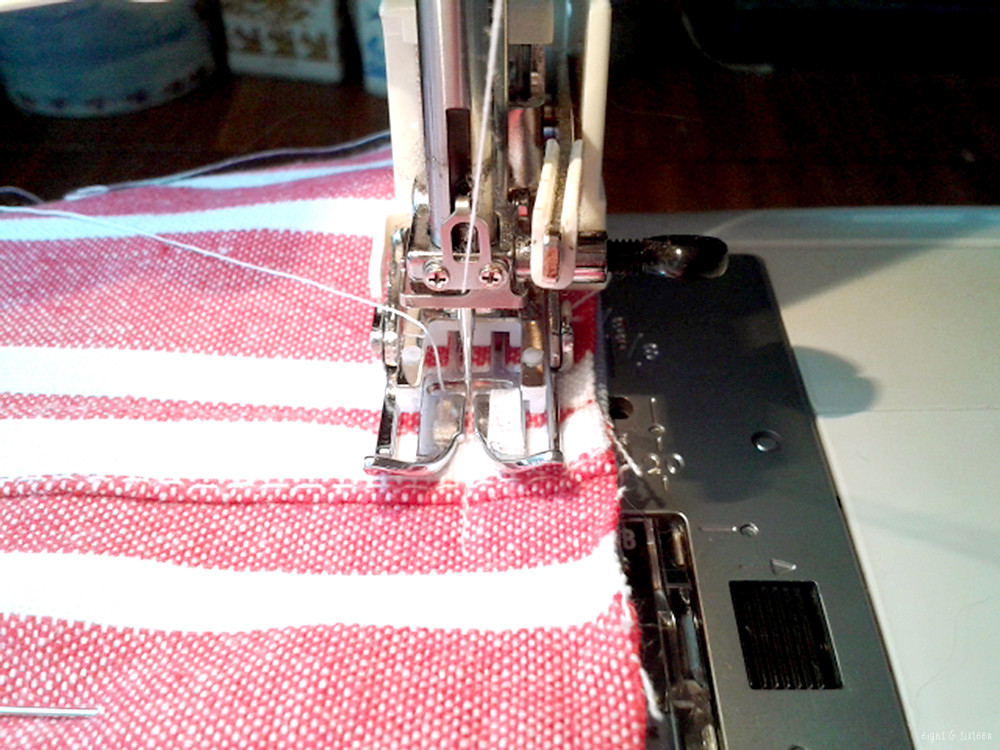
6. Pin your front and back pieces right sides together and sew all four sides with a 1.5cm seam allowance.


7. Backstitch where the two back fabric pieces overlap for extra strength.


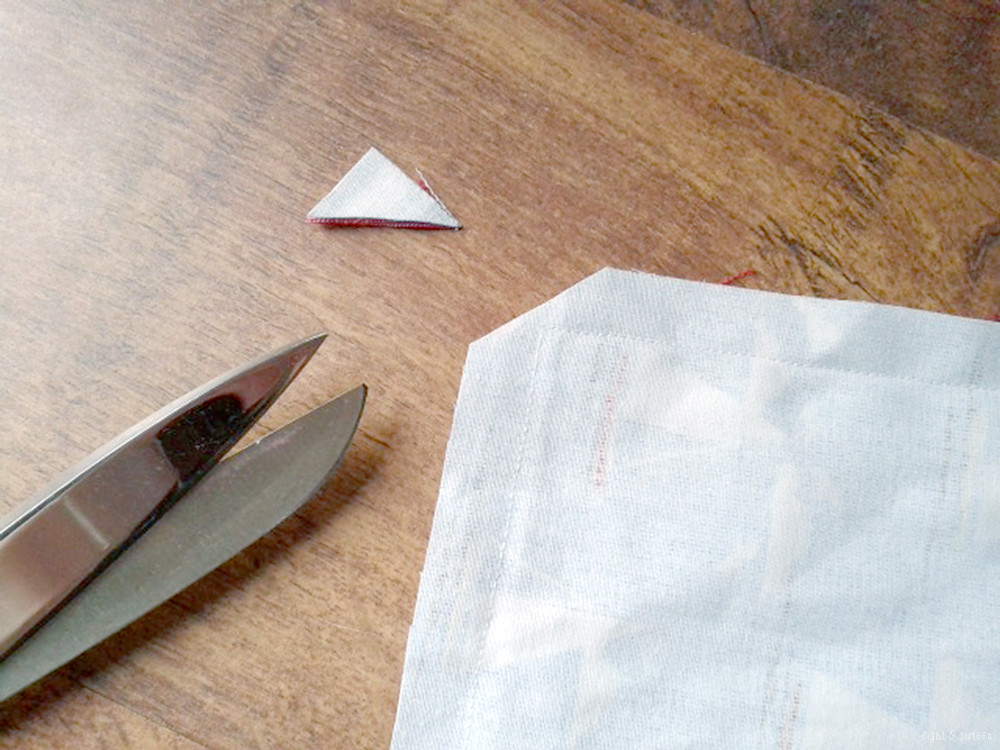
8. Trim the corners to create a neater point when you turn the fabric out.


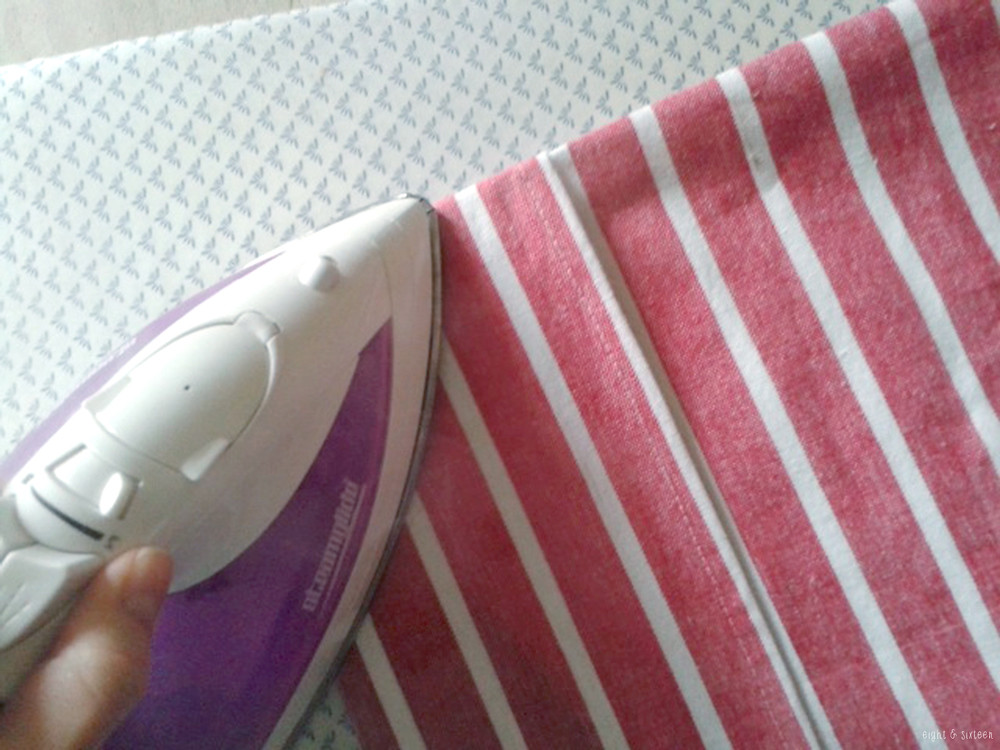
9. Remove the pins from the overlap on the two back pieces and turn the cushion the right way out through the opening. Press all seams.

Stuff your cushion covers with pads and you're all finished!

Tips:
• Buy a slightly larger sized pad than your cover for an extra plump cushion!
• If you'd like a larger cushion, simply ignore steps 1 & 2, and use whole tea towels for the front and back pieces.


We'd love to hear from you if you give this DIY a go - use the hash tag #eightandsixteen to share your photos with us!

Skye


Related Posts Plugin for WordPress, Blogger...