tabs

es about us es contact es archive es challenge es we love 9 es recipes es pintests es links

Friday, 28 November 2014

Styling Challenge: Hotel Chocolat Christmas Range

*Hotel Chocolat products c/o Hotel Chocolat available HERE.


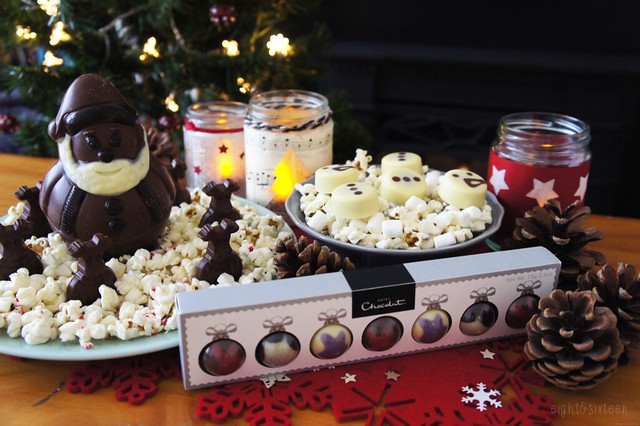
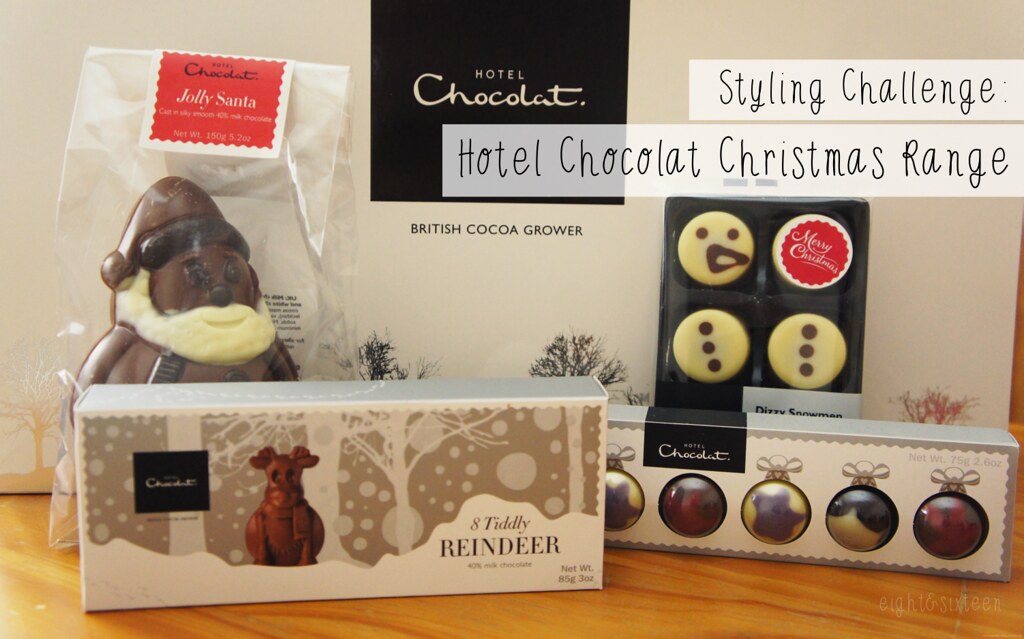
Welcome to another challenge post! This time we're showcasing some festive treats from British company Hotel Chocolat and will each be sharing how we would style the selection of products shown above! All of the products here are gluten free which is great for the both of us, and they would all make perfect little gifts for your friends and family.

Here's how we styled them...

hotel chocolat styling challenge
hotel chocolat styling challenge hotel chocolat styling challenge
hotel chocolat styling challenge

As many people catch up with friends and family over the holiday season I decided to style the products for a festive get together, sharing a few ideas of how to display them on a coffee table as treats for you and your guests to enjoy. All perfect for a little bit of luxury this Christmas, the products are great for creating an eyecatching display that your guests won't be able to resist!

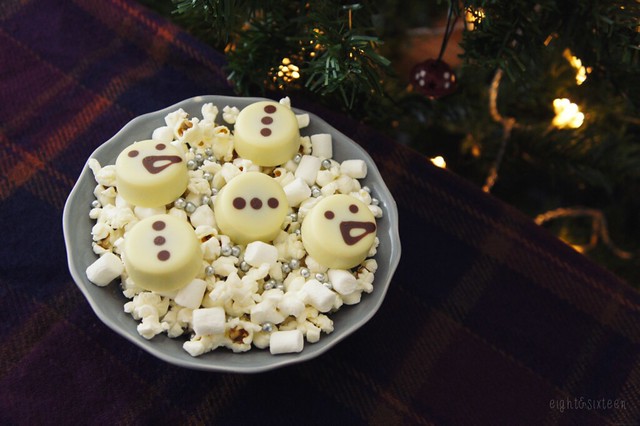
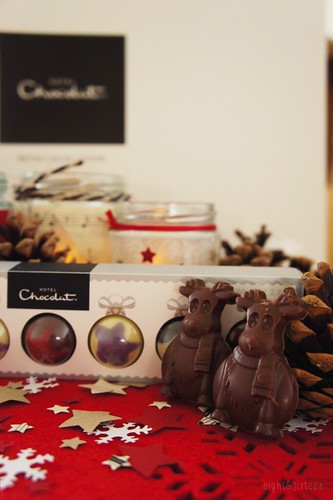
For the Dizzy Snowmen I chose to create a snowy backdrop filling a bowl with sweet popcorn, white marshmallows and edible silver balls, placing the cute (and delicious!) praline treats on top. Similarly I also used popcorn to showcase the Jolly Santa and milk chocolate Tiddly Reindeer, this time adding in some crushed candy canes for a little pop of colour and peppermint flavour which compliments the chocolate well.

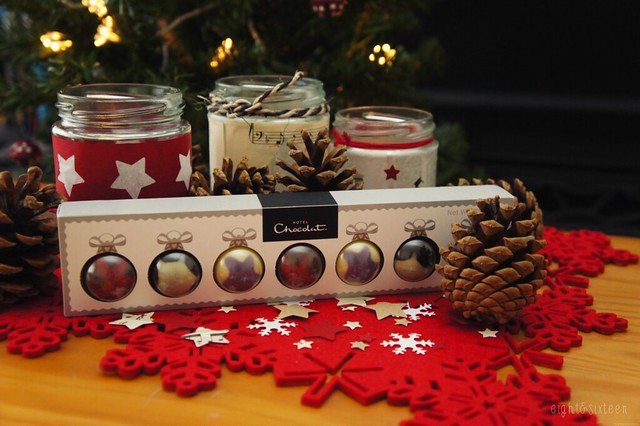
I particularly loved the chic festive packaging of the truffles, designed to look like miniature baubles,  and opted to leave them in the box surrounded by upcycled tea light jars and some homemade confetti created using craft punches. This year I've collected some woodland themed decorations for our tree and am trying to create more of a nature-inspired festive look so a few pine cones also made their way into the display! - Erin


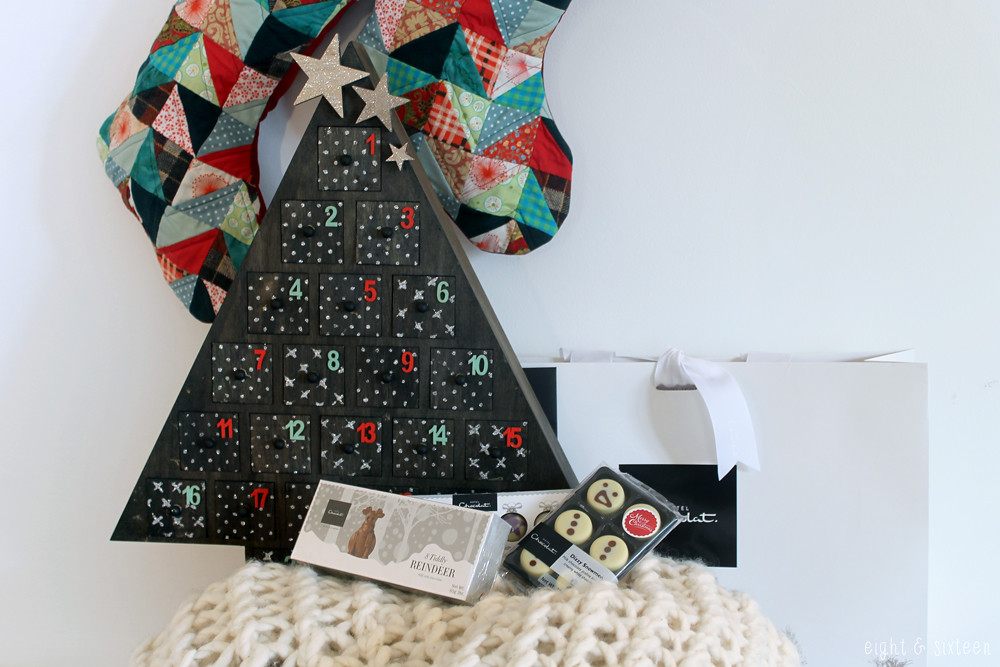
To keep the festivities going throughout December, I decided to use the products as gifts to fill an advent calendar. Ever since I finished my advent calendar a few weeks ago, I've been wondering what sort of treats to fill it with come December, and these goodies have proved to be a great match!

With very little space for a big Christmas tree, the calendar became the centrepiece for me to show off the beautifully packaged chocolates and I filled the drawers with mixtures of the Tiddly Reindeer, truffle filled Chocolate Baubles and praline filled Dizzy Snowmen.
The presentation of the Chocolate Baubles is so cute and it felt a bit wrong to remove them from their packaging, but they are the perfect size for a little daily treat. I love that it's been possible to use the chocolates in this way - being able to divide them out to fill a calendar is a great way to make them last, as tempting as it might be to scoff them all at once!
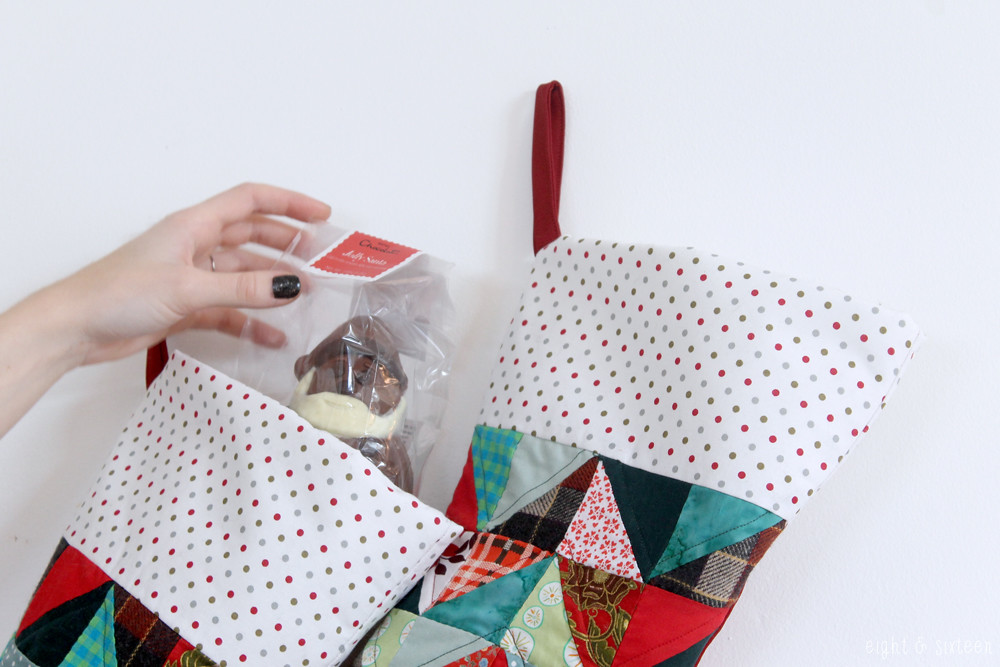
I then hung up my hand made Christmas stockings to finish off the scene, and popped Jolly Santa into the top of one as a little sneak peek to get the festive spirits in full swing.

Hotel Chocolat really do know how to present their products, and it's something that has always drawn them to me. As soon as you see a glimpse of their logo or packaging under the tree or in a stocking, you know you're in for a real treat. - Skye


Have you tried anything from the Hotel Chocolat Christmas range yet? We'd love to know what your top picks are!

Erin & Skye

Wednesday, 26 November 2014

20 Awesome Festive Decorations To DIY

20 awesome festive decorations to diy

1/ Tiny Tree Decorations (via Noodlehead)
2/ Rustic Snowflakes (via Little Things Bring Smiles)
3/ Beaded Star Ornaments (via Tara Dennis)
4/ Toilet Roll Reindeer (via The Craft Train)
5/ Quilted Christmas Stockings (via Even Artichokes have Hearts)
6/ DIY Lantern (via All Things Handmade)
7/ Bottle Cap Snowman Ornaments (via One Artsy Mama)
8/ Crafty Reindeer Games (via Jen Kim Made)
9/ Felt House (via Poopscape Projects)
10/ Sewing Machine Sampler Ornaments (via Craft Log)
11/ Button Wreath Ornament (via Martha Stewart)
12/ Cinnamon Wrapped Candles (via e-elise etc)
13/ Light Bulb Snowman Ornament (via Ginger Snap Crafts)
14/ Ribbon Christmas Tree Decoration (via Be A Fun Mum)
15/ Christmas Card Baubles (via Tara Dennis)
16/ Popcorn Garland (via A Kiss Of Colour)
17/ Snow Globe Ornament (via Cook Love Craft)
18/ Candy Cane Mice (via Martha Stewart)
19/ Felt Snowflake Decorations (via e-elise etc)
20/ DIY Advent Calendar (via Even Artichokes Have Hearts)

We'd love to hear from you if you give these DIY's a go - use the hash tag #eightandsixteen to share your photos with us!

Erin


Monday, 24 November 2014

5 Simple Gift Wrap Ideas!

With Christmas fast approaching we thought it might be nice to put together another '5 Things' style post, this time sharing some of our favourite gift wrap ideas! 

snowflake gift wrap idea

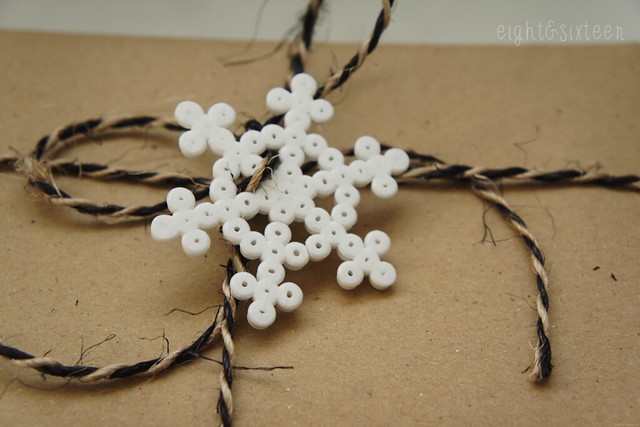
Hama Bead Snowflakes
This Pinterest inspired idea is an easy way to add a little something extra to simple brown paper and twine style gift wrap. Depending on what size peg boards and beads you have you can create lots of different snowflake designs, perhaps even a unique one for each gift! - E

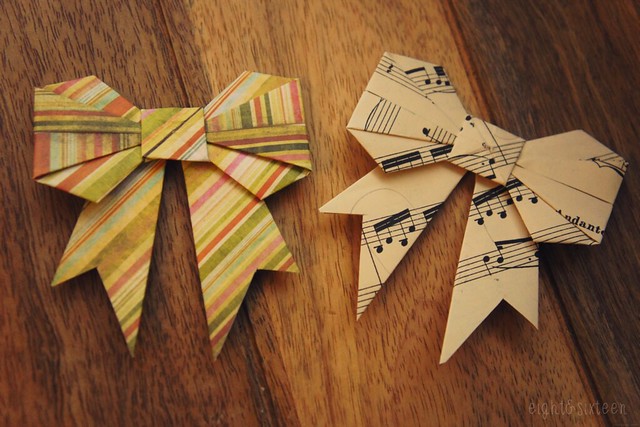
origami bows

Origami Bows
Origami bows like these are perfect for gift wrap as you can use any paper you like to make them - wrapping paper, scrapbooking sheets, even upcycled books and magazines. To create the bows pictured above I followed this great tutorial which has step-by-step photographs, once you get the hang of the technique you'll be able to whip up a whole batch in no time! - E

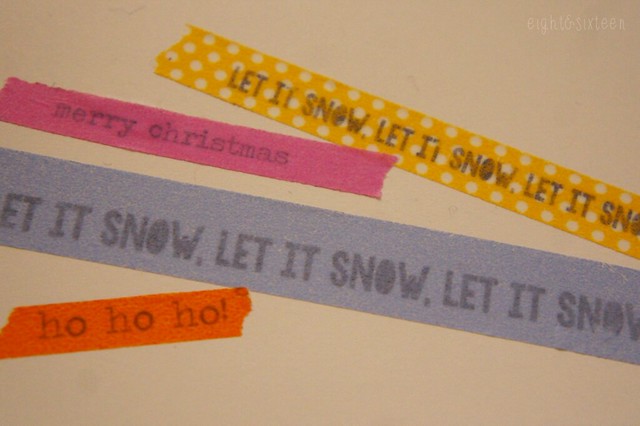
washi tape transfer

Washi Tape Transfers 
This awesome idea found on A Girl And A Glue Gun is an easy way to add text to wrapped gifts or cards. Simply type out your text, print onto a sheet of paper then place a strip of washi tape over the top lightly. When you peel away the tape the text will come with it! (Fonts used: American Typewriter & KG Bless Your Heart) - E


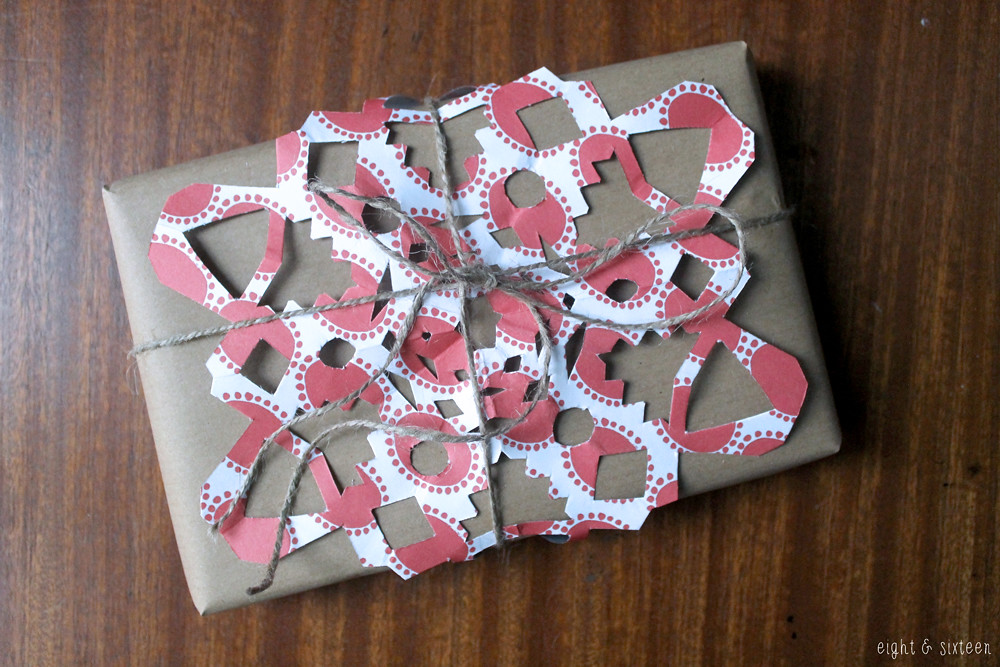
Paper Snowflake
The great thing about making paper snowflakes for your wrapping paper is that they will all be completely unique! I followed this great tutorial to get started, but you can personalise them any way you want. Use contrasting coloured paper to your main wrapping paper, or recycle magazines, and then either glue in place or tuck underneath some string. - S


Personalised Washi Tape Flags
This is such a simple but effective way to personalise your wrapping. Simply fold a strip of washi tape in half around your string, cut a triangle out from the end to create the flag shape and then write or stamp on the name. You don't have to stick to names either, why not write more personalised messages, or keep it simple with just initials.- S


We'd love to hear from you if you give these DIY's a go - use the hash tag #eightandsixteen to share your photos with us! 
Erin & Skye
Friday, 21 November 2014

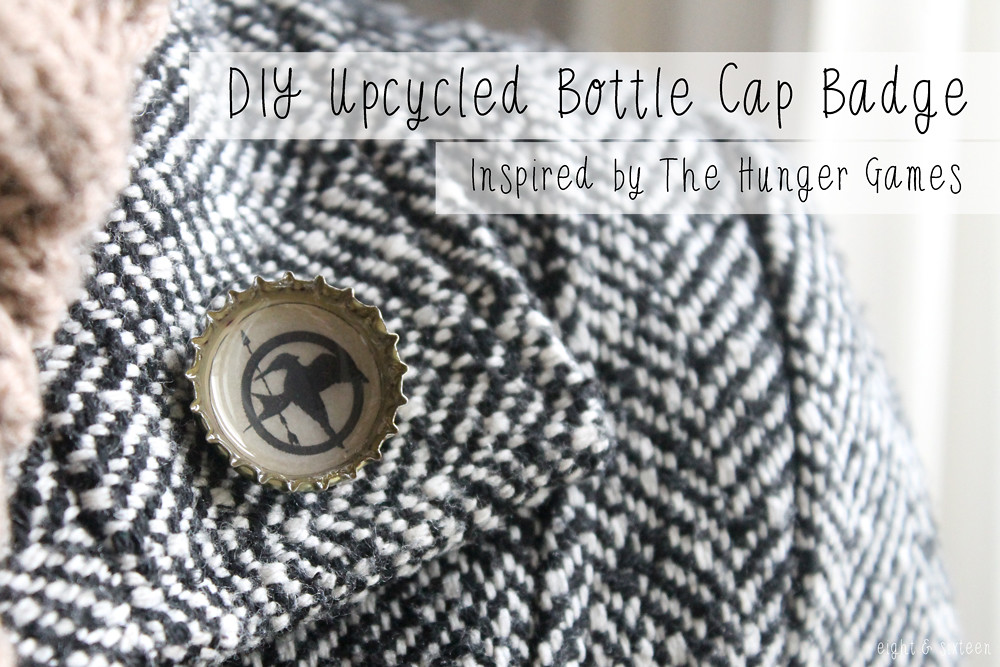
DIY Upcycled Bottle Cap Badge Inspired by The Hunger Games


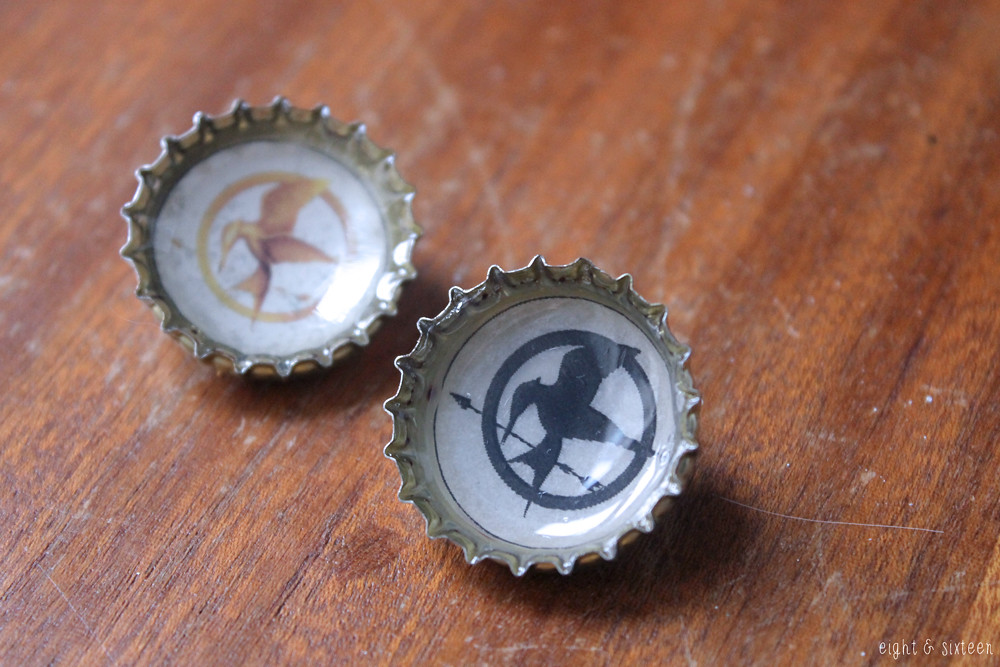
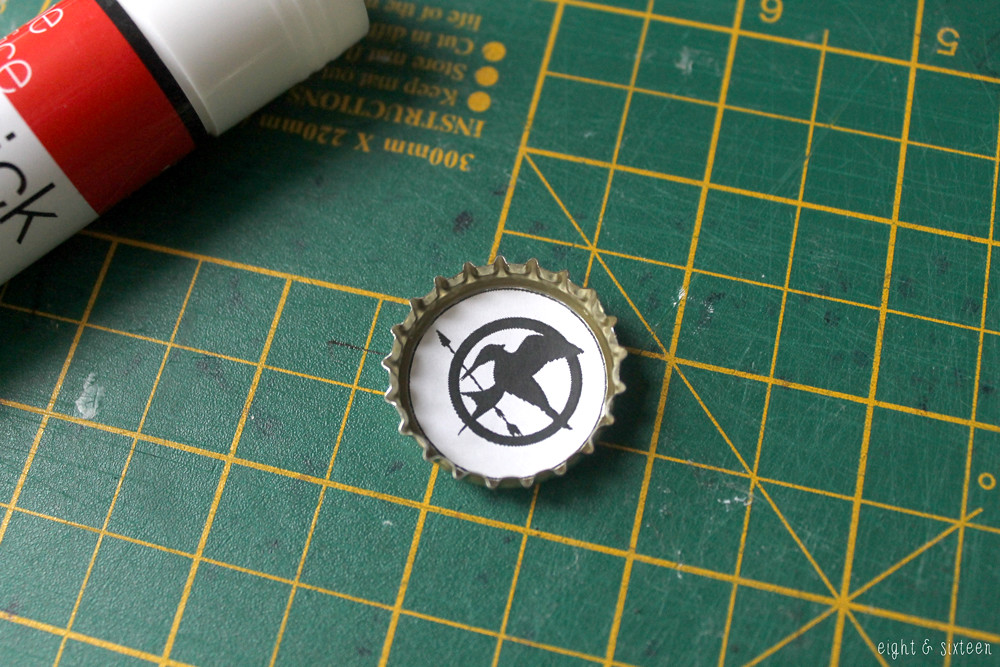
For my DIY as part of our We love The Hunger Games series, I decided to recreate the infamous Mockingjay pin that Katniss wears and I thought this would be a great way to combine a popular upcycling technique to reuse bottle caps.

You could also try making a template with your favourite quote from the book, or photograph of your favourite character, but if you'd like to stick with the Mockingjay template, you can download the templates I used HERE. Just make sure that your scaling settings are correct when you print them :)

For this DIY you will need: a bottle cap, paper template and scissors, PVA glue, Mod Podge 3D Dimensional (or similar), superglue and a brooch pin.


Print out your chosen template and cut to the size of your bottle cap.


Glue your template into the bottle cap, and then cover in two thin coats of PVA glue and leave to dry.


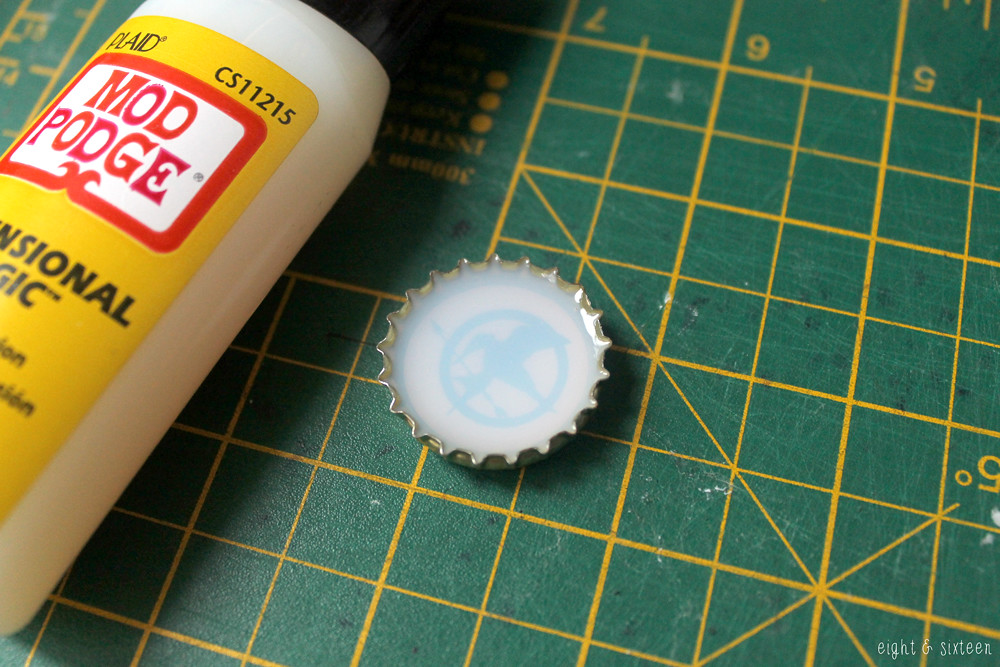
Mod Podge 3D Dimensional is a great glue for jewellery and craft making, and worked amazingly for these badges. Apply to your bottle cap, being careful not to overfill as it will spill over and get messy very quickly! Leave to set.


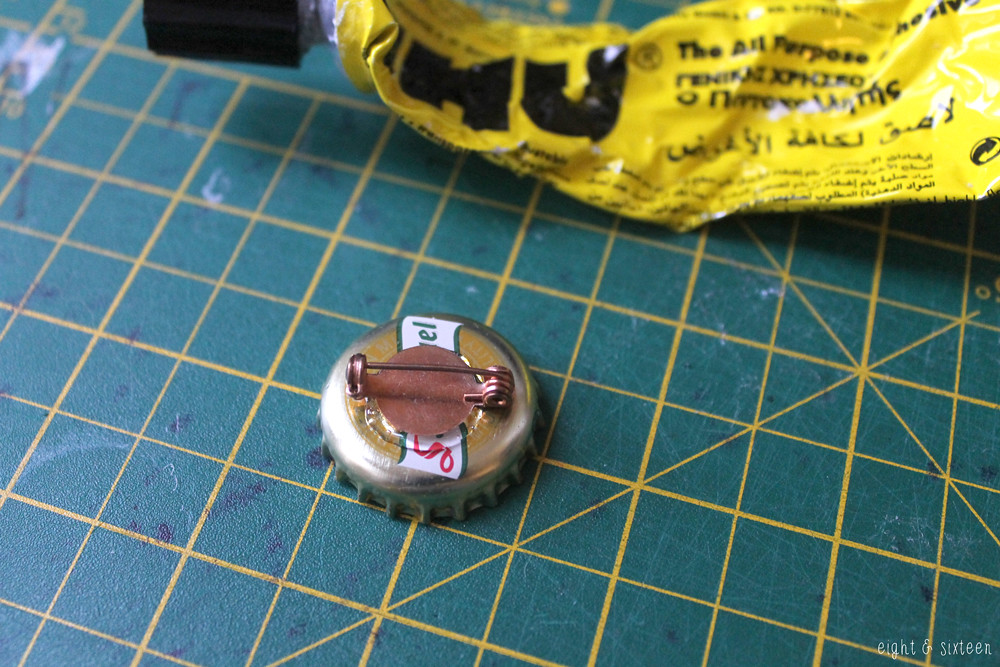
Use superglue to apply a brooch pin to the back of the bottle cap and leave to dry.

May the odds be ever in your favour...


We'd love to hear from you if you give this DIY a go - use the hash tag #eightandsixteen to share your photos with us!

Skye


Wednesday, 19 November 2014

DIY Upcycled Paper Garlands (featuring The Hunger Games)

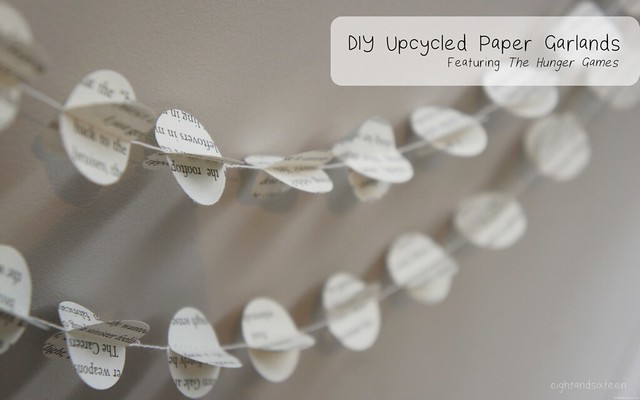
upcycled paper garlands hunger games

To celebrate the release of Mockingjay - Part 1, which Skye and I are both very excited to see, our latest We Love... topic is of course The Hunger Games!

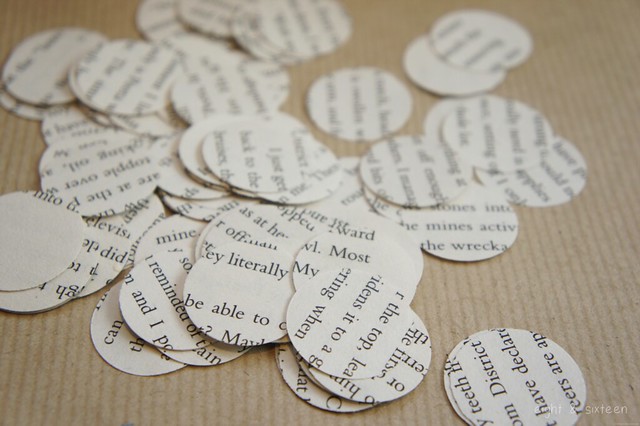
Today's very simple DIY project shows you how to make your own upcycled paper garland and in honour of Mockingjay's release I have used the better looking pages from an old battered copy of The Hunger Games for this tutorial. I know everyone won't have a falling apart copy to hand so as an alternative you can pick up bags of book confetti on Etsy, use photocopies or type out some text including key words, places and your favourite character's names.

If you're as excited about the film's release as we are why not whip yourself up one of these cute garlands to celebrate? If not, they can easily be customised - try using old magazines, newspapers, maps or pretty scrapbooking papers to make this project perfectly fit the decor of any occasion or party!

You will need: old book pages, a 1" circle punch, a sewing machine & thread

diy garland 3 diy garland 4

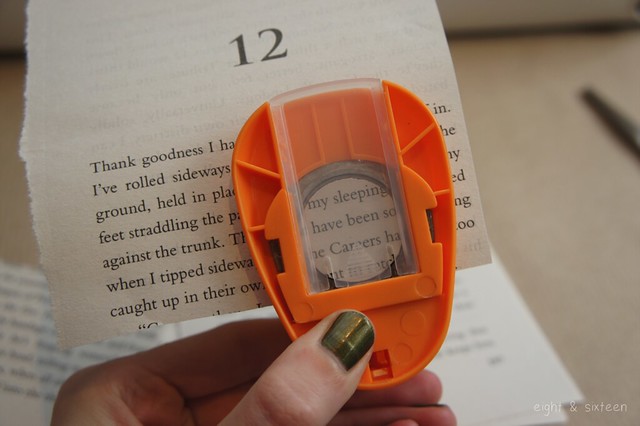
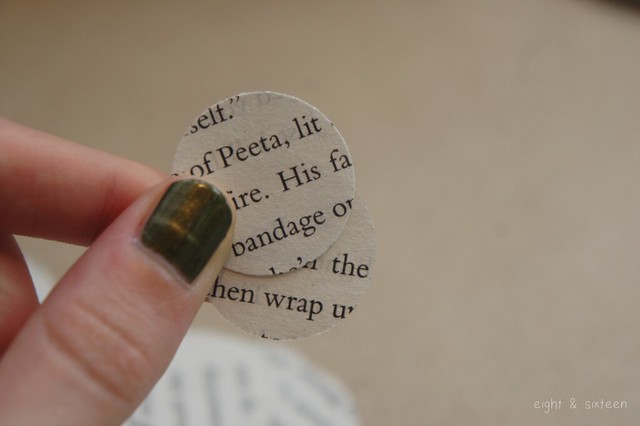
1. Start by punching out your circles until you have enough for the length garland you would like to make - I used approx 60 circles for a 50" garland

You can either punch the circles out at random (this way you can punch through multiple pages at once) or choose to frame specific words or character names within your circles

diy garland 5
diy garland 6

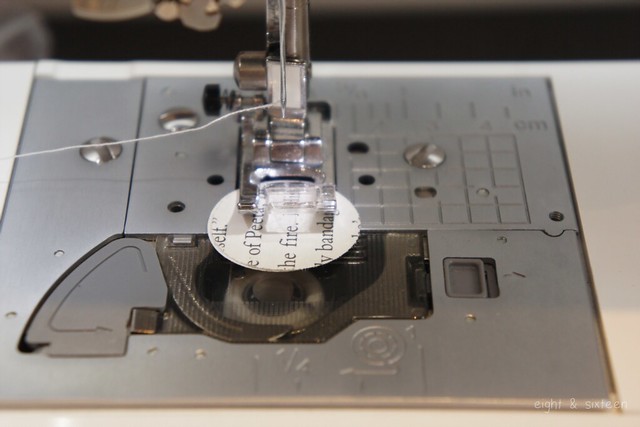
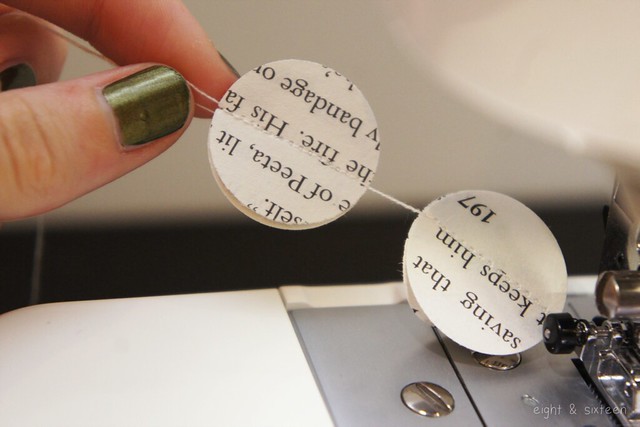
2. Pair up two of your circles and place under your sewing machine foot. Make sure that you leave a tail of thread (approx. 3") before sewing to use for hanging the garland

If you want the text to sit the correct way on your garland make sure you have the circles facing the right direction before you start to sew. Alternatively for a more random arrangement just pick up the circles as they are!

diy garland 7

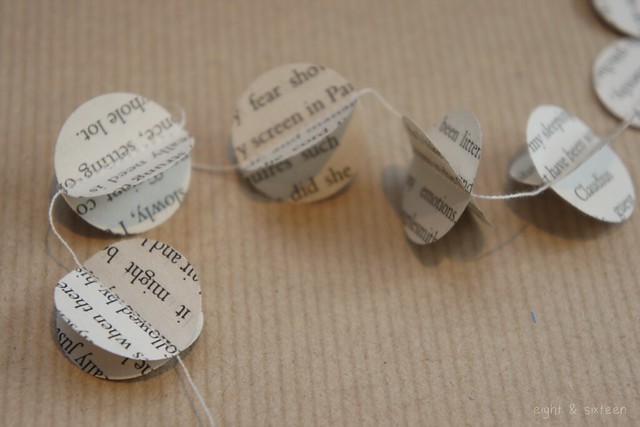
3. Sew through the centre of the circles, then continue on sewing for another 0.5-1" before placing your next set of circles under the sewing machine foot. This way you will get the gap between your circles on the finished garland

4. Continue adding on more circles in this way until you reach the desired garland length and your garland is done!

diy garland 8

You can leave your garland as is or create more of a 3D effect by carefully pressing out the circles to look like the ones shown above!

May the odds be ever in your favour...

We'd love to hear from you if you try out this DIY project - use the hashtag #eightandsixteen to share your photos with us!

Erin

Monday, 17 November 2014

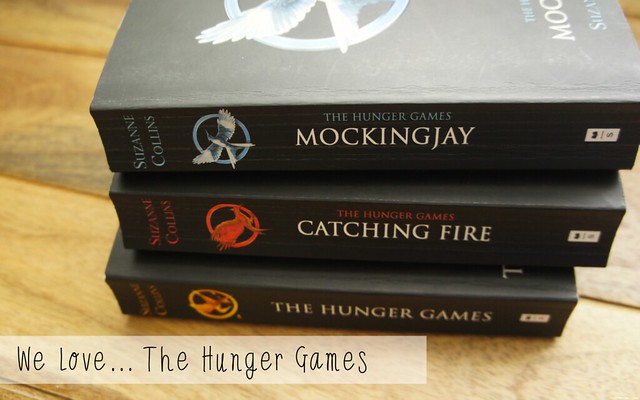
We Love... The Hunger Games

we love hunger games

One of our shared favourite book & film series has to be The Hunger Games, so of course we're both very excited about the release of Mockingjay Part 1 this week! To celebrate we have planned a couple of Hunger Games inspired projects for you and will be sharing them over the rest of the week.

If you've created any Hunger Games inspired crafts we would love to see them - leave us a comment or use the hash tag #eightandsixteen to share them with us! 

May the odds be ever in your favour...

Skye & Erin

Friday, 14 November 2014

DIY with Hobbycraft: Wooden Advent Calendar

*Wooden advent calendar & craft supplies c/o Hobbycraft, available HERE.


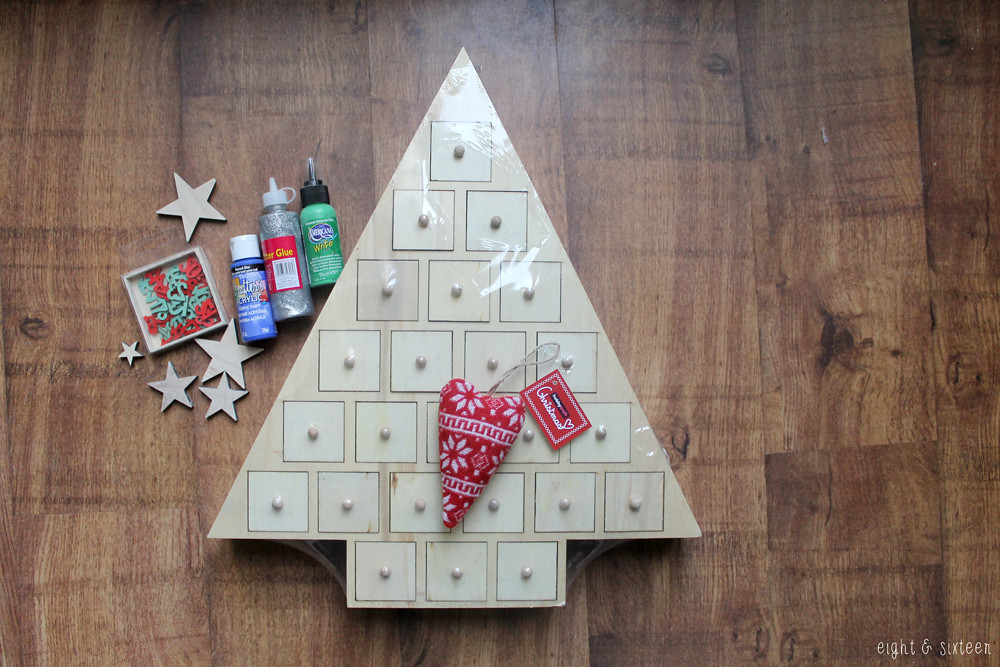
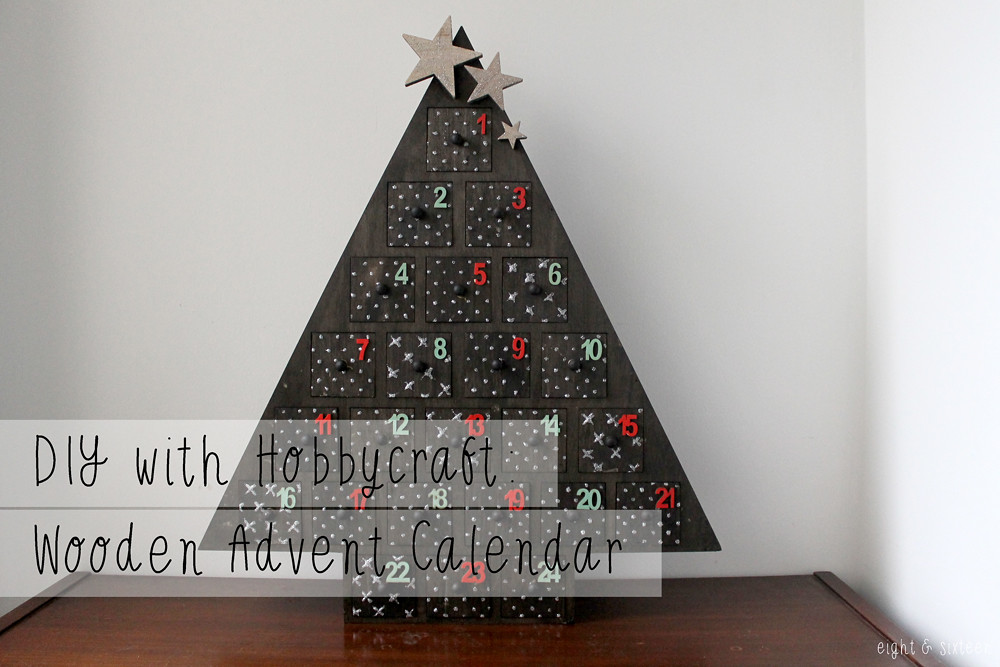
It's time to spread a little festive cheer here at Eight & Sixteen! Today I'm sharing a DIY with you courtesy of Hobbycraft, who provided this wooden advent calendar along with some craft supplies with the challenge to make it my own.

I've always loved these advent calendars as I'm a sucker for traditions, and love the idea that these can be used for years as well as being personalised to suit you. Here's how I personalised mine...


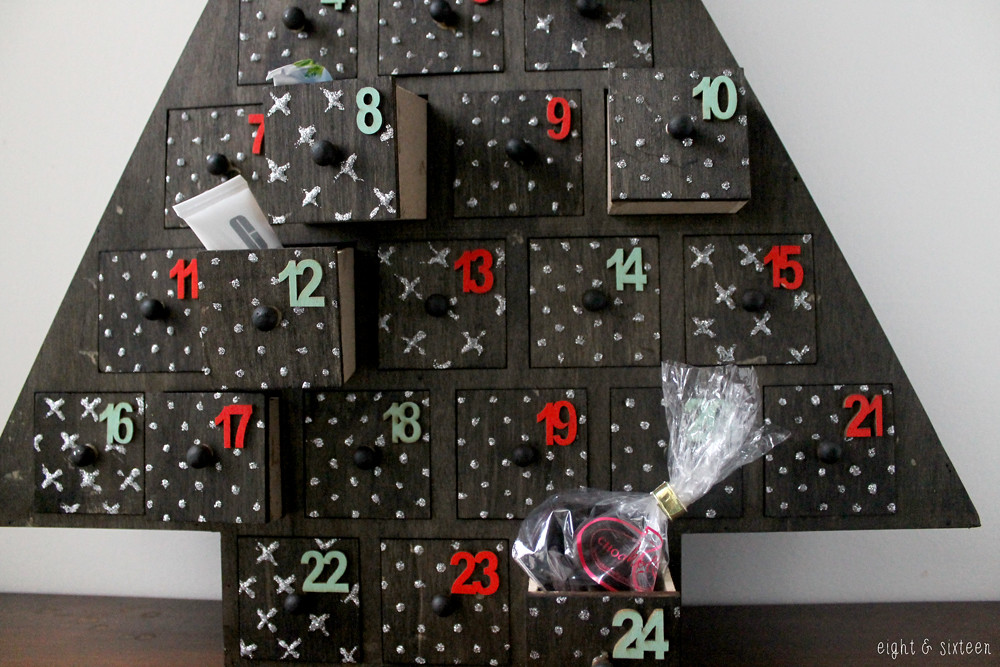
First I made the decision to stain my calendar with a dark oak wood stain. I wanted to keep the calendar looking quite natural so that I could add Christmassy details without overpowering it, and I think that the stain worked really well for this.
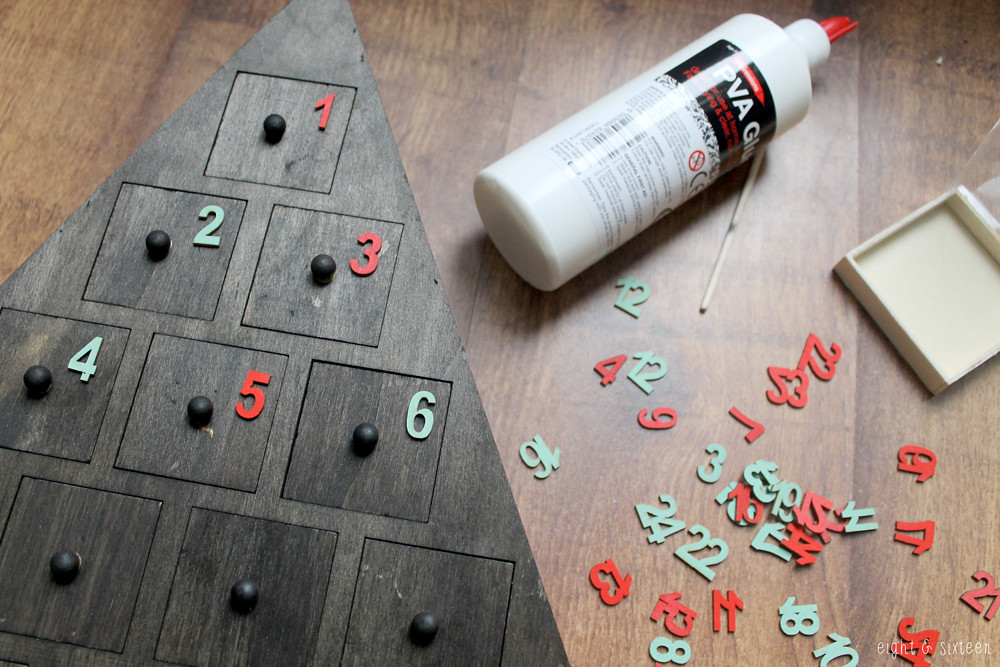
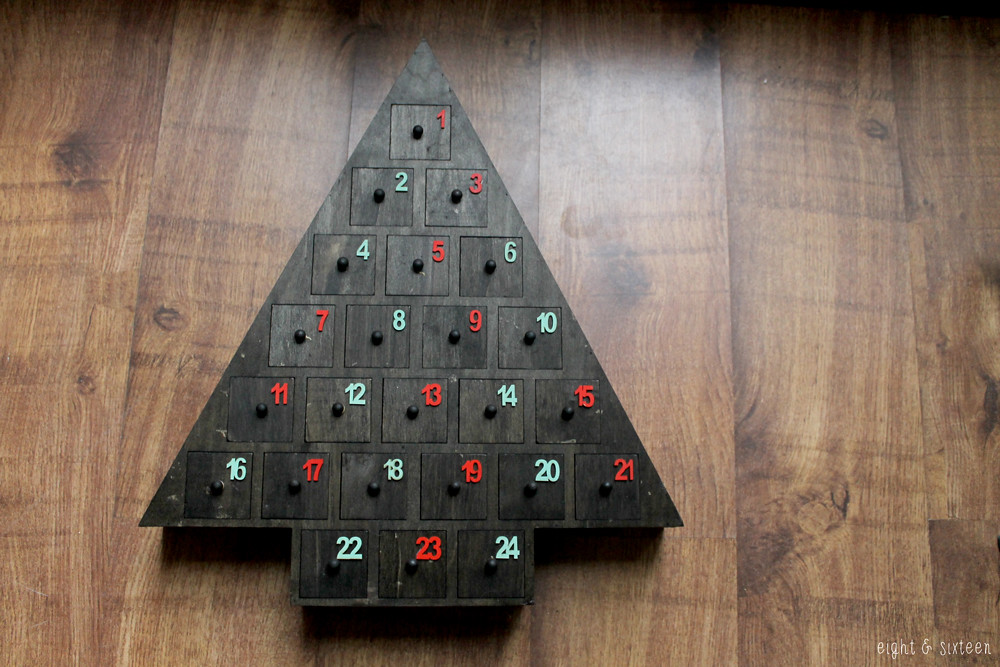
The next step was to number the drawers with the wooden numbers provided by Hobbycraft. I think it's great that they offer both red and green numbers in one set as I was able to mix and match them onto the drawers and I also love the pop of colour that they add.


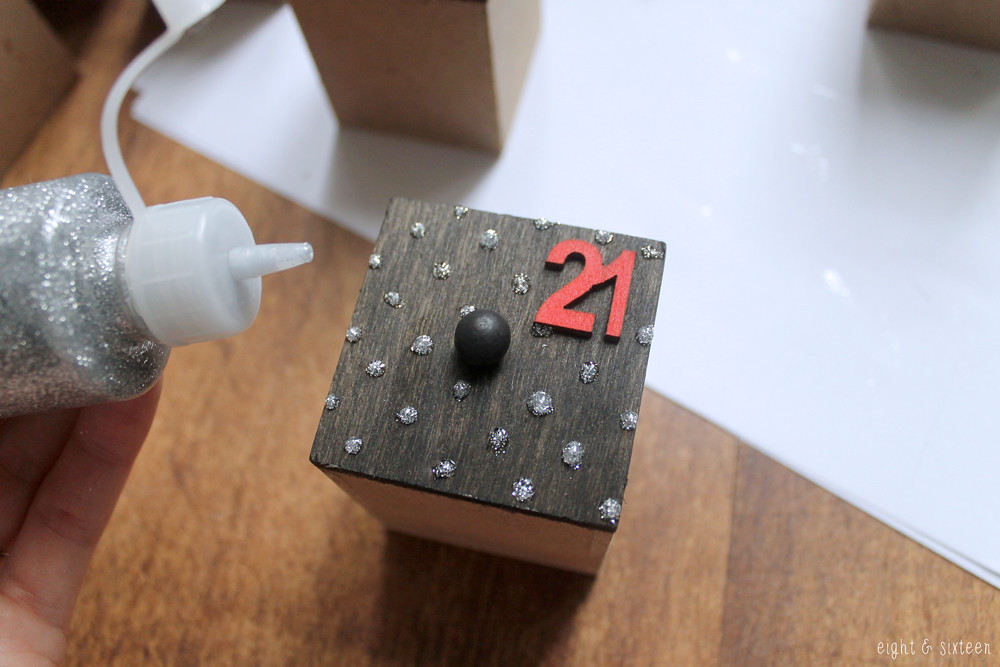
Once I'd finished glueing the numbers on, it was time to get glitter glue happy! I really struggled to pick one way to decorate the calendar at this point - there are so many ways that you could customise it - but in the end I decided that polka dots would be perfect. I also added in a few random drawers with little crosses on to mix it up.
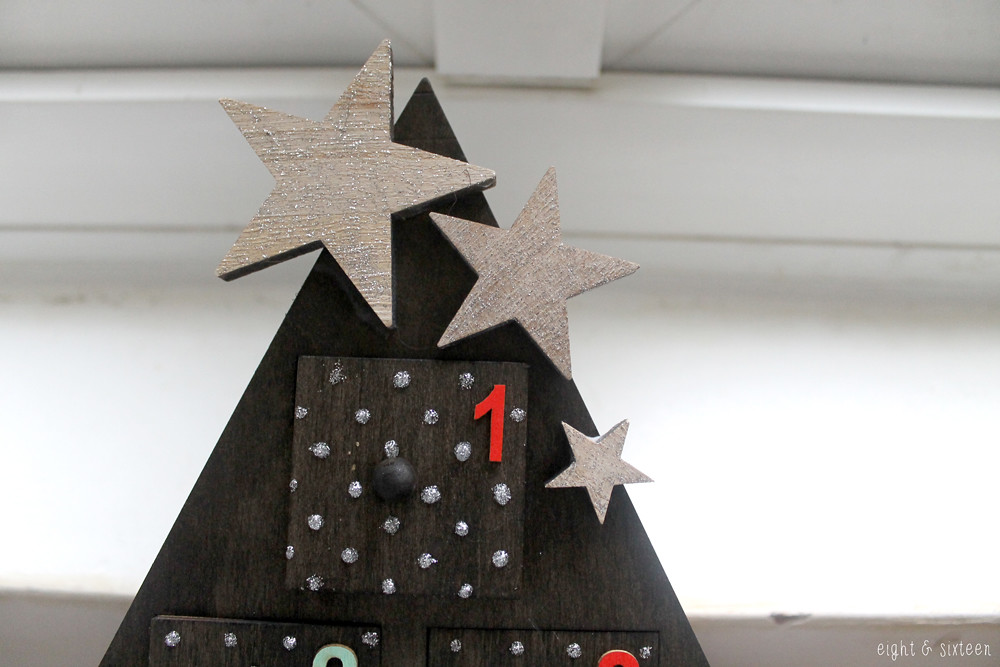
Finally, I gave the the wooden stars provided a coat of the glitter glue and glued them to the top of the calendar to finish it off.

Overall I'm really happy with my finished calendar and I particularly like the effect of the glitter glue when it catches the light :)
It's been a really fun DIY to take part in, and I've really enjoyed working with the Hobbycraft materials. If you're stuck for a Christmas present with a personal touch or are looking for a way to entertain little'uns for an afternoon, I think that a wooden advent calendar might be the way to go!


We'd love to hear from you if you've used this advent calendar from Hobbycraft or if you give this DIY a go - use the hash tag #eightandsixteen to share your photos with us!

Skye


Wednesday, 12 November 2014

Book Review - Glitterville's Handmade Christmas, Stephen Brown (2014)

Review copy c/o Netgalley, image via Goodreads

glitterville's handmade christmas

I’ll be honest with you, I’m much more of a Halloween person than a Christmas one but when I saw the unique cover of this new festive craft book from Glitterville I couldn’t turn down the chance to review it – any opportunity to discover new craft ideas!

Handmade Christmas features a whole host of completely unique and unusual projects all with their very own distinctive style. Every project is colourful, fun and of course glittery!

Beginning with lots of information on tools and materials as well as a rundown of basic techniques the book seems to be designed to teach methods that can be applied to other projects, encouraging reader’s personal creativity. Each handmade decoration idea that follows comes complete with good quality step-by-step photos in an easy to follow layout. In addition to the tutorials templates and patterns are included in the back section of the book and you won’t be surprised to hear that even these are colourful!

My personal favourite ideas from the book would probably have to be the Jolly Dolly Holly Wreath (made entirely from felt), and the Tiny Tannenbaums & Present Picks (decorative cake toppers that stand out beautifully against the white icing backdrop). The Glitter Village (as pictured on the bottom left of the book's cover) was also an impressive and detailed project.

The originality of the ideas found within this book really stood out to me and I loved how different it was from other Christmas craft books I’ve read. If you’re a big fan of this holiday and are looking to branch out from the average Christmas project into something a little more ambitious and bold this truly unique book could be perfect for you!

If you’re interested in finding out more about Glitterville’s other projects visit glitterville.com

Erin

Monday, 10 November 2014

Blog Of The Month!

Just a quick post today to let you know that we were kindly featured as Poles Direct's first blog of the month! If you'd like to find out what we had to say about all things DIY you can read the interview here.

Erin & Skye
Friday, 7 November 2014

Tea Towel Upcycle Challenge Results: Skye's DIY Lunch Bags


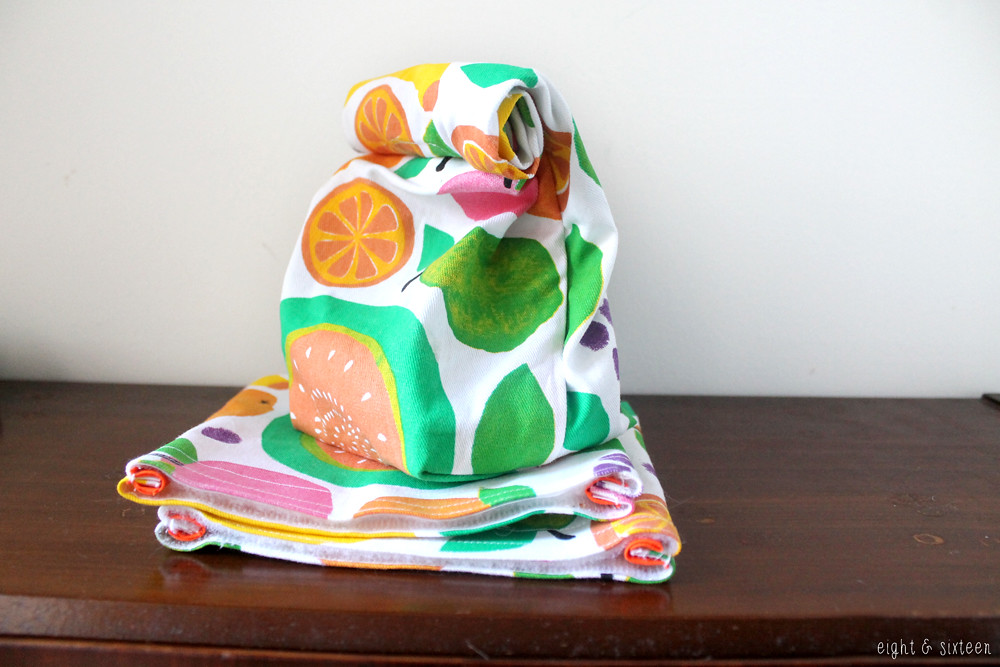
I've always loved the idea of reusable lunch bags, so for my tea towel upcycling challenge I decided to create a set perfect for lunch on the go!

To make your own you will need: a large tea towel, a sewing machine, 1 pair of sew in magnetic snaps, fabric pen, pins, scissors and a ruler.
Optional: bias binding to finish edges, and velcro for the extra sandwich bags.


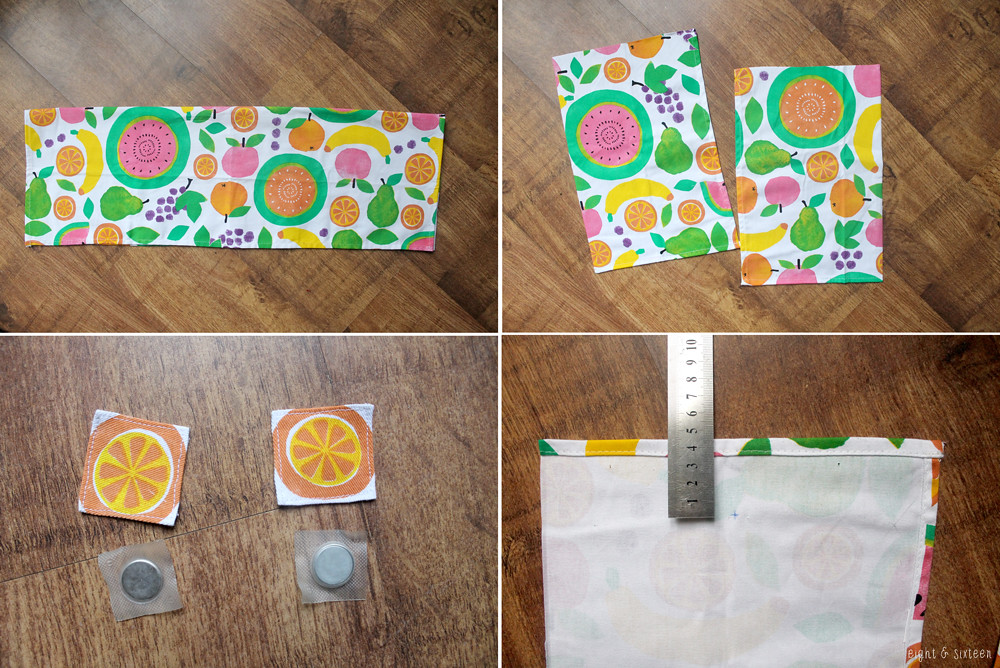
Fold your tea towel in half lengthways and cut in half, placing one half to the side for later. Cut your remaining piece in half again. The two short edges that are already hemmed will be the top of your lunch bag.
To create tabs to cover up the magnetic snaps on the inside of the bag, cut a strip from the piece you put to one side that is 5cm wide. Cut two 5cm x 5cm squares from this strip, and sew under the edges with a 2mm seam allowance.
Take your two main fabric pieces, and mark the placement for your magnetic snaps and tabs. I marked 4.5cm down on one, and 10.5cm on the other. These placements will determine the front and back of your lunch bag - the lower magnetic snap being the front. This is so that when the bag is finished you can roll the fabric down and the snaps will lock into place keeping the bag secure.


Place your magnetic snaps onto these markings on the wrong side of the main fabric, cover with the tabs and sew into place. Note: Make sure that your magnetic snaps are facing the right way so that they don't repel each other!
Place your main fabric pieces right sides together, pin and sew around the sides and bottom edge with a 1cm seam allowance.
Optional: You can choose to leave the edges raw, or use bias binding to cover them as shown.


Create a flat bottom for your bag by flattening one of the bottom corners so that the side seam meets the bottom seam and you create a triangle as shown.
Measure 5cm in from the point of this triangle, and draw a line that measures 9cm across. Stitch across this line and then cut off the excess with a 1cm seam allowance. Repeat with the other bottom corner.
Turn the lunch bag right side out, and iron. You can press the fabric into place to mimic brown paper bag style folds. Fill with snacks and thanks to the magnetic snaps, simply roll the top of your bag down to secure!


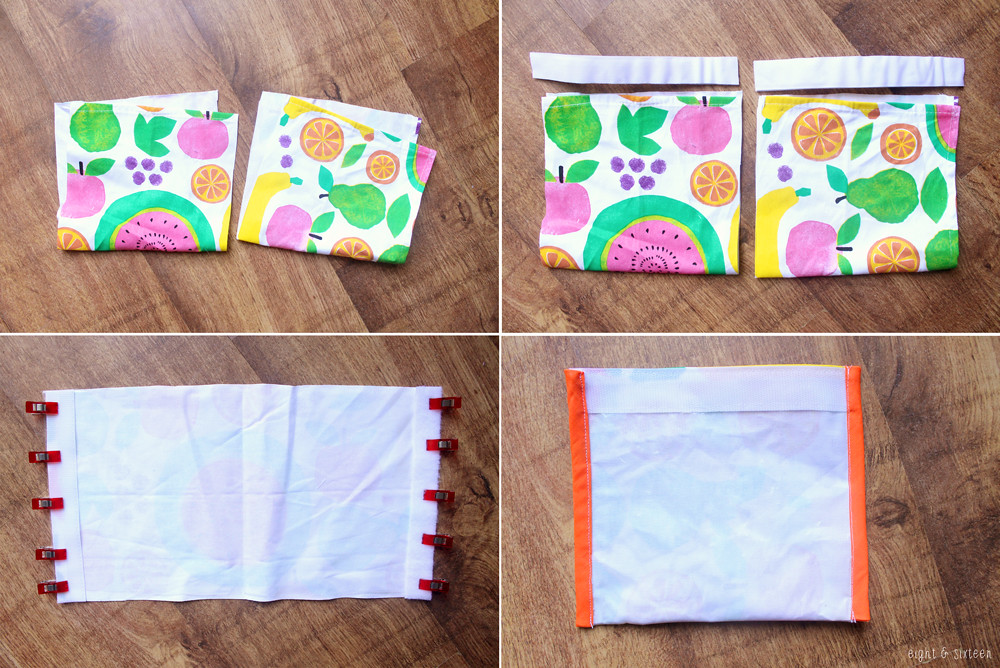
With the remaining tea towel fabric that you put to one side at the beginning, you can either create a second lunch bag as above, or create two small sandwich bags to create a set.
To make the sandwich bags, simply cut your remaining fabric into two pieces. Measure two lengths of sew in velcro the width of the short edges and pin to the fabric. Stitch into place.
Fold the fabric in half right sides together, sew the side seams with a 1cm seam allowance, and as before, binding the raw edges is optional.
Turn right sides out, and you have two reusable and sealable sandwich bags!


We'd love to hear from you if you give this DIY a go - use the hash tag #eightandsixteen to share your photos with us!

Skye


Wednesday, 5 November 2014

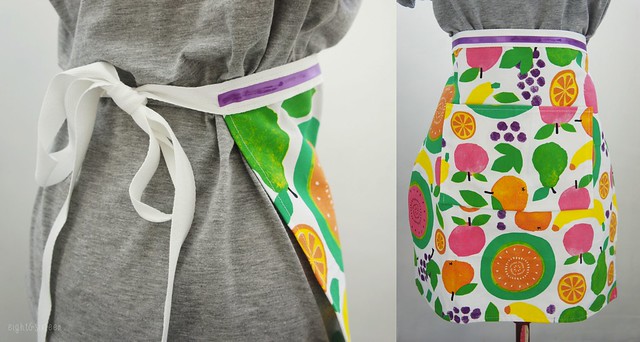
Tea Towel Upcycle Challenge Results : Erin's DIY Apron

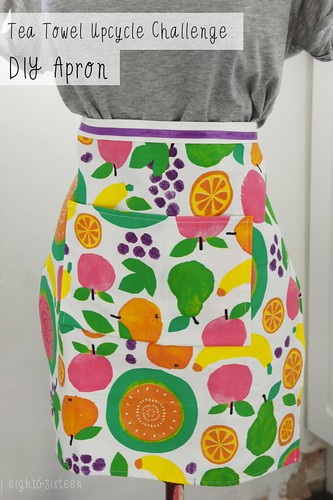
diy upcycled apron from tea towel eightandsixteen diy upcycled apron from tea towel eightandsixteen

This week myself and Skye have both taken on the challenge of upcycling this fun fruit print tea towel into something new. For my project I decided to keep it in the kitchen and create a colourful apron!
To make your own you will need: a large tea towel, cotton webbing/tape, a sewing machine, scissors, pins, a tape measure, a fabric pen/pencil + (optional) ribbon/other embellishments

diy upcycled apron from tea towel eightandsixteen

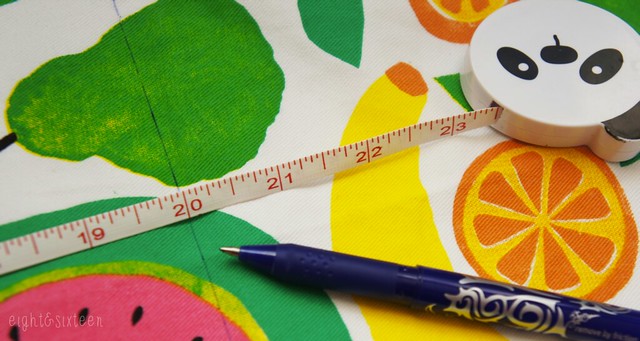
1. Measure how wide you want the apron to be, add on 1/2" to allow for neatening the edge and cut off any excess fabric.
I chose to make my apron sit flat but don’t forget to allow for gather when measuring if you want to create that vintage look!

2. Fold over the raw edge and stitch in place to make sure it won’t fray. You should now be left with a slightly smaller version of your original tea towel with no raw edges.

diy upcycled apron from tea towel eightandsixteen

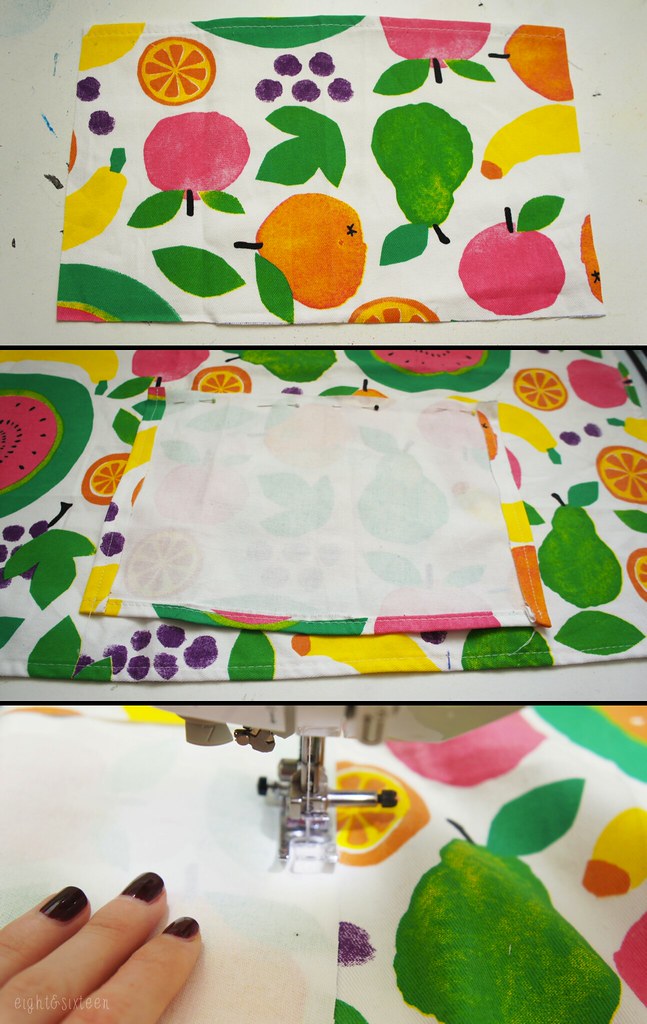
3. If you have any fabric leftover you can create a pocket on the front of the apron. I cut the two side edges off of my leftover fabric then turned over and stitched the raw edges as the original tea towel was quite wonky but you can leave the piece as is and create a pocket that stretches across the whole of the apron instead if you'd like.

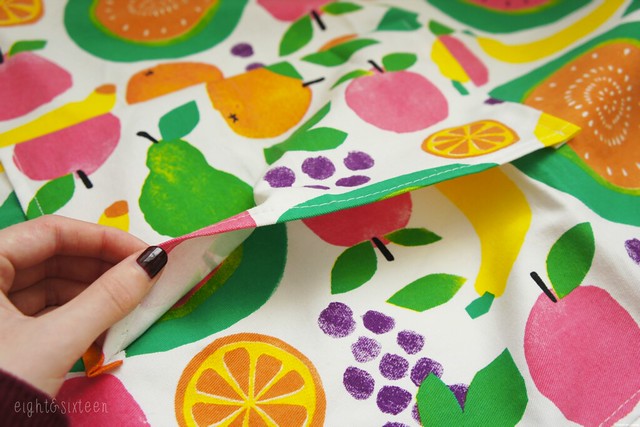
4. Decide where you want the pocket to sit, lay it face up onto the front of the apron then flip it downwards so it is upside down on the front of the apron. Stitch in place then flip the pocket back up and sew along the two side edges to create the pocket shape.

diy upcycled apron from tea towel eightandsixteen

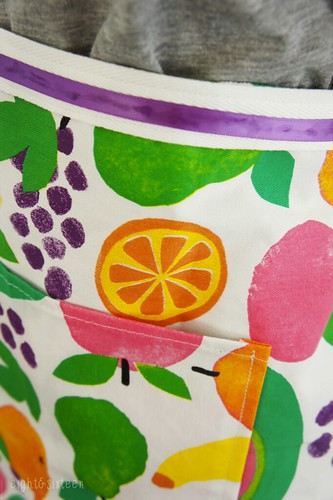
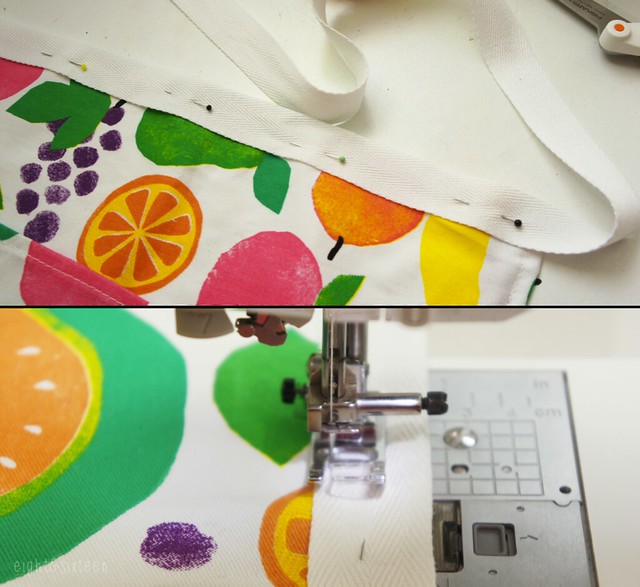
5. Take your strip of cotton tape (making sure it's long enough to tie around your waist) find the centre of the apron front and pin along the top edge. Stitch in place along both edges so it is secure.

diy upcycled apron from tea towel eightandsixteen

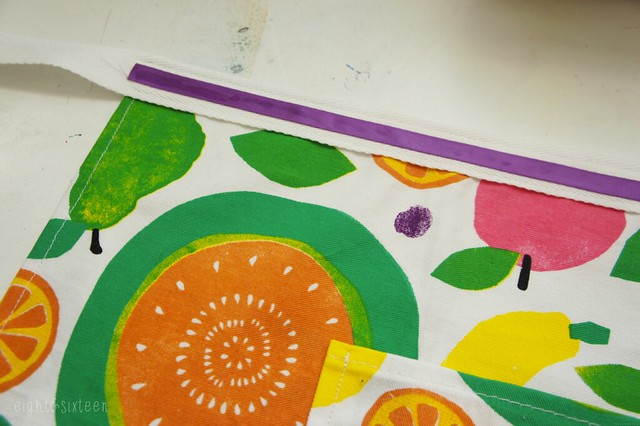
6. The final step is optional but if you wish to decorate your apron you can stitch, glue or iron on embellishments such as buttons, bows or ribbon as shown in my example.

diy upcycled apron from tea towel eightandsixteen

We'd love to hear from you if you try out this or any of our other DIY projects - use the hashtag #eightandsixteen to share your photos with us!

Don't forget to check back on Friday to see Skye's project!

Erin
Related Posts Plugin for WordPress, Blogger...