tabs

es about us es contact es archive es challenge es we love 9 es recipes es pintests es links
Showing posts with label collaboration. Show all posts

Monday, 1 December 2014

Bloggers Love Hub DIY Booth (+ Free Template Printables!)

bloggers-love-hub-1bloggers-love-hub-6bloggers-love-hub-8bloggers-love-hub-7

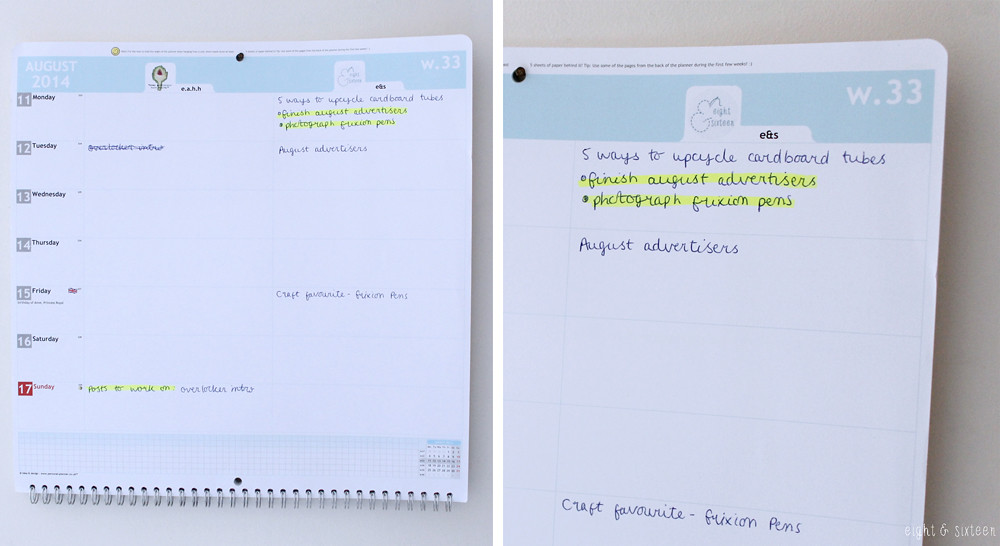
Last Monday evening we were kindly invited along to host a small DIY booth at the Bloggers Love Hub taking place at Kanaloa in London.

As we were asked to create a project related to organising we decided to decorate some plain notebooks, perfect for jotting down all of those blog post ideas! Instead of sticking on washi tapes or scrapbooking papers we chose to stitch into the notebook covers creating a textured finish.

We arrived at the event ready to set up our little booth and prepare everything to get crafting. Luckily we arrived super early which turned out to be a good thing - as you can see from the photos the lighting in the venue was not great for crafting, and we decided to use this time to make things a little easier for everyone taking part.
To create the notebooks you simply tape your chosen template onto the front cover of the notebook, and use a pin to pierce holes into the cover about 5mm apart. Then you can use a needle and thread to sew your design on and the pre-pierced holes mean that your design comes out perfectly! Due to the lack of light we decided to pierce the notebook covers with our three designs before people got stuck in as otherwise it may have taken all night to finish!

We had three designs to choose from: a festive snowflake, a cute cactus and "little book of ideas". If you want to make your own version don't forget to download the free templates at the end of this post!

bloggers-love-hub-10bloggers-love-hub-9
Wamiri & Josh with their finished notebooks

We had a great time at the event and met some really lovely bloggers too - Dani @ Floral Danielle, Daisy @ Daisy Jet, Chantelle @ Topix & Tales, Josh @ That Kid In The Bow Tie, Wamiri @ Omowamiri, Afshan @ Afshanesque, Chrissie @ Caprichia, Rebecca @ Rebecca Coco, Victoria @ My Little Black Book,  Justine @ Justine Pendrill & Brenda @ Time & Couture 

completed notebooks
Daisy & Chantelle's notebooks

If you'd like to try any of our templates, you can find them here:

Snowflake Template
Cactus Template
"little book of ideas" Template "blogging notebook" Template

The snowflake is intended to be the quickest of the three, with the "little book of ideas" being the most complex. The text templates aren't dotted, but just remember to pierce the holes onto your notebook around 5mm apart.

Once you've given these templates a go, why not try making your own? You could try your blog name for yourself or monogrammed notebooks to give as presents - perfect for a DIY Christmas!

Thank you to everyone we met at The Bloggers Hub for taking such an interest in our little DIY booth, and of course to Danielle for inviting us to be a part of the event! :)

We'd love to hear from you if you try out this DIY - use the hash tag #eightandsixteen to share your photos with us!

Erin & Skye

Friday, 28 November 2014

Styling Challenge: Hotel Chocolat Christmas Range

*Hotel Chocolat products c/o Hotel Chocolat available HERE.


Welcome to another challenge post! This time we're showcasing some festive treats from British company Hotel Chocolat and will each be sharing how we would style the selection of products shown above! All of the products here are gluten free which is great for the both of us, and they would all make perfect little gifts for your friends and family.

Here's how we styled them...

hotel chocolat styling challenge
hotel chocolat styling challenge hotel chocolat styling challenge
hotel chocolat styling challenge

As many people catch up with friends and family over the holiday season I decided to style the products for a festive get together, sharing a few ideas of how to display them on a coffee table as treats for you and your guests to enjoy. All perfect for a little bit of luxury this Christmas, the products are great for creating an eyecatching display that your guests won't be able to resist!

For the Dizzy Snowmen I chose to create a snowy backdrop filling a bowl with sweet popcorn, white marshmallows and edible silver balls, placing the cute (and delicious!) praline treats on top. Similarly I also used popcorn to showcase the Jolly Santa and milk chocolate Tiddly Reindeer, this time adding in some crushed candy canes for a little pop of colour and peppermint flavour which compliments the chocolate well.

I particularly loved the chic festive packaging of the truffles, designed to look like miniature baubles,  and opted to leave them in the box surrounded by upcycled tea light jars and some homemade confetti created using craft punches. This year I've collected some woodland themed decorations for our tree and am trying to create more of a nature-inspired festive look so a few pine cones also made their way into the display! - Erin


To keep the festivities going throughout December, I decided to use the products as gifts to fill an advent calendar. Ever since I finished my advent calendar a few weeks ago, I've been wondering what sort of treats to fill it with come December, and these goodies have proved to be a great match!

With very little space for a big Christmas tree, the calendar became the centrepiece for me to show off the beautifully packaged chocolates and I filled the drawers with mixtures of the Tiddly Reindeer, truffle filled Chocolate Baubles and praline filled Dizzy Snowmen.
The presentation of the Chocolate Baubles is so cute and it felt a bit wrong to remove them from their packaging, but they are the perfect size for a little daily treat. I love that it's been possible to use the chocolates in this way - being able to divide them out to fill a calendar is a great way to make them last, as tempting as it might be to scoff them all at once!
I then hung up my hand made Christmas stockings to finish off the scene, and popped Jolly Santa into the top of one as a little sneak peek to get the festive spirits in full swing.

Hotel Chocolat really do know how to present their products, and it's something that has always drawn them to me. As soon as you see a glimpse of their logo or packaging under the tree or in a stocking, you know you're in for a real treat. - Skye


Have you tried anything from the Hotel Chocolat Christmas range yet? We'd love to know what your top picks are!

Erin & Skye

Monday, 24 November 2014

5 Simple Gift Wrap Ideas!

With Christmas fast approaching we thought it might be nice to put together another '5 Things' style post, this time sharing some of our favourite gift wrap ideas! 

snowflake gift wrap idea

Hama Bead Snowflakes
This Pinterest inspired idea is an easy way to add a little something extra to simple brown paper and twine style gift wrap. Depending on what size peg boards and beads you have you can create lots of different snowflake designs, perhaps even a unique one for each gift! - E

origami bows

Origami Bows
Origami bows like these are perfect for gift wrap as you can use any paper you like to make them - wrapping paper, scrapbooking sheets, even upcycled books and magazines. To create the bows pictured above I followed this great tutorial which has step-by-step photographs, once you get the hang of the technique you'll be able to whip up a whole batch in no time! - E

washi tape transfer

Washi Tape Transfers 
This awesome idea found on A Girl And A Glue Gun is an easy way to add text to wrapped gifts or cards. Simply type out your text, print onto a sheet of paper then place a strip of washi tape over the top lightly. When you peel away the tape the text will come with it! (Fonts used: American Typewriter & KG Bless Your Heart) - E


Paper Snowflake
The great thing about making paper snowflakes for your wrapping paper is that they will all be completely unique! I followed this great tutorial to get started, but you can personalise them any way you want. Use contrasting coloured paper to your main wrapping paper, or recycle magazines, and then either glue in place or tuck underneath some string. - S


Personalised Washi Tape Flags
This is such a simple but effective way to personalise your wrapping. Simply fold a strip of washi tape in half around your string, cut a triangle out from the end to create the flag shape and then write or stamp on the name. You don't have to stick to names either, why not write more personalised messages, or keep it simple with just initials.- S


We'd love to hear from you if you give these DIY's a go - use the hash tag #eightandsixteen to share your photos with us! 
Erin & Skye

Monday, 20 October 2014

Pumpkin Decorating Challenge Week!

diy-challenge-pumpkins

What would an October full of Halloween inspired projects be without pumpkins? This week we'll be introducing our new 'challenge week' format and will each be sharing our own pumpkin decorating ideas. Look out for Erin's finished pumpkins on Wednesday followed by Skye's on Friday!

We'd love to hear how you're planning to decorate yours this year - use the hash tag #eightandsixteen to share your photos with us!

Skye & Erin

Monday, 25 August 2014

5 Five-Minute Back To School Washi Tape Projects!


One of the most versatile supplies in any crafter's collection has to be washi tape. There are endless uses for this brightly coloured craft essential, and it's a great way to get a quick craft fix.
Here are five washi tape projects that only take 5 minutes and will make back to school prep more fun!

washi pens

Decorated Pens & Pencils
An essential that can sometimes look pretty plain and simple is your pen and pencil collection but with just a few strips of washi tape you can add a pop of colour to your desk or pencil case! - E


Colour Coded Notebooks
If you've got lots of different notebooks for different subjects or tasks, why not colour co-ordinate them with washi tape? You could cover the whole front cover of your books or simply apply a few strips to the spine. - S

washi bookmarks

Bookmarks 
To make these bold bookmarks I used an old piece of thin card packaging cut into rectangles. I layered on strips of washi tape diagonally creating a pattern and after trimming off the excess tape I finished off the bookmarks using a hole punch and some ribbon - E


Paperclip Flags
Paperclips are great for keeping track of any loose sheets or bookmarking a particular page, and using washi tape strips to create these cute flags will make them stand out even more. - S


Pen Pots
Pen/pencil pots are essential if you want to keep track of all of your stationery, and a great way to create your own personalised pots is to cover old tins or in this case a porridge pot. Make sure you rinse out your chosen pot and then get sticking! - S


We'd love to hear from you if you give these DIY's a go - use the hash tag #eightandsixteen to share your photos with us!

Thursday, 21 August 2014

Personal Planner Giveaway!

*Giveaway now closed*


Today we're super excited to share with you our first ever giveaway here at Eight & Sixteen! We absolutely loved picking our very own Personal planners (you can read our reviews HERE) and we've teamed up with Personal Planner to offer two lucky winners either a Wall Planner or Personal Planner for themselves!

To enter, simply use the Rafflecopter form below. The competition is open for two weeks and is open to UK residents only. Good luck :)


Erin & Skye


Tuesday, 19 August 2014

Personal Planner: Review & A Giveaway!

If you’re anything like us you love a good new notebook or diary but often find yourself wishing you could change the layout or find one that starts in the month of your choosing... if this sounds like you then we think you’ll love Personal Planner!

With us both running two (in Erin's case three!) blogs on top of everything else a diary is a must have, but it can be really hard to find a pre-made diary that can cater to our specific needs, and this is where Personal Planner come in.
These cute, handy and high quality planners are completely customisable and are packed with tons of great optional features. Here's what we came up with when we were let loose on the website!

Erin's Planners*
personal planner review eightandsixteen

For my notebook planner I chose to use one of my own photographs on the cover instantly making it a one of a kind! For the inside layout there are four different options so you can tailor it to suit you. I think these little notebook planners would be great as general day-to-day dairies however I have been using mine as a sort of ‘blogging to-do list’, noting down little tasks I need to remember to get done each day. So, I opted for landscape sections for the weekdays with smaller sections assigned to the weekends. For the back section of the planner you can choose from a variety of options including square/ruled/blank pages, sheet music, colouring pages, sudoku, maps, yearly calendar overviews and more!

Most of all I really loved being able to choose how I wanted almost all of the planner elements to look. From the cover to little features such as space to record your workouts or the weather and even the colour of the elastic closures and handy detachable rulers, you can easily create something that’s unique to you and your lifestyle.

personal planner review eightandsixteen

Similarly the wall planner is also fully customisable although this time I opted for one of the pretty pre-made designs for the cover and page details. The best feature of the wall planners has to be the fact that you can add multiple columns each with their own title and image. As I’m using the planner for blogging I assigned each blog I write for it’s own column and have been using post-it notes to give me an overview of my upcoming schedule when I’m away from my laptop. Not only is this design great if you run multiple blogs but it would also be brilliant as a family calendar as each person could have their own column!

Skye's Planners*

Just like Erin, I chose to use one of my own photographs for my Personal Planner. I love the option to do this as it instantly makes the diary feel like mine, and it definitely makes me smile when I see it!
For my diary I wanted to be able to create something that could act as both a personal diary and a blog planner. I checked out each template option on the website to see which layout I thought would work best for this and in the end I went with a vertical weekly layout and added the option to have half of each day lined and half left plain. This means that I can jot down all personal bits in the ruled sections at the top of each day, and then I have the bottom half of the day to jot down anything blog related. This layout is already working brilliantly for me!
I then chose squared and blank paper for the remaining pages at the back to be used as ideas/doodles pages and also added a few pages for addresses as I really like to have those in a diary.

I completely agree with Erin about how great a Personal Planner is if you want to create something unique. There are so many options to choose from to make sure that you are creating something completely personal to you, and I think these would also make a really lovely gift!


For my Wall Planner, I decided to keep it solely blog related, so added two columns for each blog. I love the fact that you can add a little photograph to each column - a small detail, but one that really makes this planner stand out. So far I have been writing in all planned blog posts that I have, and then noting in what I have to get done on weekends/evenings and then highlighting the to-do's. I love the way Erin has used post-it notes on her wall planner! The Wall Planner is a great way to see at a glance what I need to get done - in all my excitement with Eight & Sixteen I've noticed a lack of posts on my own blog now that I've started filling out the planner. Hopefully this means I'll be able to keep a closer eye on things from now on!


We'd love to know what you think of our planners, and be sure to check back in the next few days as we will be launching an exciting giveaway in collaboration with Personal Planner!

Erin & Skye


* These planners were kindly sent to us to review, all views and opinions are our own.

Monday, 11 August 2014

5 Ways To Upcycle Cardboard Tubes

cardboard upcyles

We love a good upcycle project and hate to see simple materials with so much potential go to waste! So today we've teamed up to bring you five project ideas to turn unwanted cardboard tubes into something a little more exciting...

toilet-tube-stamped-paper

1. Stamp
This is a super easy way to create your own printed wrapping paper. Simply take your cardboard tube and flatten it in half, then open out and push one fold in to create a heart shape. Then just dip the end of the tube into your paint and stamp away. - S

upcycle cardboard tube pillow boxes

2. Pillow Boxes
Instead of making pillow boxes and simply covering them with wrapping paper I took to Pinterest to see if I could find any fun decoration ideas and stumbled across some animal designs. I loved how the shape of the pillow box lends itself to being an owl. I used a circle punch and some scrap papers to decorate the body and cut wings from the scraps of cardboard - E

cable-tidy

3. Cable Tidy
There are tons of great ways to keep all of your cables organised, and colour coded cardboard tubes is a really easy option. Cover as many tubes as needed in your favourite washi tapes or craft papers, and then pick a cable for each. That way the cables are out of the way, and you'll know exactly which one to reach for depending on its brightly covered cover. - S

hair cuff diy cardboard tube

4. Hair Cuffs
Another Pinterest inspired idea was this simple to make hair cuff that sits over and covers your regular hairband for a more fun look. To create it I cut a small section of a cardboard tube, used Mod Podge to cover it with a scrap of fabric and once dry cut a slit into it so it could easily be put in place on the ponytail and voilĂ , a new accessory in minutes! - E


seed planters

5. Seed Planters
To make the planters, cut off 1/4 of a tube, fold the remaining tube in half, and then half again. Open the tube out again and then using a pair of scissors snip about 1" into each of the folds. Fold these flaps one on top of the other and fold the remaining one underneath the first to secure, and that's the bottom of your planter. The great thing about using cardboard tubes is plant seeders is that once your plants are ready to be moved into bigger pots, the cardboard can go straight in with them as it will just breakdown into the soil. - S


We'd love to hear from you if you give these DIY's a go - use the hash tag #eightandsixteen to share your photos with us!


Monday, 28 July 2014

We Love... Harry Potter

we love harry potter

One of the first things we discovered we had in common was a love of Harry Potter and of course, we're not the only ones. Earlier this month marked three years since the release of final movie adaptaion The Deathly Hallows Part 2 so, what better subject for our next We Love... series?

Over the next four weeks, amongst our usual variety of posts, we'll be sharing some Harry Potter inspired DIYs perfect for our fellow fans to celebrate this amazing series!

Don't forget to check back on Wednesday for the first tutorial! :)

Erin & Skye

Monday, 30 June 2014

Why We Love Pinterest


Ah Pinterest. We can't quite remember a time without it in our lives, and we also can't imagine a better hub for browsing, sharing and feeling pretty damn inspired.

Sometimes though, there can just be too much to choose from, and it can be hard to know which pins to trust!
So we want to explore the most popular DIY's and tutorials that can be found on Pinterest, find out whether they're as easy as it seems, and then share the results with you.

We've got tons of inspiration to get started and experiment with, but if you have any requests for what you'd like us to take on, just pop a comment below!

Erin & Skye


Related Posts Plugin for WordPress, Blogger...