tabs

es about us es contact es archive es challenge es we love 9 es recipes es pintests es links
Showing posts with label PR. Show all posts

Wednesday, 10 December 2014

#PaperHaul - Crafty Creatives New Subscription Box!

* #PaperHaul box c/o Crafty Creatives
PaperHaul Box December 2014 PaperHaul Box December 2014 PaperHaul Box December 2014

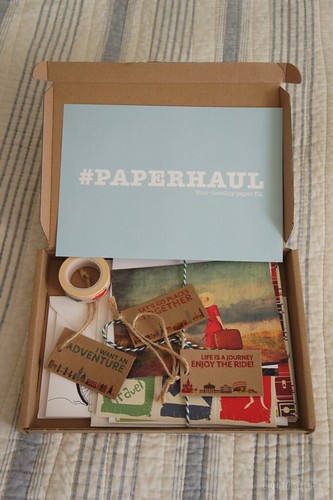
#PaperHaul is a brand new monthly box of goodies from the team behind Crafty Creatives. The idea is that you sign up to receive a box of paper treats each month (priced at £10), each with a different theme. We’ll be taking it in turns to review each month’s box and I was lucky enough to receive the first one which spoiler alert; I love!

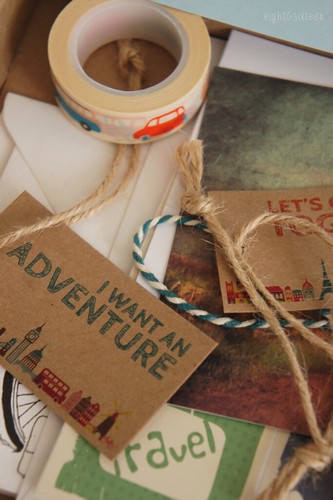
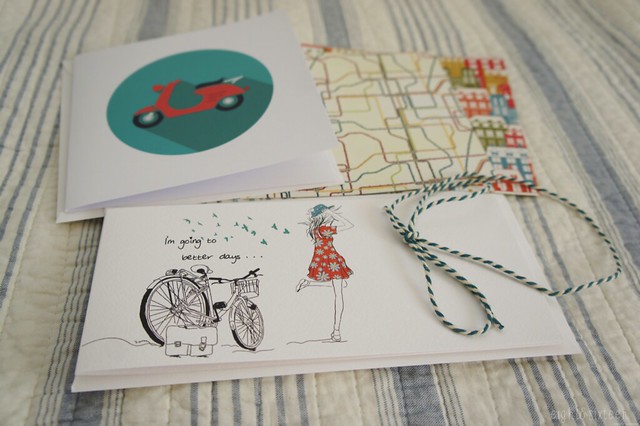
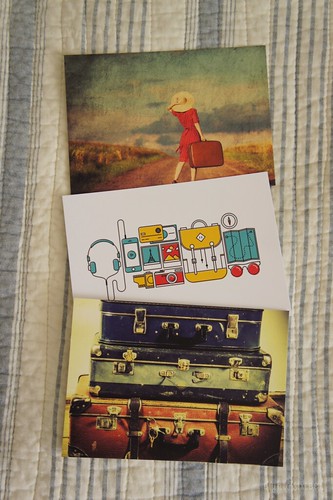
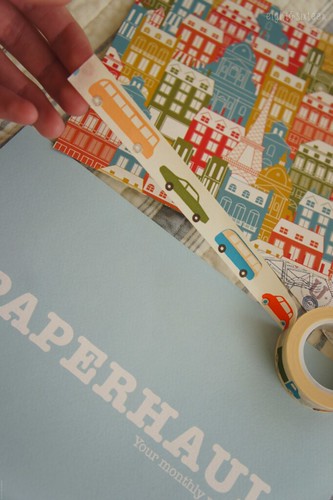
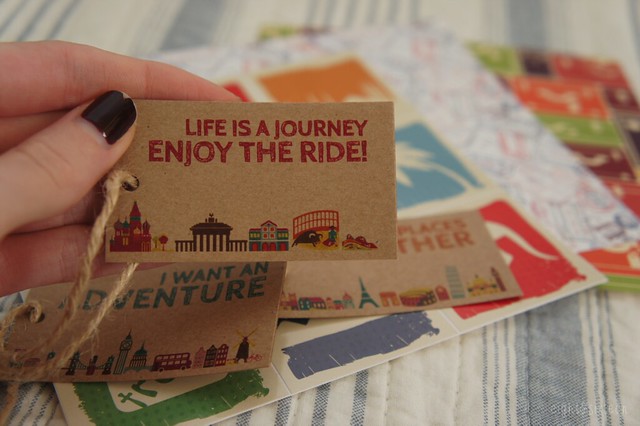
The theme for December is travel and adventure with a mixture of items including postcards, scrapbooking papers, cards, stickers, gift tags and washi tape - all adorned with bicycles, suitcases and other travel-inspired prints. Although centred around the same theme the items have a good mixture of styles with vintage looking postcards next to bold graphic style stickers - there's definitely something for everyone! To be honest there isn't really anything I don't like in the box so it's hard to pick a favourite item but I think I'd probably have to go with the tags or the cute washi tape adorned with various vehicles.

Not only is the box filled with stationery goodness but it also arrived neatly packaged and well-presented - the items were even tied together using a string which could also come in handy for a project! The box is slim and designed to fit through your letterbox so there's no need to worry about being home when it arrives. The only additional thing I would have liked to have seen included would be a little leaflet or card with information on the theme and the month's items - the brands, why they were chosen etc (similar to those found in beauty subscription boxes) as I'd love to know more about how it all came together - but overall I'm very impressed with the first #PaperHaul box and am looking forward to seeing what next month's theme will be!

If you're looking to treat yourself or a friend you can sign up or find out more about #PaperHaul on the Crafty Creatives website.

PaperHaul Box December 2014 PaperHaul Box December 2014 PaperHaul Box December 2014

Will you be subscribing to #PaperHaul? We'd love to hear your thoughts!

Erin

Friday, 28 November 2014

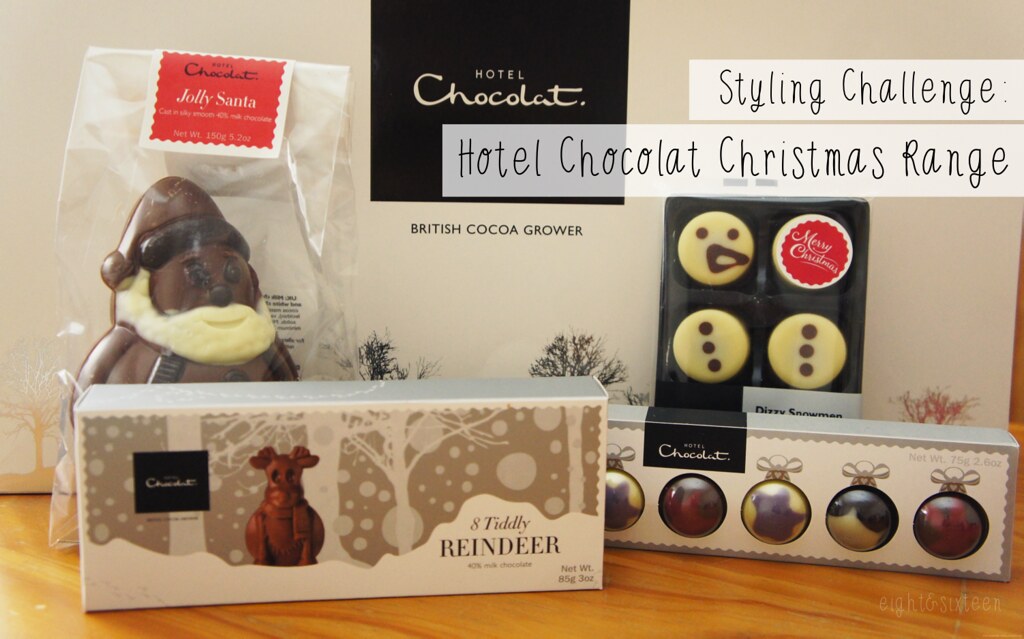
Styling Challenge: Hotel Chocolat Christmas Range

*Hotel Chocolat products c/o Hotel Chocolat available HERE.


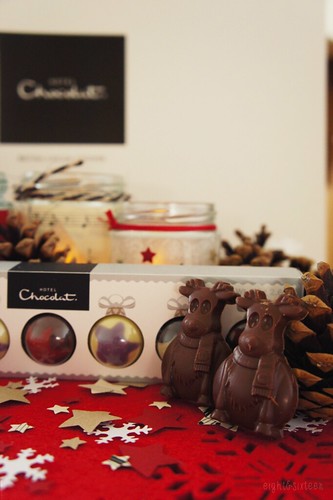
Welcome to another challenge post! This time we're showcasing some festive treats from British company Hotel Chocolat and will each be sharing how we would style the selection of products shown above! All of the products here are gluten free which is great for the both of us, and they would all make perfect little gifts for your friends and family.

Here's how we styled them...

hotel chocolat styling challenge
hotel chocolat styling challenge hotel chocolat styling challenge
hotel chocolat styling challenge

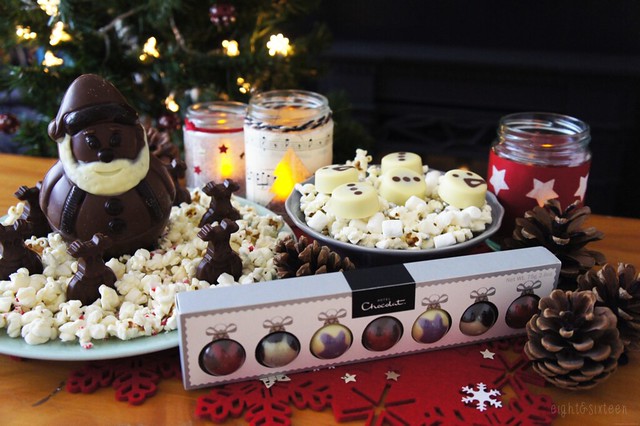
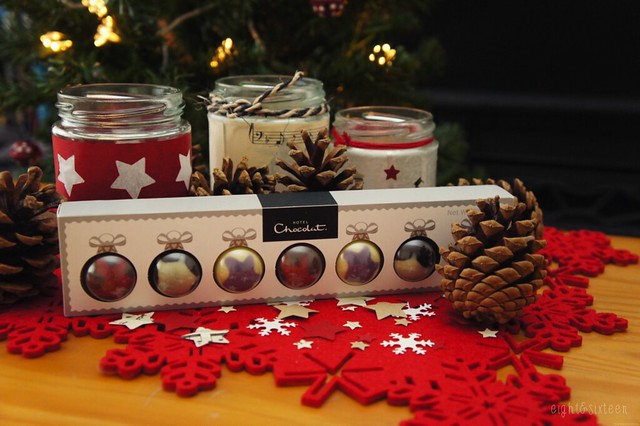
As many people catch up with friends and family over the holiday season I decided to style the products for a festive get together, sharing a few ideas of how to display them on a coffee table as treats for you and your guests to enjoy. All perfect for a little bit of luxury this Christmas, the products are great for creating an eyecatching display that your guests won't be able to resist!

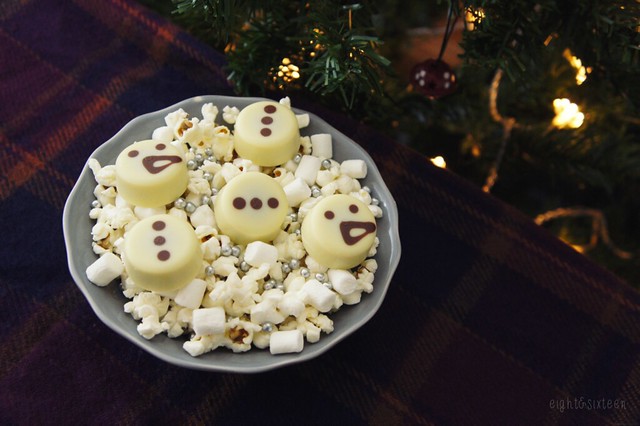
For the Dizzy Snowmen I chose to create a snowy backdrop filling a bowl with sweet popcorn, white marshmallows and edible silver balls, placing the cute (and delicious!) praline treats on top. Similarly I also used popcorn to showcase the Jolly Santa and milk chocolate Tiddly Reindeer, this time adding in some crushed candy canes for a little pop of colour and peppermint flavour which compliments the chocolate well.

I particularly loved the chic festive packaging of the truffles, designed to look like miniature baubles,  and opted to leave them in the box surrounded by upcycled tea light jars and some homemade confetti created using craft punches. This year I've collected some woodland themed decorations for our tree and am trying to create more of a nature-inspired festive look so a few pine cones also made their way into the display! - Erin


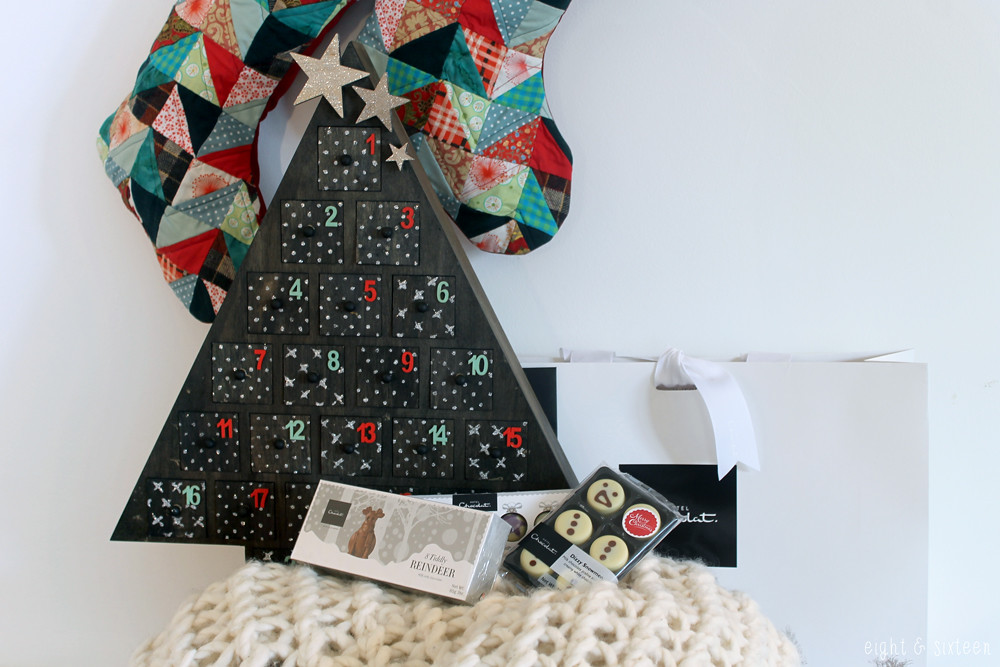
To keep the festivities going throughout December, I decided to use the products as gifts to fill an advent calendar. Ever since I finished my advent calendar a few weeks ago, I've been wondering what sort of treats to fill it with come December, and these goodies have proved to be a great match!

With very little space for a big Christmas tree, the calendar became the centrepiece for me to show off the beautifully packaged chocolates and I filled the drawers with mixtures of the Tiddly Reindeer, truffle filled Chocolate Baubles and praline filled Dizzy Snowmen.
The presentation of the Chocolate Baubles is so cute and it felt a bit wrong to remove them from their packaging, but they are the perfect size for a little daily treat. I love that it's been possible to use the chocolates in this way - being able to divide them out to fill a calendar is a great way to make them last, as tempting as it might be to scoff them all at once!
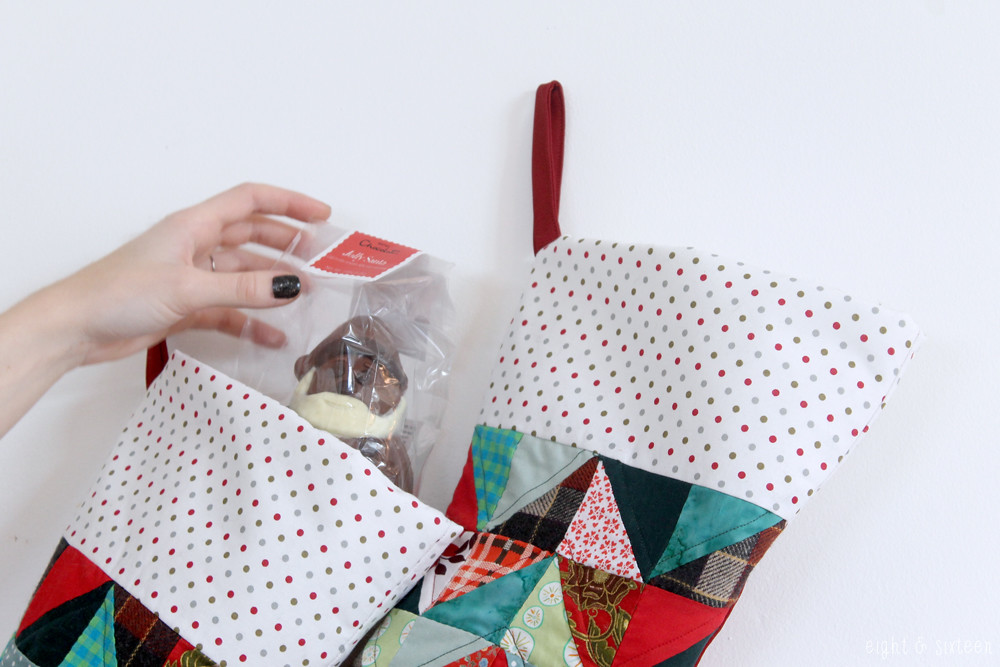
I then hung up my hand made Christmas stockings to finish off the scene, and popped Jolly Santa into the top of one as a little sneak peek to get the festive spirits in full swing.

Hotel Chocolat really do know how to present their products, and it's something that has always drawn them to me. As soon as you see a glimpse of their logo or packaging under the tree or in a stocking, you know you're in for a real treat. - Skye


Have you tried anything from the Hotel Chocolat Christmas range yet? We'd love to know what your top picks are!

Erin & Skye

Friday, 14 November 2014

DIY with Hobbycraft: Wooden Advent Calendar

*Wooden advent calendar & craft supplies c/o Hobbycraft, available HERE.


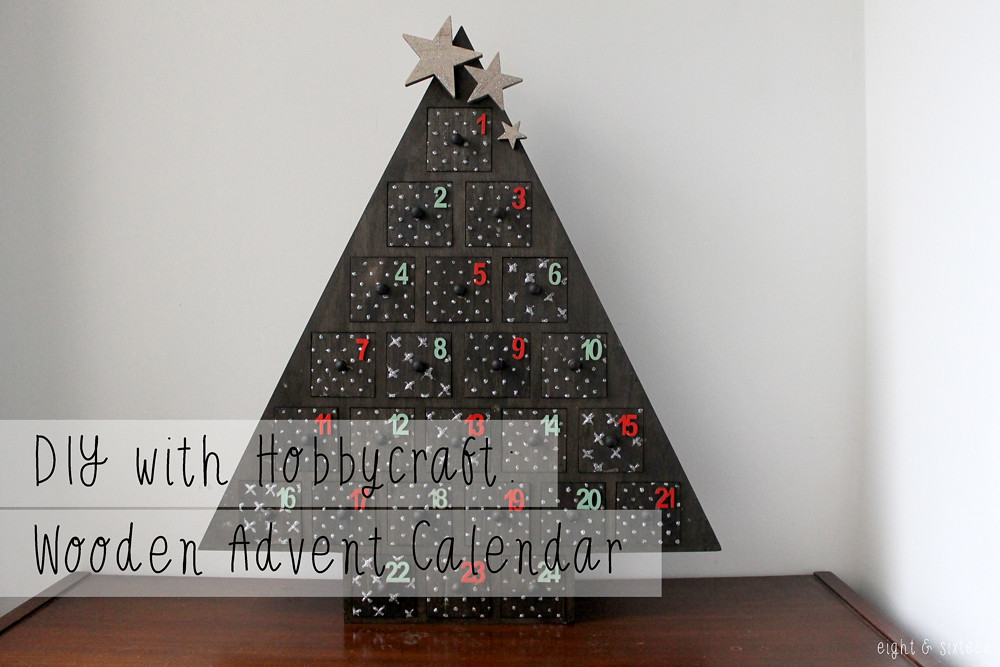
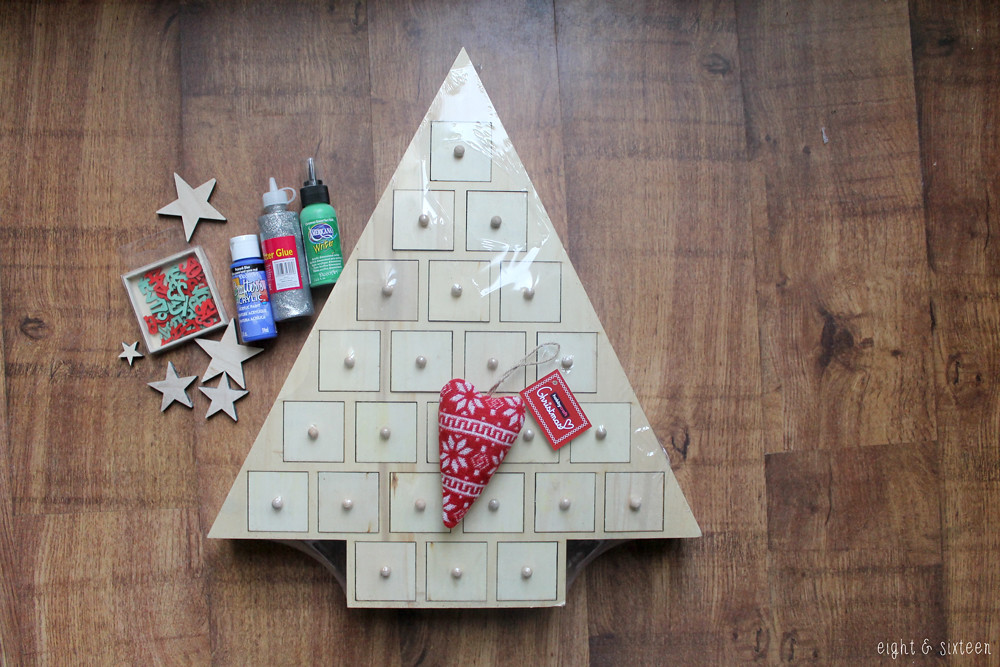
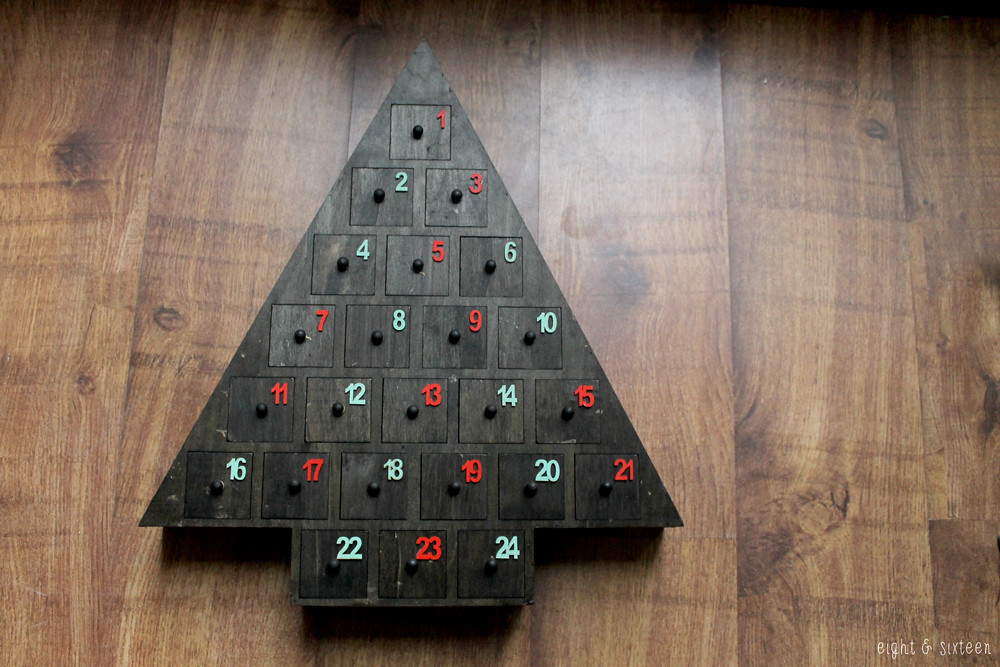
It's time to spread a little festive cheer here at Eight & Sixteen! Today I'm sharing a DIY with you courtesy of Hobbycraft, who provided this wooden advent calendar along with some craft supplies with the challenge to make it my own.

I've always loved these advent calendars as I'm a sucker for traditions, and love the idea that these can be used for years as well as being personalised to suit you. Here's how I personalised mine...


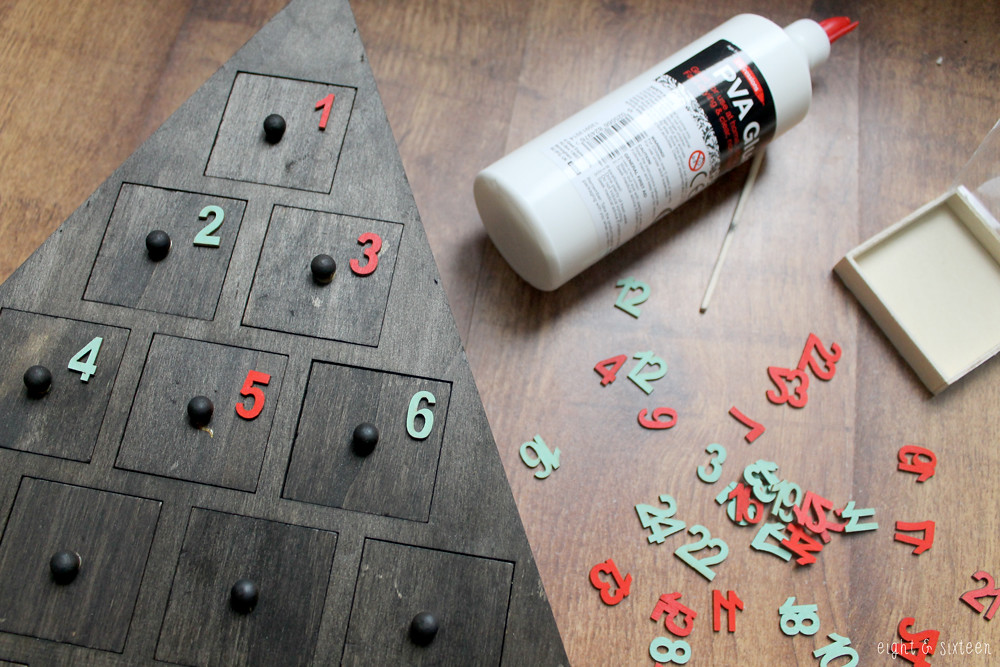
First I made the decision to stain my calendar with a dark oak wood stain. I wanted to keep the calendar looking quite natural so that I could add Christmassy details without overpowering it, and I think that the stain worked really well for this.
The next step was to number the drawers with the wooden numbers provided by Hobbycraft. I think it's great that they offer both red and green numbers in one set as I was able to mix and match them onto the drawers and I also love the pop of colour that they add.


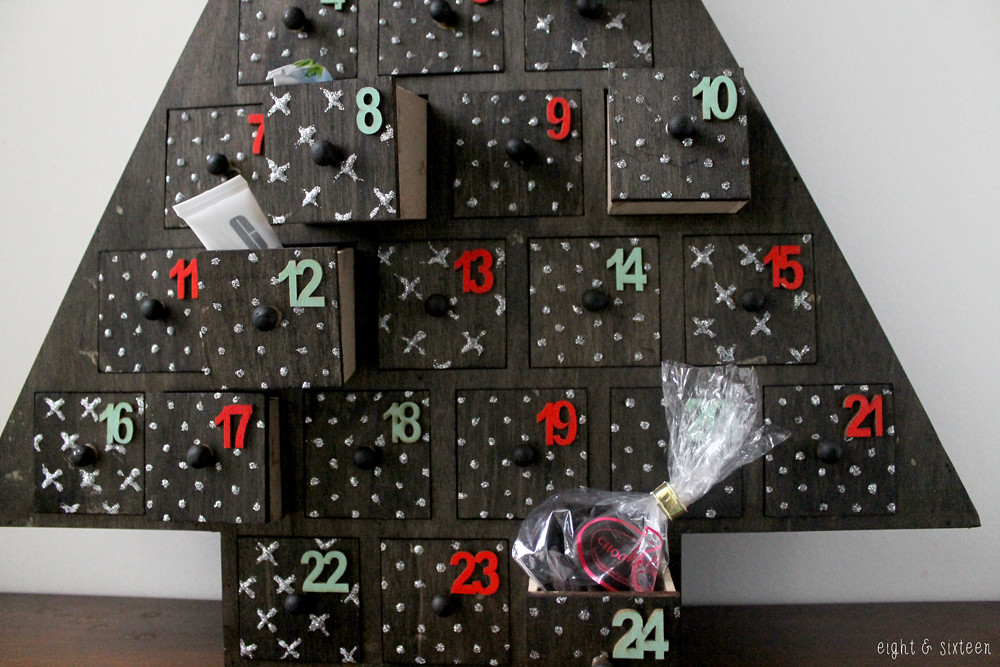
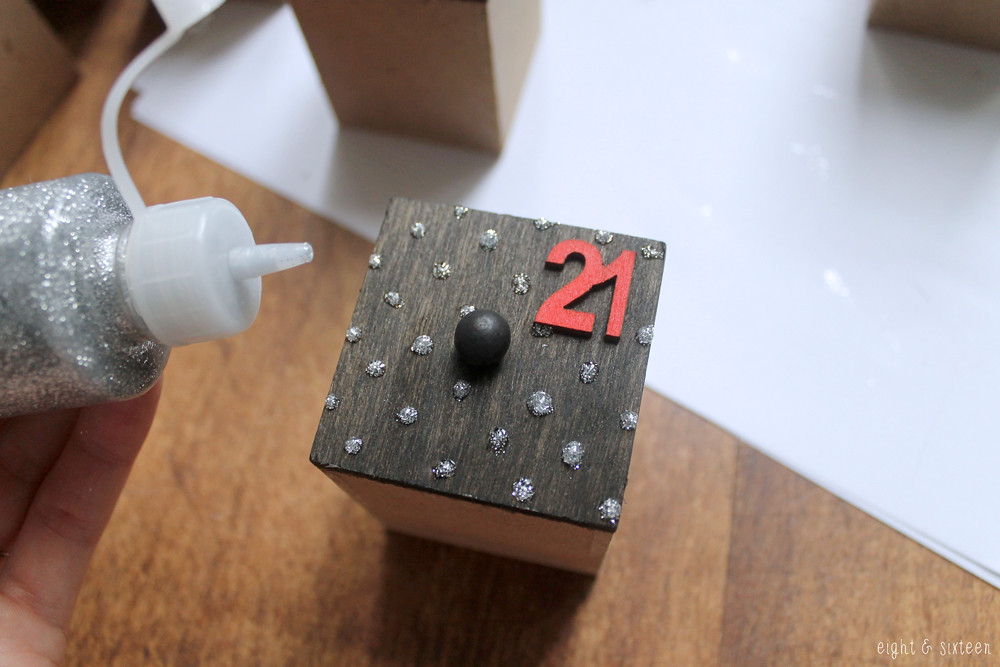
Once I'd finished glueing the numbers on, it was time to get glitter glue happy! I really struggled to pick one way to decorate the calendar at this point - there are so many ways that you could customise it - but in the end I decided that polka dots would be perfect. I also added in a few random drawers with little crosses on to mix it up.
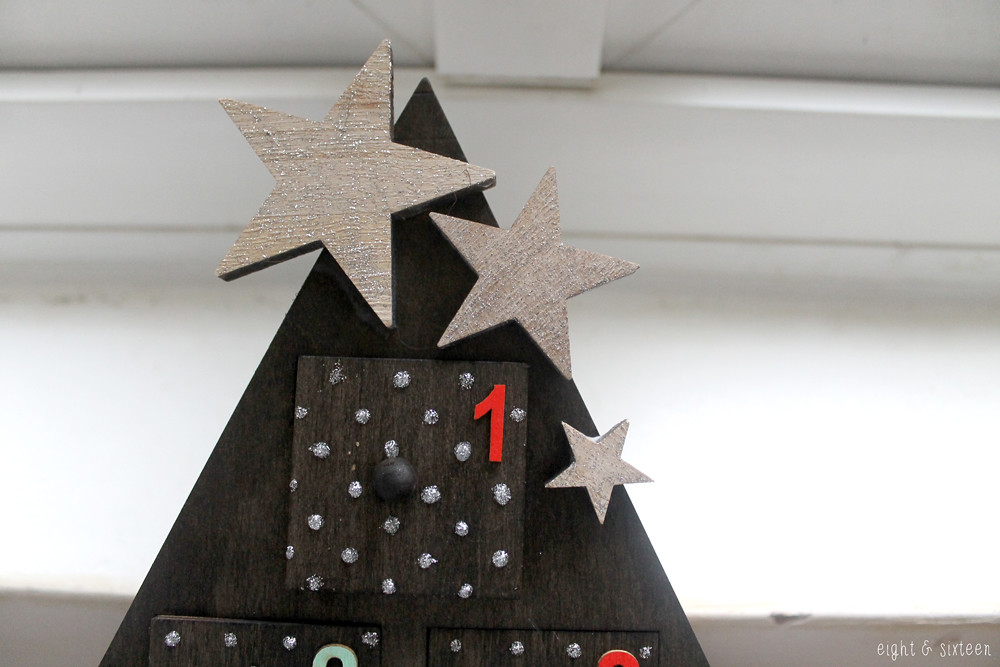
Finally, I gave the the wooden stars provided a coat of the glitter glue and glued them to the top of the calendar to finish it off.

Overall I'm really happy with my finished calendar and I particularly like the effect of the glitter glue when it catches the light :)
It's been a really fun DIY to take part in, and I've really enjoyed working with the Hobbycraft materials. If you're stuck for a Christmas present with a personal touch or are looking for a way to entertain little'uns for an afternoon, I think that a wooden advent calendar might be the way to go!


We'd love to hear from you if you've used this advent calendar from Hobbycraft or if you give this DIY a go - use the hash tag #eightandsixteen to share your photos with us!

Skye


Monday, 6 October 2014

2014 Christmas Craft Calendar

bunting xmas

Today I wanted to write a quick post to share this handy little calendar created by Chums. The calendar features details on various festive events happening up and down the country over the next couple of months including craft fairs and markets. So, if you're on the lookout for some crafty events to pop along to or would just like to source some lovely handmade or vintage gifts for your friends & family this year, you can find out what events are happening near you by checking out the calendar!

Will you be visiting any Christmas fairs or markets this year?

Erin

Friday, 26 September 2014

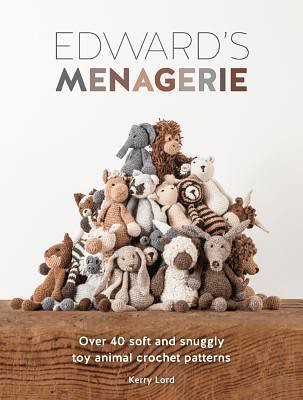
Book Review: Edward's Menagerie, Kerry Lord (2014)

*Review PDF copy & images c/o MLPR
edwards menagerie

Edward’s Menagerie is a beautiful new crochet book from Kerry Lord, the founder of UK alpaca yarn company TOFT. Created for her son Edward the book contains a collection of cute crochet animal patterns perfect for the children in your life… as well as the adults!

Each different animal pattern comes with cute name, character description and of course a step-by-step tutorial. The instructions found in Edward’s Menagerie use UK terminology however it is worth noting that conversions are also included in the book. The patterns are split into three sections depending on their difficulty and range from beginner through to advanced so whatever your skill level there’s a project to try!

Before jumping into the patterns themselves there is also a section on creating the standard forms which make up the base for all of the designs. At the end of the book you’ll find more detailed advice on stuffing the toys, sewing the parts together, adding facial features alongside other tips and tricks.

The amazing range of designs have all been created using TOFT yarns with natural colours that compliment them perfectly. As both of us have used TOFT’s yarns in the past we can vouch for the fact that they are super soft and lovely to work with!
skye toft

This book has completely fuelled my desire to learn crochet properly. Whilst I have crocheted before and made a few different things, I've never really been as comfortable with crochet as knitting - until now!
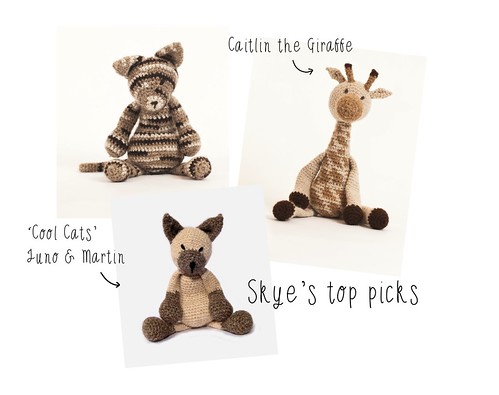
I absolutely love the concept of this book, and think that every animal is well thought out and as a collection they are just adorable. I especially like Caitlin the Giraffe and I'm definitely going to attempt to make her when I feel confident enough.
I was also happy to see a variety of cats included, and luckily for me Alexandre the Cat is featured in the beginners section. I've been working away on my very on cat, so stay tuned for a post on him next week :) - Skye

erin toft
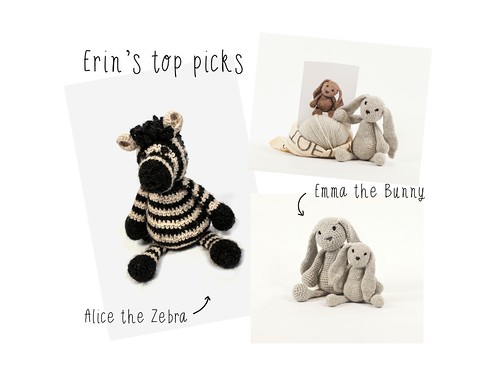
It was definitely tricky to pick out just two favourite projects from the book as there are so many adorable designs! As a rabbit owner Emma the Bunny of course had to make my list - and really, who could resist those big ears?! Another favourite design is definitely Alice the Zebra with her contrasting stripes and loopy tail. Although I currently have zero crochet skills the awesome collection of designs in Edward's Menagerie has definitely made me want to give this craft a go! - Erin

Find out more on the TOFT website!

Have you read this book? We'd love to hear your thoughts so don't forget to use the hashtag #eightandsixteen to share them with us!

Erin & Skye

Monday, 15 September 2014

DIY's With Speedy Stamps


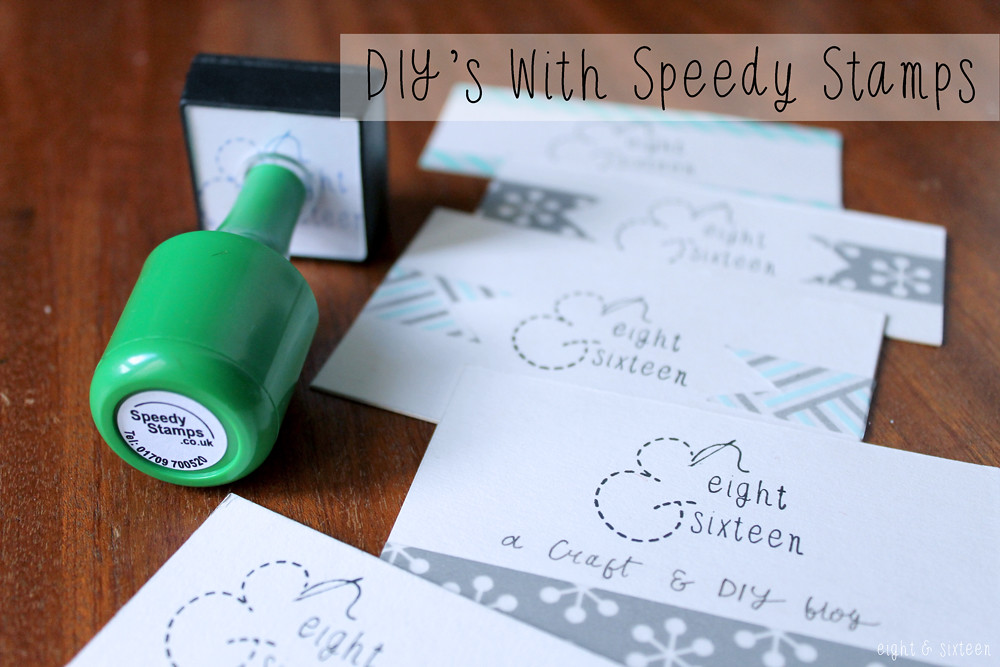
Today we have a few DIY ideas to share with you that use our personalised Speedy Stamps stamp (you can see our full review here).

Skye's DIY

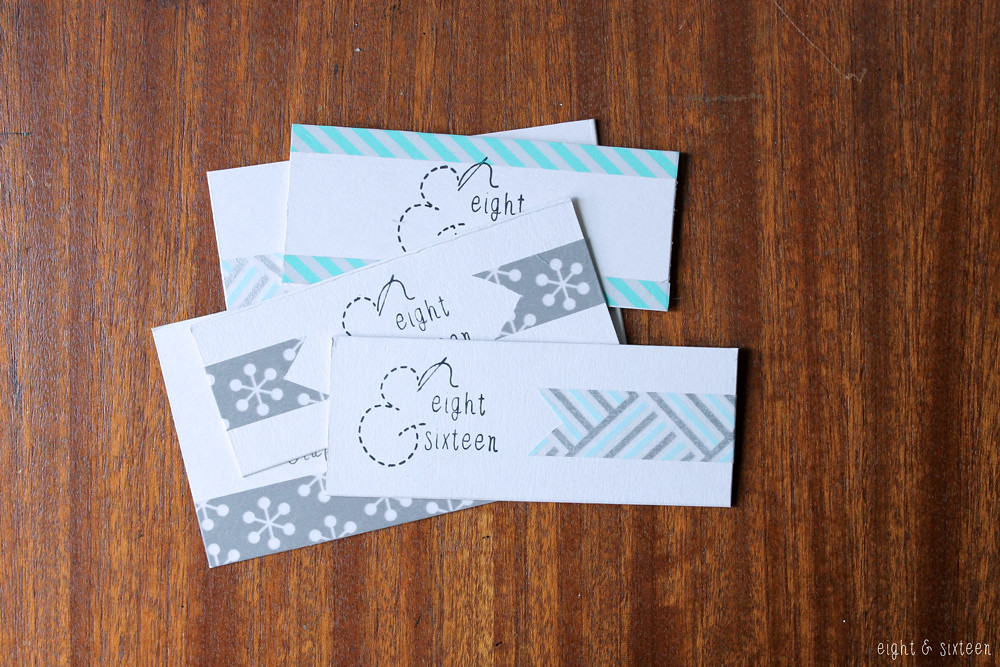
For my Speedy Stamps DIY, I decided to make some e&s business cards - a perfect way to show off our logo and the stamp.
I wanted the design of the cards to be simple and let the logo become the main focal point, so simply added different washi tapes in a variety of ways across the cards.
I think that the overall effect is very reflective of the e&s blog - minimalistic but a little playful :)

Erin's DIY
diy business card holder

To compliment Skye's project I decided to use my stamp to make a personalised business card case perfect for protecting your new cards when you're carrying them around in your bag! Not only is this a handy little case to make but it's also a quick and easy project, here's how I did it...

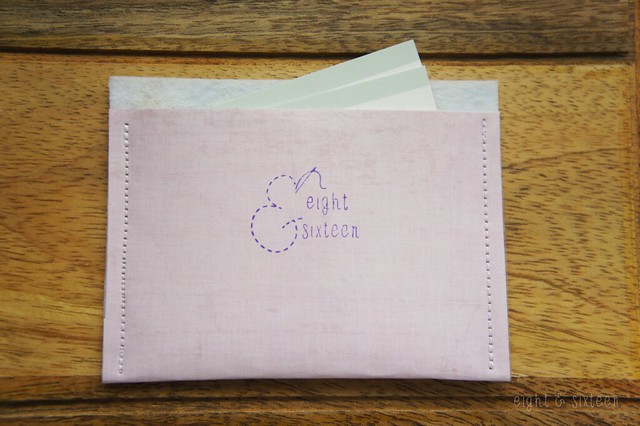
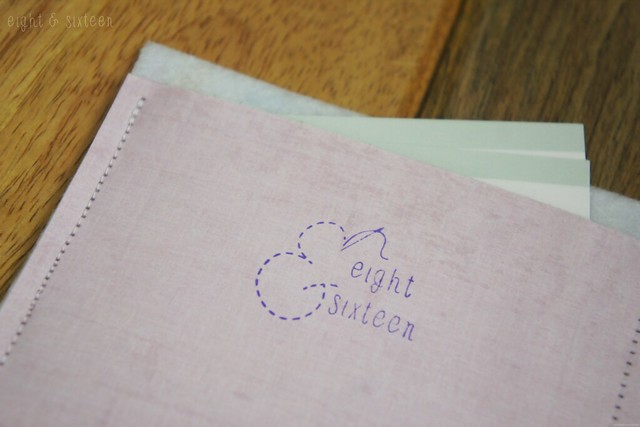
To create the case I cut three 4.5 x 6.5" rectangles, one from felt, one from paper and one from sticky back plastic. I stamped our Eight & Sixteen logo onto the paper before placing it face down onto the sheet of sticky back plastic to create a protective layer for the outside of the case.

I then used a craft glue to stick the piece of felt onto the reverse side of the paper, folded into a case shape and used my sewing machine to stitch together the sides turning it into a pouch style case!


These are just two DIY project ideas that are great for custom stamps - what would you make with yours?

We'd love to hear from you if you give these DIY's a go - use the hash tag #eightandsixteen to share your photos with us! 
 
Erin & Skye

Tuesday, 9 September 2014

Speedy Stamps Custom Stamp Review

speedy stamps review eightandsixteen

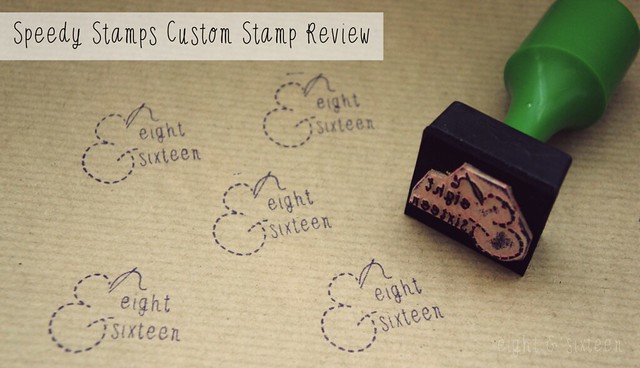
Today we wanted to share these awesome Eight & Sixteen stamps kindly sent to us by Speedy Stamps. The idea behind the business is that you can send in your own design and have it made into a bespoke stamp - perfect for bloggers, small businesses, DIYers and stationery lovers!

The ordering process is simple, all you need to do to create your own stamp is upload a greyscale image of your chosen design, choose a size and the rest is done for you! If design isn’t your thing you can still create a great personalised stamp using the website’s basic tutorials which will help get you started.

Our stamps feature the Eight & Sixteen logo and measure approx. 35cm which is a handy size for lots of projects. A particularly impressive factor was how detailed the stamp design can be as our Eight & Sixteen logo design uses a hand drawn font and dashed line, both of which are thin, we were concerned about how well they would show up on the stamp. As you can see the detail shows up well and we're pleased to say that we are very happy with our new stamps!

If you want to see just a couple of the ways we’ll be using the stamps make sure you check back next Tuesday for a DIY post!

Erin & Skye


Sunday, 7 September 2014

Personal Planner Giveaway - The Winners!


Thank you to everyone who entered our Personal Planner giveaway; we've been overwhelmed with the entries and have loved reading your top tips on staying organised.

Congratulations to our two winners!

Gift Voucher for 1 x Personal Planner - Claire Wood

Gift Voucher for 1 x Wall Planner - Heather Knotts

If you could please pop us an email, we will put you in touch with Personal Planner to arrange your prizes :)

Erin & Skye


Thursday, 21 August 2014

Personal Planner Giveaway!

*Giveaway now closed*


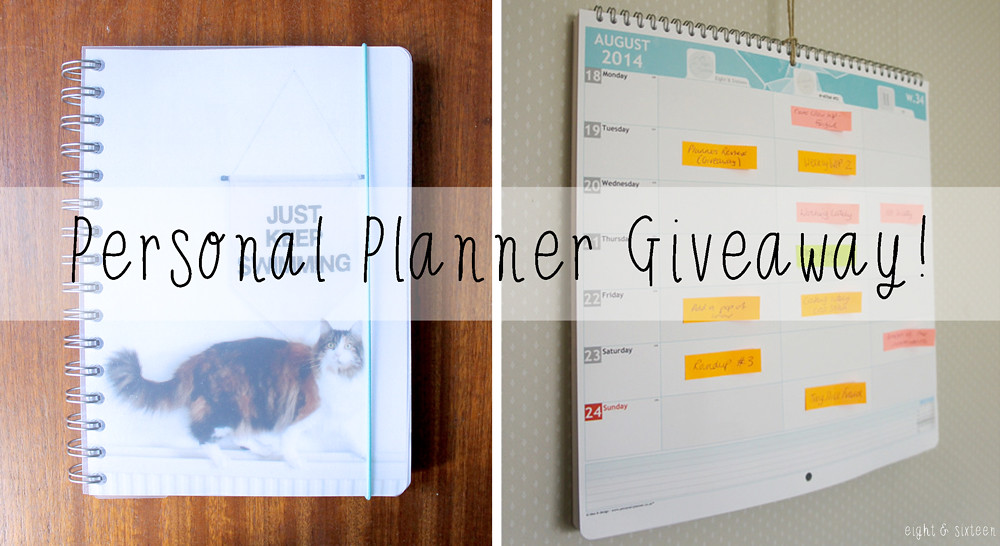
Today we're super excited to share with you our first ever giveaway here at Eight & Sixteen! We absolutely loved picking our very own Personal planners (you can read our reviews HERE) and we've teamed up with Personal Planner to offer two lucky winners either a Wall Planner or Personal Planner for themselves!

To enter, simply use the Rafflecopter form below. The competition is open for two weeks and is open to UK residents only. Good luck :)


Erin & Skye


Tuesday, 19 August 2014

Personal Planner: Review & A Giveaway!

If you’re anything like us you love a good new notebook or diary but often find yourself wishing you could change the layout or find one that starts in the month of your choosing... if this sounds like you then we think you’ll love Personal Planner!

With us both running two (in Erin's case three!) blogs on top of everything else a diary is a must have, but it can be really hard to find a pre-made diary that can cater to our specific needs, and this is where Personal Planner come in.
These cute, handy and high quality planners are completely customisable and are packed with tons of great optional features. Here's what we came up with when we were let loose on the website!

Erin's Planners*
personal planner review eightandsixteen

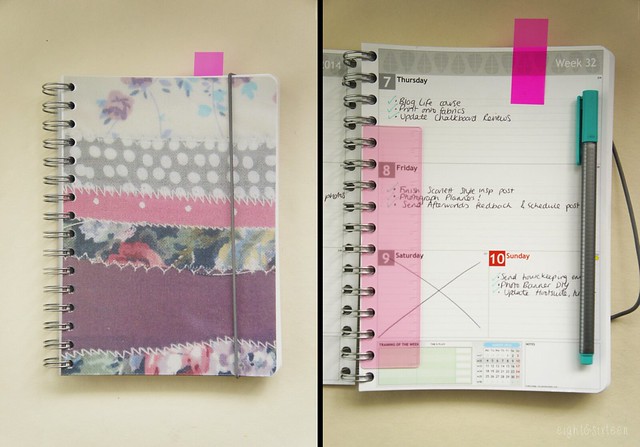
For my notebook planner I chose to use one of my own photographs on the cover instantly making it a one of a kind! For the inside layout there are four different options so you can tailor it to suit you. I think these little notebook planners would be great as general day-to-day dairies however I have been using mine as a sort of ‘blogging to-do list’, noting down little tasks I need to remember to get done each day. So, I opted for landscape sections for the weekdays with smaller sections assigned to the weekends. For the back section of the planner you can choose from a variety of options including square/ruled/blank pages, sheet music, colouring pages, sudoku, maps, yearly calendar overviews and more!

Most of all I really loved being able to choose how I wanted almost all of the planner elements to look. From the cover to little features such as space to record your workouts or the weather and even the colour of the elastic closures and handy detachable rulers, you can easily create something that’s unique to you and your lifestyle.
personal planner review eightandsixteen

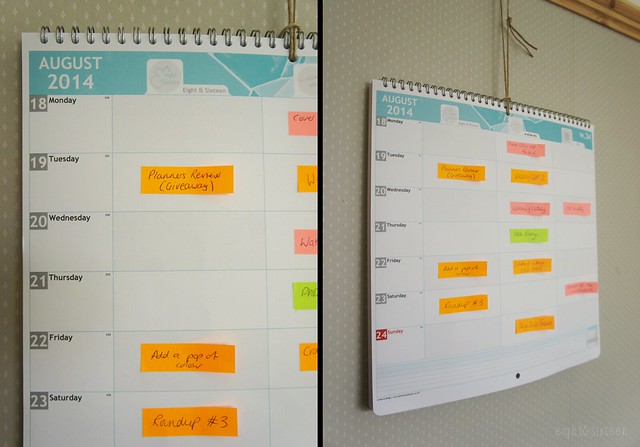
Similarly the wall planner is also fully customisable although this time I opted for one of the pretty pre-made designs for the cover and page details. The best feature of the wall planners has to be the fact that you can add multiple columns each with their own title and image. As I’m using the planner for blogging I assigned each blog I write for it’s own column and have been using post-it notes to give me an overview of my upcoming schedule when I’m away from my laptop. Not only is this design great if you run multiple blogs but it would also be brilliant as a family calendar as each person could have their own column!

Skye's Planners*
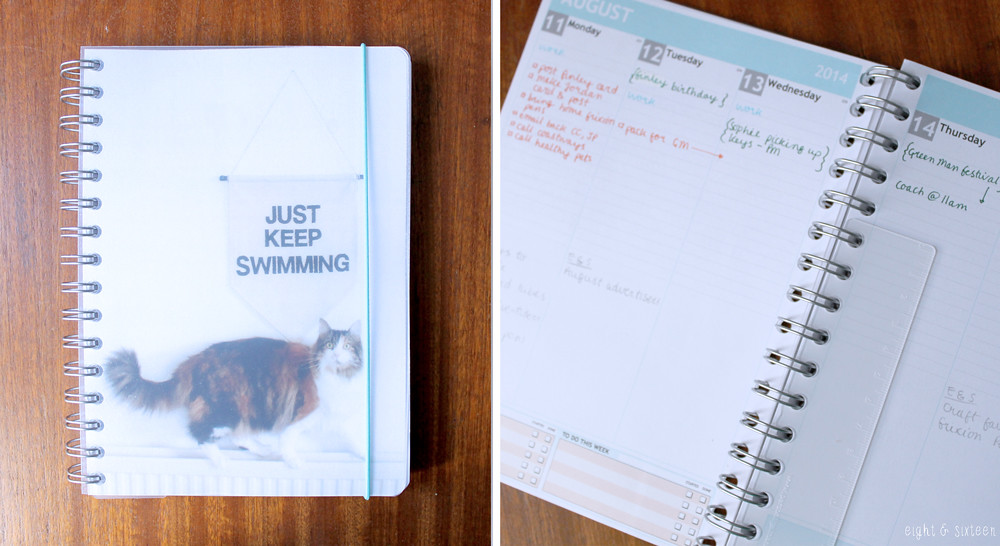
Just like Erin, I chose to use one of my own photographs for my Personal Planner. I love the option to do this as it instantly makes the diary feel like mine, and it definitely makes me smile when I see it!
For my diary I wanted to be able to create something that could act as both a personal diary and a blog planner. I checked out each template option on the website to see which layout I thought would work best for this and in the end I went with a vertical weekly layout and added the option to have half of each day lined and half left plain. This means that I can jot down all personal bits in the ruled sections at the top of each day, and then I have the bottom half of the day to jot down anything blog related. This layout is already working brilliantly for me!
I then chose squared and blank paper for the remaining pages at the back to be used as ideas/doodles pages and also added a few pages for addresses as I really like to have those in a diary.

I completely agree with Erin about how great a Personal Planner is if you want to create something unique. There are so many options to choose from to make sure that you are creating something completely personal to you, and I think these would also make a really lovely gift!
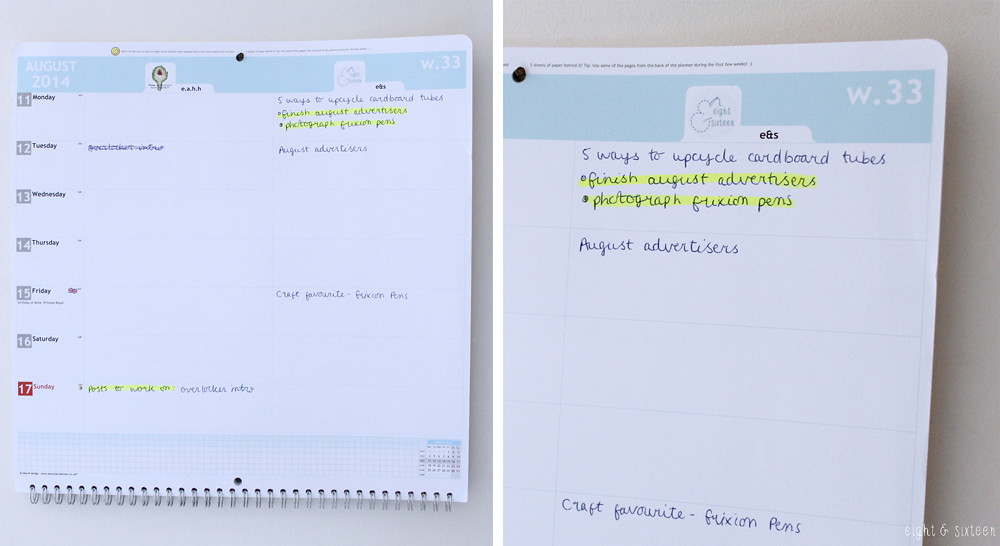

For my Wall Planner, I decided to keep it solely blog related, so added two columns for each blog. I love the fact that you can add a little photograph to each column - a small detail, but one that really makes this planner stand out. So far I have been writing in all planned blog posts that I have, and then noting in what I have to get done on weekends/evenings and then highlighting the to-do's. I love the way Erin has used post-it notes on her wall planner! The Wall Planner is a great way to see at a glance what I need to get done - in all my excitement with Eight & Sixteen I've noticed a lack of posts on my own blog now that I've started filling out the planner. Hopefully this means I'll be able to keep a closer eye on things from now on!


We'd love to know what you think of our planners, and be sure to check back in the next few days as we will be launching an exciting giveaway in collaboration with Personal Planner!

Erin & Skye


* These planners were kindly sent to us to review, all views and opinions are our own.

Related Posts Plugin for WordPress, Blogger...