tabs

es about us es contact es archive es challenge es we love 9 es recipes es pintests es links

Monday 30 June 2014

Why We Love Pinterest


Ah Pinterest. We can't quite remember a time without it in our lives, and we also can't imagine a better hub for browsing, sharing and feeling pretty damn inspired.

Sometimes though, there can just be too much to choose from, and it can be hard to know which pins to trust!
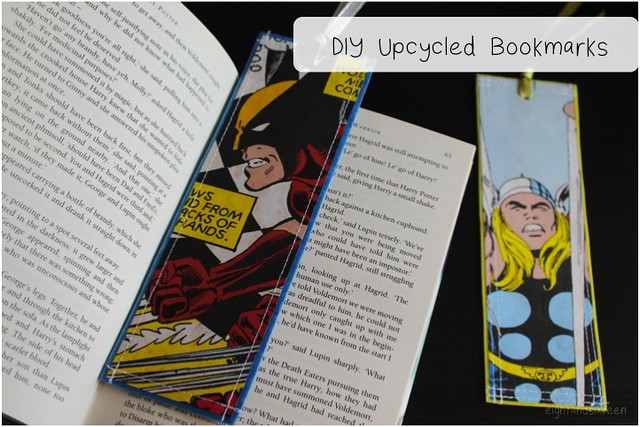
So we want to explore the most popular DIY's and tutorials that can be found on Pinterest, find out whether they're as easy as it seems, and then share the results with you.

We've got tons of inspiration to get started and experiment with, but if you have any requests for what you'd like us to take on, just pop a comment below!

Erin & Skye


Saturday 28 June 2014

Eight & Sixteen - Roundup #1

roundup 1 eight and sixteen blog crafts diy uk recipe tutorial sewing

Welcome to our first Eight & Sixteen roundup! We'll be posting these at the end of each four week period as an easy way for you to catch up on any posts you might have missed. Here's a look at our first month's posts... we hope you've enjoyed them!


  • Welcome to Eight & Sixteen!
  • DIY Stamped Monogram Necklace
  • Craft To Learn: Calligraphy
  • We Love... Nutella
  • DIY Tea Towel Cushions
  • Book Review: The Gentle Art Of Quilt Making, Jane Brocket (2014)
  • Recipe: 3 Ingredient Nutella Brownies
  • DIY Upcycled Bookmarks
  • Craft Favourite: Chalk Marker
  • DIY Challenge: Upcycled Terrariums
  • Advertise With Eight & Sixteen!
  • DIY Film & TV Quote Banners
  • Recipe: No-Bake Nutella Cheesecake


  • We'd love to hear your thoughts and feedback on our first month of posts so don't forget to leave a comment or tweet us using the hashtag #eightandsixteen  

    You can also vote on which type of posts you would like to see more of here in future by taking the anonymous poll in the sidebar on the right!

    Erin & Skye

    Friday 27 June 2014

    Recipe: No-Bake Nutella Cheesecake (Gluten Free)

    nutella cheesecake

    I recently saw a Nigella recipe for Nutella cheesecake and knew I had to try out something similar, as it turned out it was perfect for our first We Love... feature!

    As the original recipe used pretty large quantities and wasn't gluten free I adapted it a little bit to make it work for me. Here's how I did it...

    Ingredients: 200g Nutella, 300g cream cheese, 60g icing sugar, 1 packet of gluten free digestives (approx. 170g), 60g butter, chopped hazelnuts (enough to add a tbsp into the base mixture & to cover the top of the cheesecake)

    1. Place the biscuits in a zip up plastic bag and crush with the end of a rolling pin. Melt the butter in a pan, remove from the heat and mix in the biscuits plus a spoonful of chopped hazelnuts

    2. Place the base mixture into your (lined) tin, press down using the base of a glass and pop in the fridge for around 20-30 minutes to set

    3. Whilst the base is setting it's time to create the filling. Beat together the cream cheese and icing sugar, then when fully mixed add the Nutella and mix thoroughly

    4. Spread the mixture evenly over the biscuit base, sprinkle the top generously with chopped hazelnuts and put back in the fridge to set for a few hours or overnight - then eat & enjoy!

    We'd love to hear from you if you try out this tasty recipe - use the hashtag #eightandsixteen to share your photos with us!

    Happy baking,
    Erin

    Wednesday 25 June 2014

    DIY Film & TV Quote Banners


    These DIY Film & TV Quote Banners are such a fun project to make, and so effective! Take your pick of your favourite quote - from a film, a tv show, or a book, and make your own personalised banner. You could even make personalised name banners for a loved ones birthday!

    What you need: 1/4 metre calico, 1 sheet black felt, fabric glue or spray glue, 40cm piece of bamboo cane, string.


    1. Start with a rectangle of calico fabric. Create a point at the bottom by folding up the two bottom corners. Press into place.


    2. Cut away the excess fabric at the point and then fold in the side and point edges sides with a 1cm seam allowance.


    3. Stitch around the side and point edges with a 5mm seam allowance. With the wrong side of the banner facing up, fold down the top edge around 5cm and stitch in place. This will create the casing for the cane to hang your banner, so make sure that it fits through the 5cm gap before sewing.


    4. Print out (or draw!) your chosen quote, and cut out each letter.


    5. Pin your letters onto felt and cut out. This spray adhesive is great as it is only permanent once set with heat. This meant that I could glue the paper letters to the felt rather than using pins and then peel them off easily.


    6. Lay out your letters onto the banner and make sure that they are all aligned.


    7. Glue the letters onto the banner. With this spray glue I just sprayed the reverse side of the letters, pressed them into place on the banner and then set in place with an iron for one minute. Fabric glue such as Tacky Glue is also great for this.


    8. Insert a piece of bamboo cane into the casing at the top of the banner, and then tie some string on either side.


    I think these banners are great for home decor and would also make a really special gift. The added geekery of the quotes also make them great conversation pieces :)

    We'd love to hear from you if you give this DIY a go - use the hash tag #eightandsixteen to share your photos with us!

    Skye


    Tuesday 24 June 2014

    Advertise with Eight & Sixteen!

    Our first month is nearly over here at Eight & Sixteen - it's flown by!
    It has been so much fun to share our projects with you, connect with all sorts of creative people, and really start to get across what we're all about.

    As we said in our very first post, we want Eight & Sixteen to be all about creating a community that shares your creative talent too, and so as of next month we will be offering advertising spots in the sidebar.

    As a thank you to everyone for reading so far, six spots will be offered for free on a first come, first serve basis. So, if you're a fellow blogger, small business owner or craft publication and would like to advertise it with us just drop us an email or pop a comment below with your contact details and we will get back to you as soon as we can!

    We will then be offering those lucky six people a discounted rate for the next month, and will also offer a discount to everyone else if you book a spot for three months.

    If you'd like any more information on advertising with Eight & Sixteen, feel free to email us at: eightandsixteen[at]gmail[dot]com

    Erin & Skye

    Monday 23 June 2014

    DIY Challenge: Upcycled Terrariums

    terrariums challenge title

    Today we have the first post in another regular feature here at Eight & Sixteen - DIY challenges!
    In these posts we will both be taking on the same, or similar, projects based around a theme and sharing the results with you in a collaborative post!

    As we are both fans of terrariums for the first challenge we decided to create our own using upcycled containers. Here's what we came up with....

    Erin's Terrarium
    before terrarium
    terrarium after 4

    Although I had originally hoped to find the perfect glass bowl in a charity shop or at a car boot sale I didn't manage to track one down as I was looking for quite a specific shape - one that would fit on my windowsill. Then, on a recent trip to IKEA I found this one tucked away in 'Bargain Corner' for £3 and snapped it up! As you can see from the 'before' photo the container was an ex-display item filled with a variety of rocks, soil, and a few not-so-healthy looking plants.
    I emptied out the container completely to create my terrarium but did manage to salvage a few of the decorative shiny grey pebbles which I mixed in with the other pebbles on the top layer for an extra bit of interest.

    Overall I'm really pleased with how it turned out and how perfectly it fits on my windowsill. I'm already planning to make another one!

    Skye's Terrarium
    I spent a good few hours hunting around charity shops to try and find the perfect bowl for my terrarium. I came across so many different glass bowls, and although I didn't find exactly what I was looking for, this one ticked most of the boxes for me.
    I love the shape and that it has a base to slightly raise it up. The only problem is that it's quite shallow, so I can't have any more than 4 cacti in there. It's worth noting that I think the photo is a little deceiving - the cacti aren't squished too closely together, and definitely have enough breathing room :)

    I'm really happy with the finished result, and can see myself making more of these in the future when I stumble across another bowl that fits the bill!


    We'd love to hear from you if you try out this DIY project - use the hashtag #eightandsixteen to share your photos with us!

    Erin & Skye

    Friday 20 June 2014

    Craft Favourite: Chalk Marker

    You know those products that sometimes you see and think, "huh, what's the point?"... and then you try out said product and realise that actually it's awesome, and then wonder how you ever lived without it?!
    Well, that's the story for me with Chalk Markers. Having started out thinking that a regular stick of chalk would be just fine for an outdoors project, I soon realised after a night of heavy rain that I needed something more substantial.

    This lead me to buying a chalk marker from amazon, and I have to say - it's amazing! It is so much easier to write with than a stick of chalk, has much better definition, and so far (2 months later) it is water resistant.
    This did prove a little tricky when I first started using it as it really doesn't budge; I'd suggest using a pencil to outline your writing first to make things easier. If you make a mistake and wash it straight away it will probably be fine, but after 24 hours this stuff isn't going anywhere!

    The only question now is, how many other objects can I cover in blackboard paint just so that I can write on them?! :)


    Do you have a crafty product that you can't live without? We'd love to hear about it!

    Skye


    Wednesday 18 June 2014

    DIY Upcycled Bookmarks (featuring Marvel superheroes!)

    upcycled bookmarks

    Today's project is one for my fellow bibliophiles! These cute upcycled bookmarks are easy to make as well as completely customisable. They can be made with any paper you like including printed wallpapers like this Marvel superhero one I've used for the tutorial. Here's how to make your own...

    You will need: patterned paper, clear sticky back plastic, felt, ribbon, a ruler, scissors/a craft knife, a sewing machine and a hole punch

    diy upcycled bookmarks 2 eight and sixteen

    1. Start by cutting two strips of your chosen paper, each measuring 5.5 x 19cm

    diy upcycled bookmarks 4 eight and sixteen

    2. Next cut a strip of felt measuring 7 x 20.5cm. As you can see this will leave a thin border around your paper image

    diy upcycled bookmarks 3 eight and sixteen

    3. Cut two pieces of your sticky back plastic the same size as the piece of felt (7 x 20.5 cm)

    4. Take one of your sticky back plastic rectangles and peel off the backing. Place it sticky side up on a flat surface then place the paper face down onto it, followed by your felt

    5. Take the second piece of sticky back plastic and do the same with your other paper image, then stick this onto the reverse of the felt so your bookmark is double-sided!

    diy upcycled bookmarks 5 eight and sixteen

    6. Move over to your sewing machine and use a simple straight stitch to go around the edge of the bookmark securing the layers together

    Tip! Sewing paper may blunt your needles, so for this project you may want to use an old needle or buy a different type that's more suitable for paper projects. It also may help prevent tearing if you use a longer stitch length than you would for fabrics!

    diy upcycled bookmarks 8 eight and sixteen

    7. Punch a hole near the top edge of your fabric and thread through a colourful ribbon

    8. Tie a knot in the ribbon to secure it in place and your bookmark is done!

    diy upcycled bookmarks 10 eight and sixteen

    We'd love to hear from you if you try out this DIY project - use the hashtag #eightandsixteen to share your photos with us!

    Erin

    Monday 16 June 2014

    Recipe: 3 Ingredient Nutella Brownies


    First up in our We love... series this month is a super simple Nutella brownies recipe. These brownies are super simple to make and offer the best of both worlds; the outer pieces are soft and chewy whilst the centre pieces are soft and gooey!

    Ingredients:
    • 280g Nutella
    • 10tbsp plain flour
    • 2 eggs

    (Optional: Flaked almonds to sprinkle on top)

    To make, simply combine all the ingredients together in a mixing bowl, transfer to a greased baking dish and bake for 30 minutes at 180°c.


    We'd love to hear from you if you give this recipe a go - use the hash tag #eightandsixteen to share your photos with us!

    Skye


    Friday 13 June 2014

    Book Review: The Gentle Art Of Quiltmaking, Jane Brocket (2014)

    *Review copy c/o Netgalley, image via goodreads.com

    gentle art of quiltmaking


    Everyday things and sights such as fields of pretty flowers, rows of beach huts, items of clothing and even stamps inspire all the quilt designs found in this book. Each project starts with a short explanation of the idea and inspiration behind the design before moving on to the how-to for the quilt which all include colour photographs of the final piece. My personal favourite of the finished quilts was probably the stamp inspired design as the pattern and colours most suited my taste.

    As well as the wide selection of designs the book is also filled with tips and advice for beginners with the final section covering the basics – from equipment to cutting, preparing fabrics as well as the binding and actual quilting. In addition there are fabric suggestions, measurements and information is given on things such as calculating fabric needs and how to choose a design. However its not just the designs and fabrics that Jane talks tips for, she also has advice on creating the right workspace, a useful addition to the book as lack of space is something that can often put people off taking the plunge and making their first quilt.

    With such a variety of inspirations and patchwork designs plus all the basics covered The Gentle Art Of Quiltmaking has something for everyone and would be a good reference book to have around as well as one to look at for a little inspiration.

    3stars

    Have you read this book? We'd love to hear your thoughts so don't forget to leave a comment or tweet us using the hashtag #eightandsixteen 

    Erin

    Wednesday 11 June 2014

    DIY Tea Towel Cushions


    Hi guys, for my first DIY here at Eight & Sixteen I wanted to share with you a different use for tea towels.
    There are so many cute designs to be found on tea towels these days, it just doesn't seem right to reserve them for bubbly dishes. But, with just two tea towels you can make yourself a pair of cushions like these - here's how:


    1. Take two tea towels, fold them in half lengthways and cut along the fold.


    2. You now have two front and two back pieces for your cushion covers.


    3. Measure the length of your back fabric piece and cut off 1/3.


    4. Flip the two back pieces so that the already hemmed edges overlap by 5cm.


    5. Pin the two pieces together at the overlap and then lay them on top of the front fabric piece. Trim away any excess fabric from the front piece.


    6. Pin your front and back pieces right sides together and sew all four sides with a 1.5cm seam allowance.


    7. Backstitch where the two back fabric pieces overlap for extra strength.


    8. Trim the corners to create a neater point when you turn the fabric out.


    9. Remove the pins from the overlap on the two back pieces and turn the cushion the right way out through the opening. Press all seams.

    Stuff your cushion covers with pads and you're all finished!

    Tips:
    • Buy a slightly larger sized pad than your cover for an extra plump cushion!
    • If you'd like a larger cushion, simply ignore steps 1 & 2, and use whole tea towels for the front and back pieces.


    We'd love to hear from you if you give this DIY a go - use the hash tag #eightandsixteen to share your photos with us!

    Skye


    Monday 9 June 2014

    We Love... Nutella

    It's time to introduce another feature here at Eight & Sixteen that we are both super excited about.
    We love... is a monthly feature that will shine a spotlight on a variety of different things that we love from foods to films and more.
    So for our first feature, it seemed only right to go with one of our greatest shared loves - Nutella!

    Over the next month we will be sharing some pretty tasty recipes with you using this magical ingredient - stay tuned!

    Erin & Skye


    Friday 6 June 2014

    Craft To Learn: Calligraphy


    Welcome to the first instalment in our Craft To Learn series! Every month, we will be sharing new crafts with you that we want to learn, and share our progress with you along the way. First up, it's calligraphy.

    To me, calligraphy is a beautiful form of art.
    It's so unique, so full of expression, and such a great talent to have.
    Handwriting and fonts can be so much fun to play around with, and I think that calligraphy is a perfect example of this.

    I have a dip pen and set of nibs, the "Calligraphy for Dummies" book to hand, and a moleskin gridded sketchbook at the ready.

    I'll post an update soon with what I've learnt, how I'm getting on, and maybe even an example or two!

    Have you ever tried calligraphy? Send me your links if you have examples, I'm always looking for more inspiration :)

    Skye


    Wednesday 4 June 2014

    DIY Stamped Monogram Necklace

    monogram necklace diy 3

    For my first tutorial here at Eight & Sixteen I'll be showing you how to make this simple personalised necklace design - a pretty project to make for yourself or to give as gifts! It's also a great way to practise your basic metal stamping technique before moving on to more ambitious projects.

    You will need: metal alphabet stamps, a stamping block, a hammer, a small blank metal charm (I used a 15mm circle), a black Sharpie, a necklace chain, a small jump ring, jewellery pliers, washi/masking tape
    + optional: a bead, a headpin, round nose pliers


    monogram necklace diy 5

    1. Use washi tape to secure your metal disc in place on a stamping block and mark out where you want the letter to sit

    2. Take your metal stamp, line up with the tape and tap the end with a hammer to stamp on the design. Be careful to keep the stamp upright and still to get a clean stamp and not a wobbly one!

    monogram necklace diy 6

    3. To help the stamped letter stand out more use a black Sharpie to colour over it and then gently rub away the excess colour with a cloth. Repeat this step a few times until you are happy with the colour

    monogram necklace diy 7

    4. If you want to add on a pretty bead embellishment take a headpin, thread on a bead, use jewellery pliers to create a hanging loop and cut off any excess wire

    5. Use pliers to open up a jump ring and thread on both the stamped charm and bead charm plus a necklace chain. Carefully use pliers to close up the jump ring and you're done!

    monogram necklace diy 8

    We'd love to hear from you if you try out this DIY project - use the hashtag #eightandsixteen to share your photos with us!

    Erin


    Related Posts Plugin for WordPress, Blogger...