tabs

es about us es contact es archive es challenge es we love 9 es recipes es pintests es links

Wednesday 31 December 2014

Erin's Five Favourite Projects Of 2014!

diy quilted cobweb coasters halloween crafts
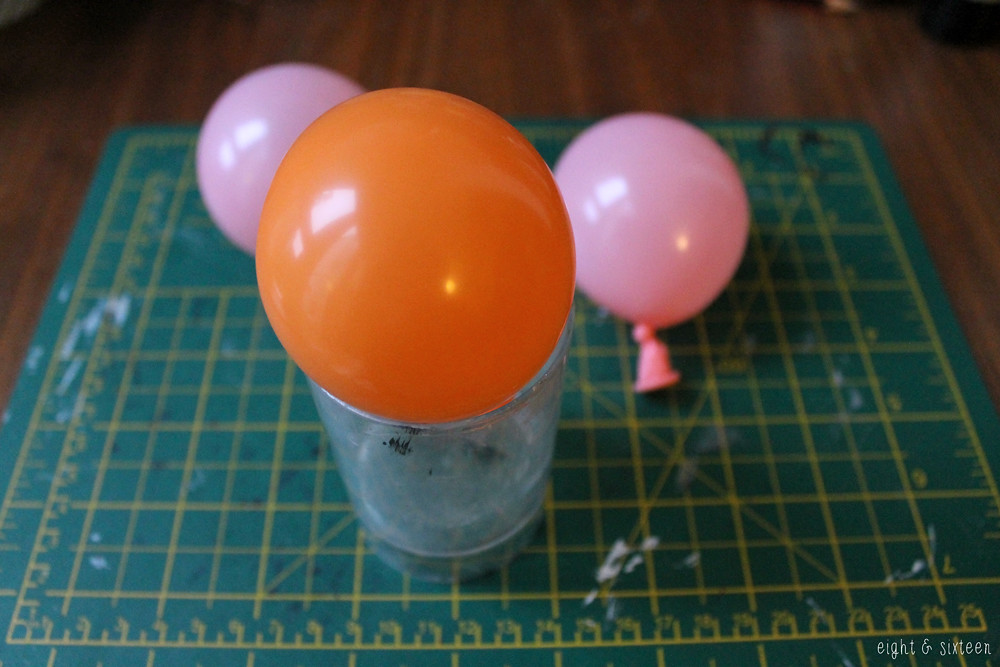
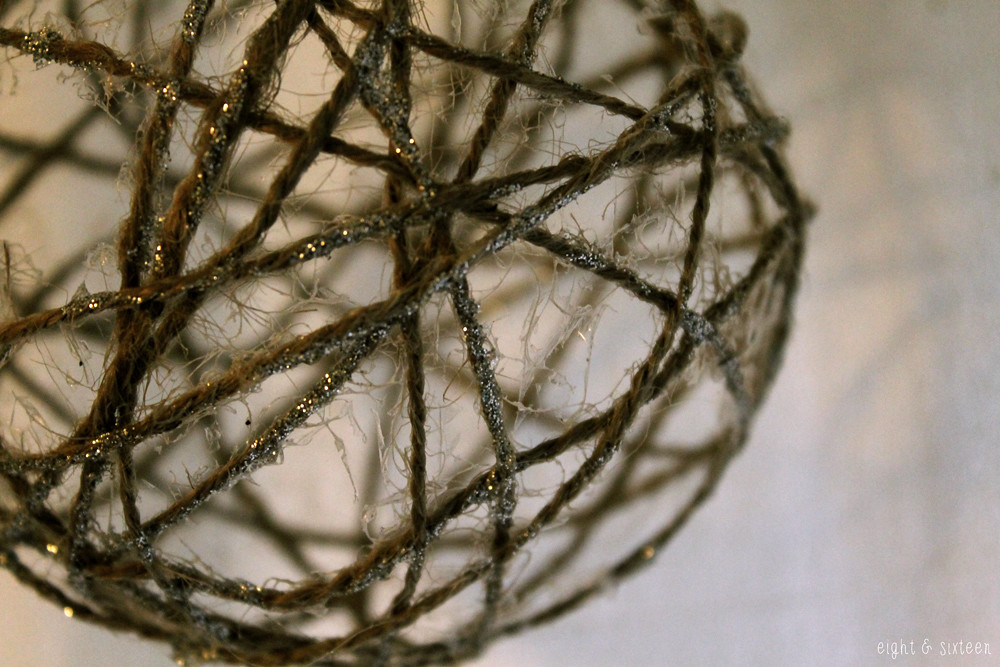
DIY Quilted Cobweb Coasters


harry potter pouch
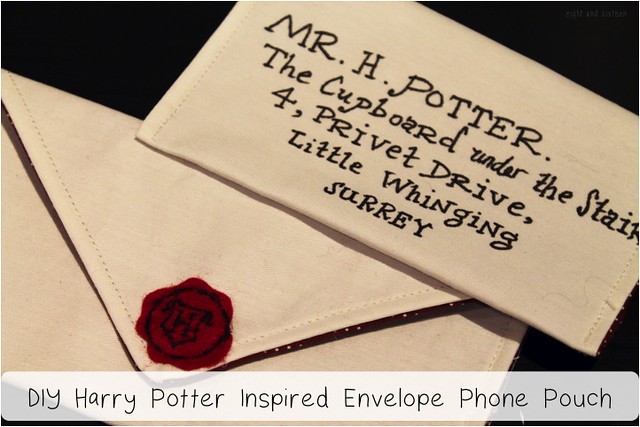
DIY Harry Potter Inspired Envelope Pouch

pintest wire skulls
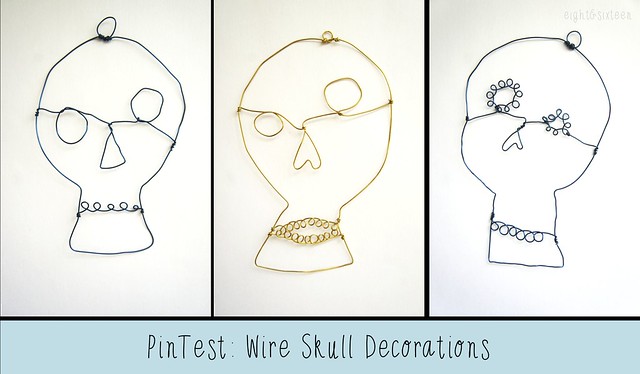
Wire Skull Decorations
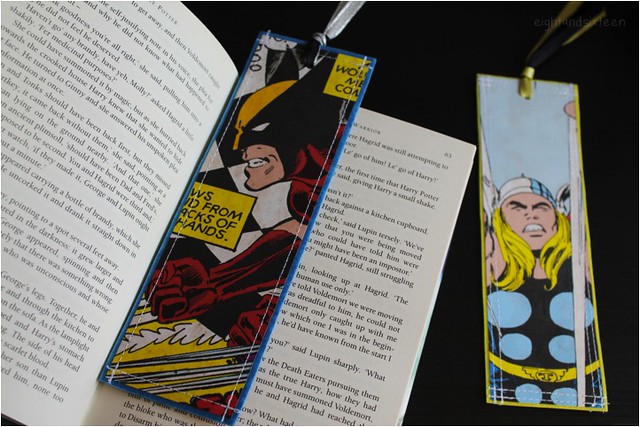
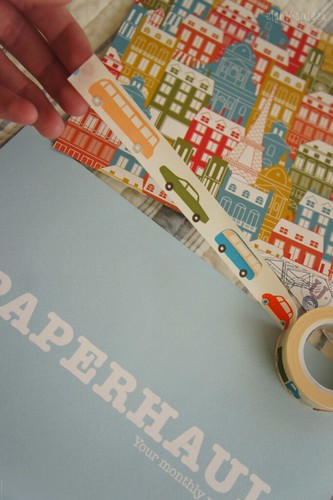
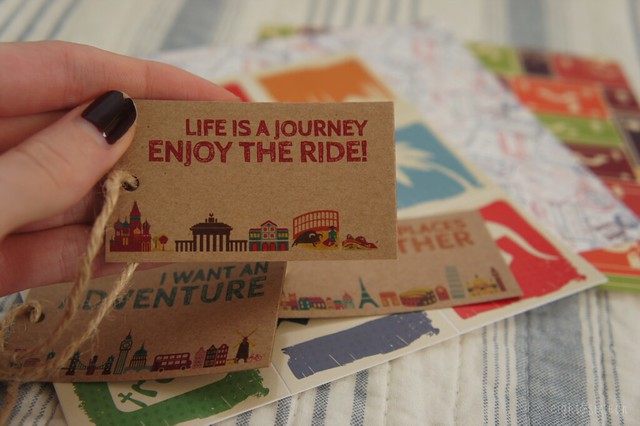

diy upcycled bookmarks 9 eight and sixteen
Upcycled Bookmarks


diy upcycled light bulb snowman ornament by eight & sixteendiy upcycled light bulb snowman ornament by eight & sixteen
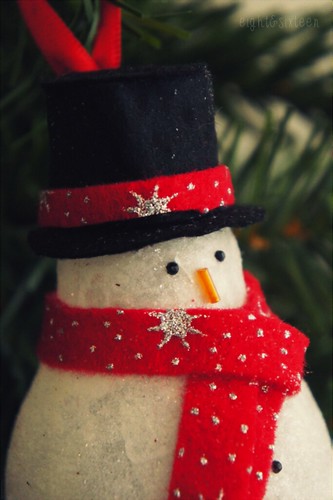
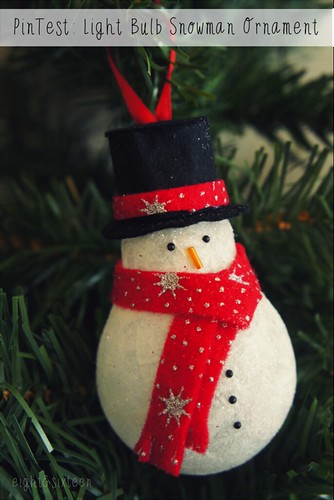
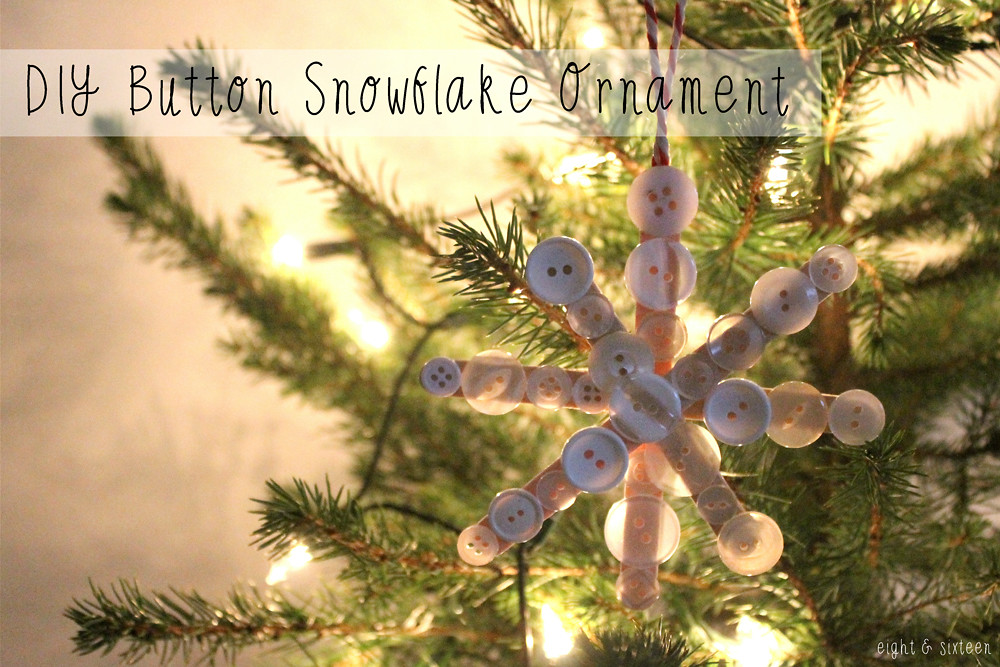
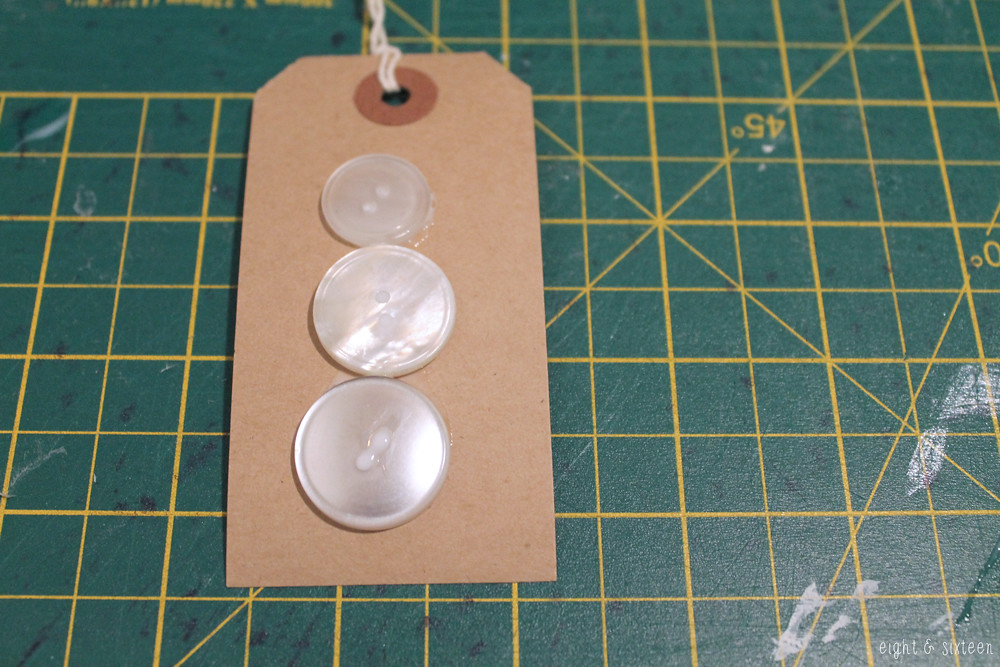
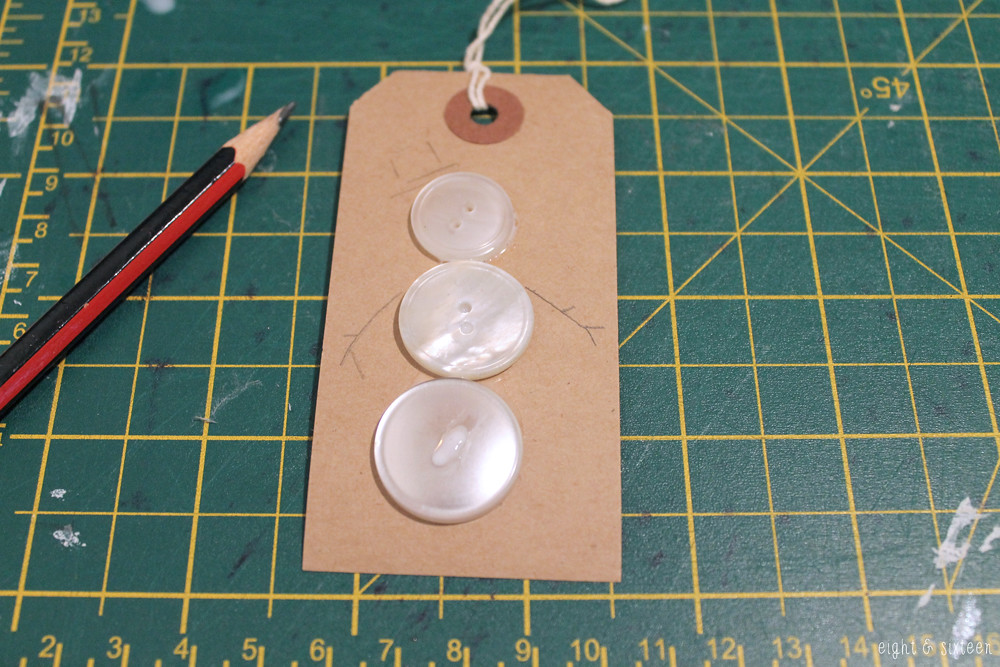
Light Bulb Snowman Ornament

It's been a crazy seven months here at Eight & Sixteen, who would have thought that we would have created so many projects in such a short space of time?! I've really enjoyed working with Skye on this little blog and found it so difficult to choose just five favourite projects. Although it was tempting to opt for all Halloween ones (those are always my favourites to work on!) I eventually managed to narrow it down to the five shown above.

The quilted coasters had to make my top five as not only were they for Halloween but they also required me to learn new skills as they were my first completed quilting project. I learnt the single binding method especially for this project and was really proud of how the coasters turned out. Similarly the envelope pouch was a project that took perseverance to complete. Again having dreamed up the idea I didn't have a pattern or instructions to follow and in the end it took me three attempts to get the finished product looking exactly how I wanted.

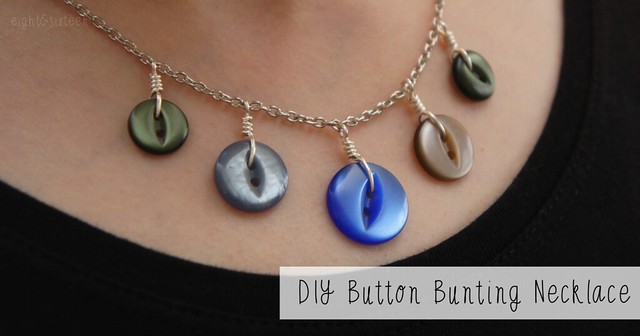
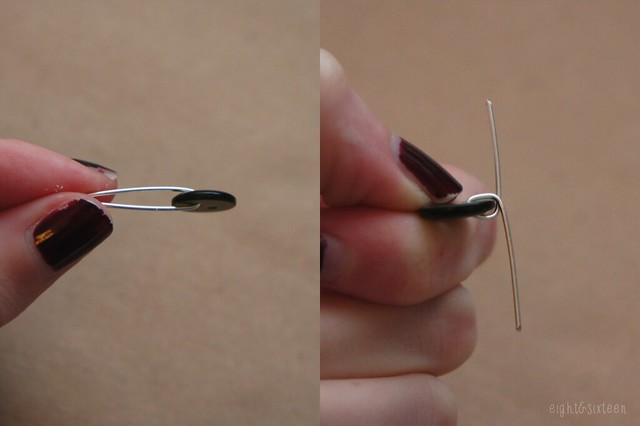
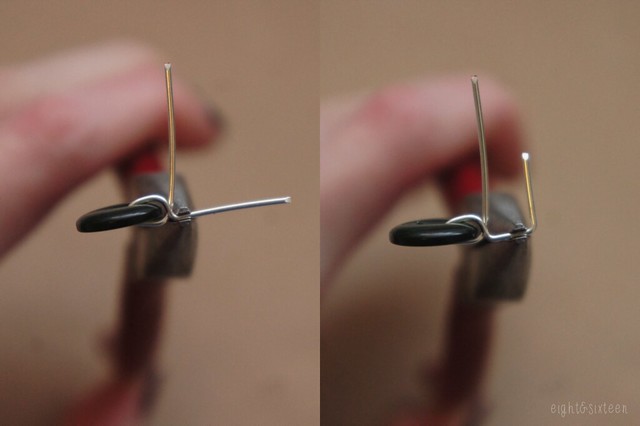
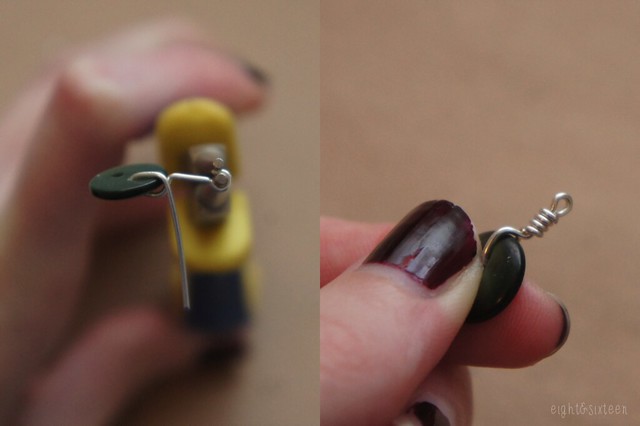
The skulls represent how much I've been really enjoying working with wire this year and not just on jewellery projects. It's such a versatile craft supply and I'm hoping to find more new ways to use it in 2015!

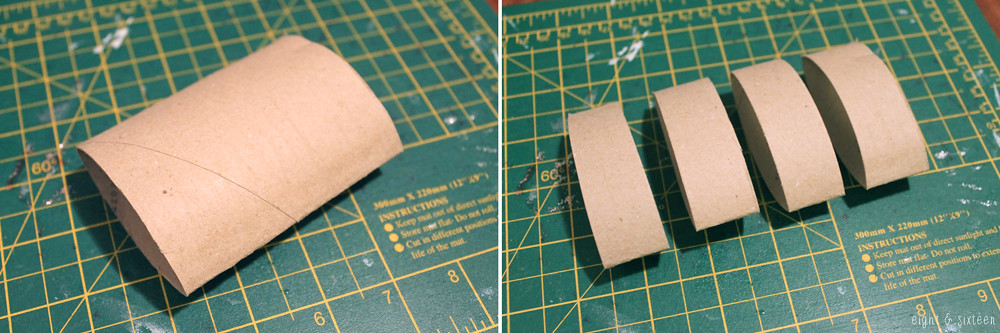
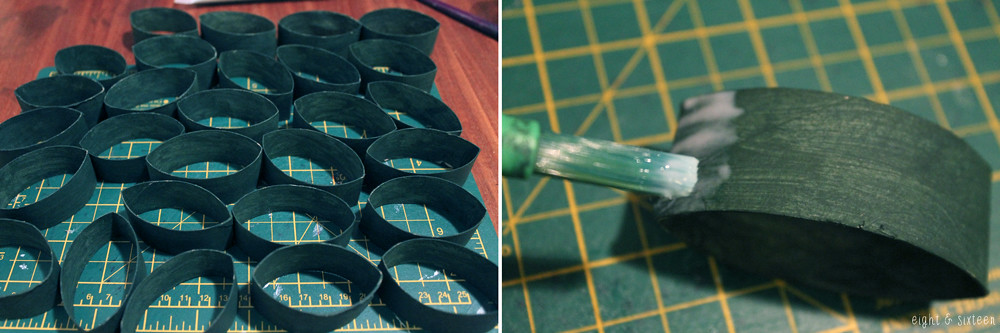
The final two projects on my list are both upcycles, something I've become more and more enthusiastic about this year. I had so much fun making both the snowman ornament and the bookmarks which were one of the first Eight & Sixteen projects I set to work on. I loved seeing the simple light bulb and wallpaper samples transform into new items.

I hope you've enjoyed our 2014 DIYs just as much as we have. If you've got any particular projects or techniques you'd like to see featured in 2015 please do let us know!

We'd love to know what your favourite projects of the year have been - use the hashtag #eightandsixteen to let us know or share your photos with us!

Erin

Friday 26 December 2014

Craft Favourite: Alphabet Stamps


It's been a while since our last Craft Favourite post, and with the festive season coming to an end I've been reminded of just how much I love my Alphabet Stamps.

If you prefer the hand made route (we sure do!), then stamps are perfect for card making, organising and customising. You can buy all sorts of sizes, fonts and sets; the little wooden set above were an eBay purchase, and the larger set were a present years ago from Not On The High Street.

If you add a variety of coloured inks to your collection then even better - metallics can look great to personalise wrapping paper, and bright colours are perfect for birthday cards.
It can take a little practise to get used to working with the stamps, but I've never found wonkiness an issue - in fact, I think it just adds to the charm of the hand stamped look :)


Do you have a crafty product that you can't live without? We'd love to hear about it!

Skye


Wednesday 24 December 2014

PinTest: Hama/Perler Bead Spinning Tops

diy pinterest test spinning tops from hama perler beads

The inspiration for today's PinTest came from various Pins including this one which show how you can easily make your own colourful spinning tops with just a few Hama beads and a cocktail stick - perfect for a Christmas Eve crafting session! I love using these beads as there's so many great little projects you can create with them from simple toys like this to jewellery, decorations and more - the possibilities are endless!

All you need to do to make your own spinning tops is create your design on a circular peg board, cover with ironing paper and iron to fuse the beads together. Whilst still warm, carefully push a cocktail stick through the centre of your beads and trim down the other end to use as a handle.

This quick project is not just simple but is also a lot of fun to make and would be perfect for a rainy day!

We'd love to hear from you if you try out this or any of our other DIY projects - use the hashtag #eightandsixteen to share your photos with us.

Erin

Monday 22 December 2014

9 Wearable Festive DIYs

9 wearable festive diys

1/ Christmas Tree Earrings (via Legendary Beads) - if you want to practise your wire work skills these earrings are the perfect project. Made simply from coils of wire with bead embellishments they're great for beginners.

2/ Snow Globe Necklace (via Tatertots & Jello) - this design takes a classic Christmas decoration and recreates it in miniature to be used as an eye catching necklace pendant.

3/ Icy Earrings (via Epbot) - this idea is perfect for anyone who loves to upcycle as these pretty statement earrings are made from bubble wrap!

4/ Bracelet For Christmas Day (via PandaHall) - if beading is your craft you'll love this festive bracelet made using tiger tail wire and Swarovski crystals.

5/ Quickie Candy Cane Earrings (via All Free Jewelry Making) - another beginner project is these cute candy cane earrings that can be made in no time! Again they are perfect for beginners and don't require too many supplies.

6/ Frosted Snowflake Charm Bracelet (via e-elise etc) - this tutorial uses frosted shrink plastic to create snowflake charms which hang alongside simple beads for a fun festive bracelet.

7/ Ornament Headband (via in-lala-land) - if you want to go for something more quirky this bold headband is sure to turn heads. Made from colourful baubles this one could be perfect for a festive party!

8/ Quilted Christmas Booties (via Fave Quilts) - if sewing and quilting are your favourite crafts you'll love these cute patchwork slippers, brilliant for a handmade gift!

9/ Glitter Christmas Light Bulb Necklace (via Sugar Bee Crafts) - another colourful piece, these glittery bulb pendants are sure to make a statement.

We'd love to hear from you if you give these DIY's a go - use the hash tag #eightandsixteen to share your photos with us!

Erin

Friday 19 December 2014

4 Festive Button DIY's - Roundup!


We hope you've enjoyed our week of festive button DIY's! Here's a roundup in case you missed any of them; why not give them a go this weekend for some last minute festive fun?!

1. Bunting Necklace
2. Gift Tags
3. Flower Brooch
4. Snowflake Ornament

We'd love to hear from you if you give any of these DIY's a go - use the hash tag #eightandsixteen to share your photos with us!

Erin & Skye


Thursday 18 December 2014

DIY Button Snowflake Ornament


Today is the final DIY in our week of button projects - we hope you've enjoyed them!
These decorations are great for the Christmas tree, but could also make sweet stocking fillers or even gift tags for presents!

Note: I collected some lolly sticks to make this project even thriftier, but you can easily find packs of craft sticks to buy if you plan to make lots of decorations.


First you need to glue your sticks together to create your snowflake design. Leave this to dry as you don't want them moving around when it comes to the next step!


Starting with the stick on the bottom, start glueing your buttons into place.
Tip: Use smaller buttons at the centre of the sticks for a better fit.


Continue glueing your buttons onto each stick, finishing with the top stick.


Using a piece of twine or ribbon, create a loop and glue this into place on the back of your snowflake. Hang your decoration on the Christmas tree, and step back to admire your handiwork!


We'd love to hear from you if you give this DIY a go - use the hash tag #eightandsixteen to share your photos with us!

Skye


Wednesday 17 December 2014

DIY Button Flower Brooch

DIY Button Flower Brooch by Eight and Sixteen

Today's button tutorial is for this cute accessory that's perfect for a handmade gift this Christmas! These brooches would make great stocking fillers - just customise the design to suit your friends and family members by using their favourite colours.

You will need: buttons, felt, a brooch back, a pen, scissors, fabric glue + a needle & thread

1. Arrange your 'petal' buttons in a circle on a sheet of felt, draw around them and cut out two of this shape.

Tip! You can choose any buttons that you like for your brooch however I would recommend heart shaped ones as they lend themselves well to creating the button flower's petals. 

2. Next take a needle and thread and sew each of your buttons onto one of your felt shapes until you have your finished button circle. Then sew your centre button.

Tip! You can also make any sized brooch you like - just make sure your centre button is large enough to slightly overlap the 'petal' buttons for a 3D effect.

3. Take your second piece of felt and neatly stitch on a brooch back. Then use fabric glue to attach this onto the back of your first piece of felt, covering up your stitching for a neater finish. Once dry your button flower accessory is ready to wear or give as a gift!

We'd love to hear from you if you try out this or any of our other DIY projects - use the hashtag #eightandsixteen to share your photos with us.

Don't forget to check back tomorrow for another button project idea!

Erin

Tuesday 16 December 2014

DIY Button Gift Tags


I'm pretty sure that most households contain a button jar/tin/box somewhere... right?! These button gift tags are a great way to upcycle those odd buttons, and you can create so many cute Christmas designs really easily as a finishing touch to your presents.


First, have a play around with your design until you're happy with the layout.
Then glue your buttons into position on your gift tag and leave to dry.


Draw on any extra details in pencil - for this snowman I added a hat and stick arms.


Finally, use a sharpie or similar to fill in the pencil details, or try glitter glue as I did for the baubles gift tag.

And that's it - such a simple DIY, but so effective!


We'd love to hear from you if you give this DIY a go - use the hash tag #eightandsixteen to share your photos with us!

Skye


Monday 15 December 2014

DIY Button Bunting Necklace

diy button bunting necklace tutorial by eight & sixteen

With Christmas fast approaching we've decided to share four button projects including gifts and decorations! For the first project of the week I wanted to share this necklace design that I think could be the perfect DIY for anyone looking to give unique handmade gifts this year!

To make your own you will need: buttons, jewellery wire, wire cutters, flat and round nose pliers, an assembled chain (or supplies to make your own)

diy button bunting necklace tutorial by eight & sixteen

1. To make your bunting necklace you will need to turn each of your chosen buttons into a charm. Start with a piece of wire approx. 2" long, thread it through one of the holes in your button and bend in half

2. Use your flat nose pliers to bend out the lengths of wire in the opposite directions, creating a loop around the edge of the button

diy button bunting necklace tutorial by eight & sixteen

3. Take your pliers and bend the wire that sits on the front side of the button up at a right angle - this will be the piece you turn into the loop

4. Move a little way along the wire then add a second bend in the opposite direction

diy button bunting necklace tutorial by eight & sixteen

5. Switch to your round nose pliers and bend the end of the wire around them to create a loop

6. Finally, wrap the other length of the wire around it securing it in place and adding a decorative finish

diy button bunting necklace tutorial by eight & sixteen

7. Once you have all of your button charms, find the centre of your necklace chain and attach on your middle charm. To do this use pliers to gently open up the hanging loop you created, thread through the chain link and close.

8. Repeat this process to add on the remaining button charms making sure to space them apart evenly, and your necklace is done!

We'd love to hear from you if you try out this DIY project - use the hashtag #eightandsixteen to share your photos with us!

Erin

Friday 12 December 2014

DIY Cardboard Tube Wreath


Today's DIY is a super simple festive wreath made from painted cardboard tubes and a few decorative berries. Depending on how many tubes you have to hand you can make this wreath as simplistic or extravagant as you like, and you could also try adding different embellishments such as bows or mistletoe.


To start off, take your cardboard tubes, flatten them and cut them into 4 pieces. If you prefer, you can paint your tubes before doing this, but I didn't want any plain edges showing once they'd been cut.


Paint all of your tubes (inside and out!) and leave to dry.
Once dry, divide up the tube pieces into the 'flower shapes' and start glueing them together. I used a little glue on the points, and then used paperclips to keep the pieces together until dry.


Repeat with all of your tube pieces, and then join all of these flowers into a circle and glue/paperclip in the same way. Leave to dry.
You can then embellish the wreath - I have used decorative berries on wire that I simply wrapped around the centre of each flower.

This wreath will only be suitable for indoor use, but is a great addition to any festive decor and it can be so easily customised to suit your colour scheme :)


We'd love to hear from you if you give this DIY a go - use the hash tag #eightandsixteen to share your photos with us!

Skye


Wednesday 10 December 2014

#PaperHaul - Crafty Creatives New Subscription Box!

* #PaperHaul box c/o Crafty Creatives
PaperHaul Box December 2014 PaperHaul Box December 2014 PaperHaul Box December 2014

#PaperHaul is a brand new monthly box of goodies from the team behind Crafty Creatives. The idea is that you sign up to receive a box of paper treats each month (priced at £10), each with a different theme. We’ll be taking it in turns to review each month’s box and I was lucky enough to receive the first one which spoiler alert; I love!

The theme for December is travel and adventure with a mixture of items including postcards, scrapbooking papers, cards, stickers, gift tags and washi tape - all adorned with bicycles, suitcases and other travel-inspired prints. Although centred around the same theme the items have a good mixture of styles with vintage looking postcards next to bold graphic style stickers - there's definitely something for everyone! To be honest there isn't really anything I don't like in the box so it's hard to pick a favourite item but I think I'd probably have to go with the tags or the cute washi tape adorned with various vehicles.

Not only is the box filled with stationery goodness but it also arrived neatly packaged and well-presented - the items were even tied together using a string which could also come in handy for a project! The box is slim and designed to fit through your letterbox so there's no need to worry about being home when it arrives. The only additional thing I would have liked to have seen included would be a little leaflet or card with information on the theme and the month's items - the brands, why they were chosen etc (similar to those found in beauty subscription boxes) as I'd love to know more about how it all came together - but overall I'm very impressed with the first #PaperHaul box and am looking forward to seeing what next month's theme will be!

If you're looking to treat yourself or a friend you can sign up or find out more about #PaperHaul on the Crafty Creatives website.

PaperHaul Box December 2014 PaperHaul Box December 2014 PaperHaul Box December 2014

Will you be subscribing to #PaperHaul? We'd love to hear your thoughts!

Erin

Monday 8 December 2014

DIY Festive Miniature Bottle Ornaments

DIY Festive Miniature Bottle Ornaments by eight and sixteenDIY Festive Miniature Bottle Ornaments by eight and sixteen

These pretty glitter-filled miniature bottle ornaments are the perfect addition to anyone's decor this season, no matter how much space you have! With just a few supplies they're easy to make and can be customised to suit your colour scheme.

You will need: miniature glass bottles with corks, headpins, flat and round nose pliers, a pin, glitter/beads/sequins, thin ribbon, scissors & strong glue

DIY Festive Miniature Bottle Ornaments by eight and sixteen

1. Fill up your bottles with glitter, beads, sequins or other sparkly items and set aside

2. To hang the bottle you'll need to add wire hoops to the corks. To do this first use a pin to pierce through them vertically - this will allow you to thread through a headpin more easily

DIY Festive Miniature Bottle Ornaments by eight and sixteen

3. Next use pliers to turn the end of the headpin into a hanging loop. Start by bending the wire to the side then use round nose pliers to shape into a loop

DIY Festive Miniature Bottle Ornaments by eight and sixteen

4. Use strong glue to secure a cork into each bottle

5. Cut lengths of ribbon and tie one into a bow around the bottle neck for an extra embellishment. Use another length of ribbon for hanging by threading it through the wire loop and tying a knot

We'd love to hear from you if you try out this DIY project - use the hashtag #eightandsixteen to share your photos with us!

Erin

Friday 5 December 2014

PinTest: Twine Ball Ornament


We have another festive PinTest for you today, and this is another great idea for Christmas tree decorations or decor around the home.
I love the idea of twine decorations and think that the natural look and colour works really well against a Christmas tree draped in fairy lights.

You can find the original Pin here, and here's how I made mine...


Blow up a balloon to the size you'd like your ornament to be - try and keep it small if you plan to hang them on a tree, but you could also try an oversized one to hang from a door frame or lots of little ones to make a garland.


Cover the balloon in cling film - the original pin says that this step is essential, so I didn't take any chances!


Cover the balloon in a layer of PVA glue, and then start winding twine around it to create a criss cross pattern.


Optional: I used glitter glue to cover several areas of the string, but you can leave it plain.

I used excess twine to create a loop at the top of my decoration, but you could also add some ribbon afterwards.
Leave the ornament to dry overnight somewhere secure - I hung mine on the washing line!
Once dry, pierce the balloon and pull it out of a gap in the twine being careful not to squish the ornament out of shape.

This has been a great PinTest for me and one that I can see myself trying again. It's a little messy but the simplicity of it is so worth it for the outcome, and I think that these would be great fun to spend an afternoon making.


We'd love to hear from you if you give this DIY a go - use the hash tag #eightandsixteen to share your photos with us!

Skye


Related Posts Plugin for WordPress, Blogger...