


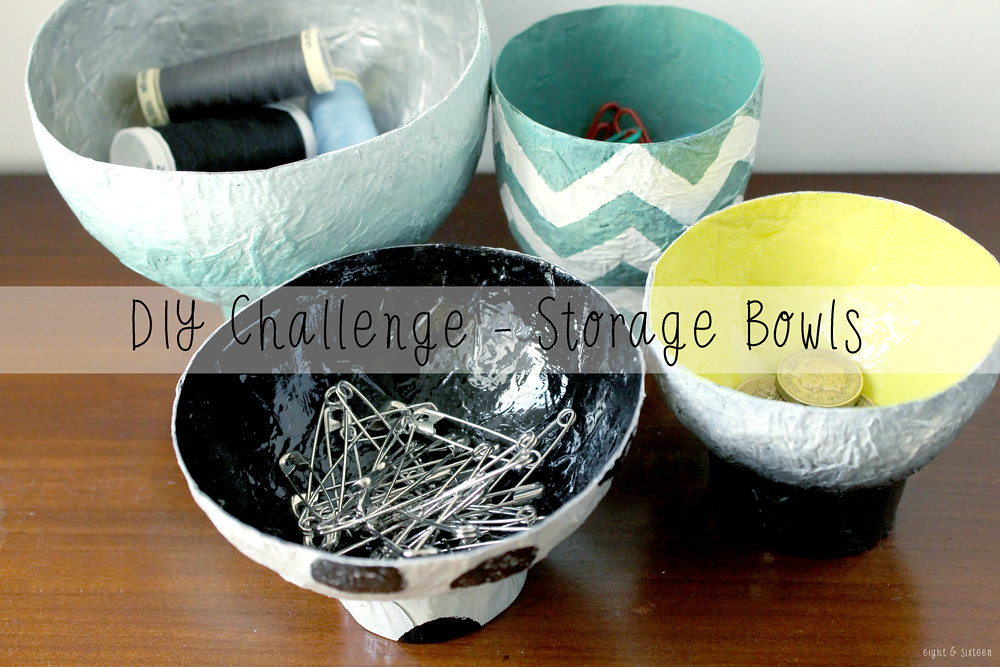
Today we have our second DIY challenge - storage bowls! We both liked the idea of creating bowls for storing our craft supplies, and decided to take on different materials to create them: fabric and paper mache.
Here's what we came up with....
Erin's Storage Bowl
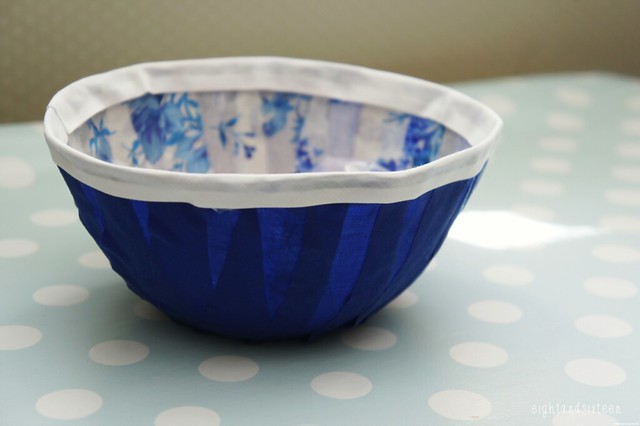
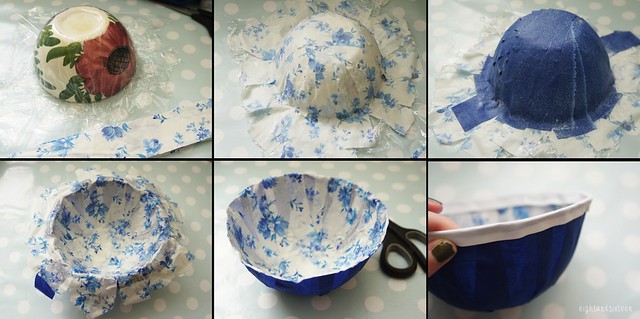
For my project I chose to make a
bowl using fabric. I'd already seen a few of these around on Pinterest
and thought it looked like a great idea! To create it I covered a china
bowl with clingfilm (to use for shaping), cut strips of fabric, coated
them in a mixture of Mod Podge and water and layered them onto the bowl.
I wanted the inside to be floral so I layered these strips on first
face down, then added a layer of blue strips for the outside of the bowl
and left to dry overnight. After removing it from the china bowl and
peeling away the clingfilm the last step was to trim the edges and cover
them with a strip of bias binding for a neater finish.
To be honest I'm not that pleased with how my bowl project turned out. Although the method works well I don't think the fabrics that I chose gave the best results. If I were to have a second attempt at this project I would definitely stay away from fabrics with white backgrounds. As the Mod Podge/water mixture means that the fabrics dry to a slightly transparent finish you can see the colour of the second fabric through any white sections. Perhaps two layers of each fabric would also give a nicer finish however it took long enough to dry with just the two layers!
Skye's Storage Bowls
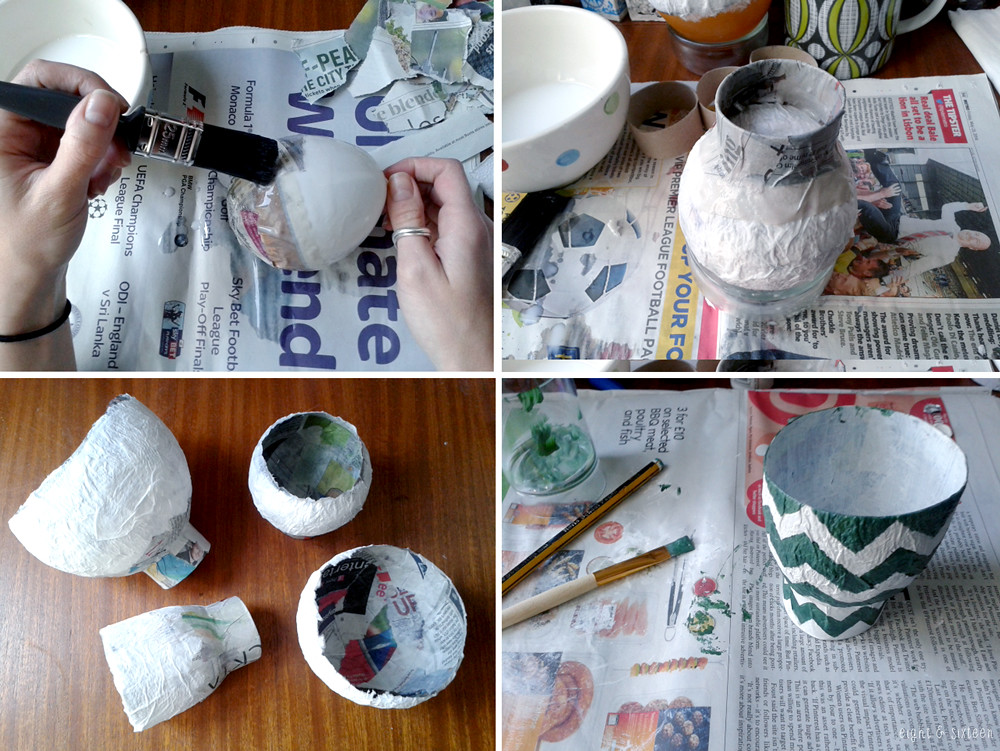

Making paper mache bowls definitely felt like a trip down memory lane for me; Art Attack anyone?! Although this method is pretty easy, it does take a long time as there is a lot of waiting around for glue to dry.
I used 4 different shaped and sized balloons and set to work covering them in strips of newspaper and PVA glue (If you have some old bowls or glasses, these come in handy to prop your balloons in whilst waiting for the layers to dry). In the end I did three newspaper layers, and then added a final kitchen towel layer which gives the textured finish.
I also added bases to the bowls by cutting a cardboard tube into 4 pieces, and attaching it to the bottom of the bowls with more newspaper and PVA glue.
Once the paper mache was completely dry, I burst the balloons and trimmed the top edges to neaten. Then I simply painted each one and added a coat of varnish once the paint had dried to seal everything.
I definitely had fun making these bowls, but I think if I made them again I would be more patient and add a few more layers of paper mache for strength. I have filled each bowl with various supplies, but they are a little flimsy and I think that some extra strength would help them to stand the test of time.
We'd love to hear from you if you try out this DIY project - use the hashtag #eightandsixteen to share your photos with us!
Erin & Skye
These are so cute!
ReplyDeleteStephanie
http://missstephanieusher.blogspot.co.uk/
http://www.bloglovin.com/blog/3436251
xxxx
Thanks Stephanie! :)
DeleteLovvvve these!!! Im so shite at blowing balloons which always puts me off paper mache even though it shouldn't!
ReplyDeleteAhh don't let it Sophie! Grab Callum to help you out ;)
Delete