tabs

es about us es contact es archive es challenge es we love 9 es recipes es pintests es links

Friday 29 August 2014

DIY Revamp - Check & Stripe Mix Shirt


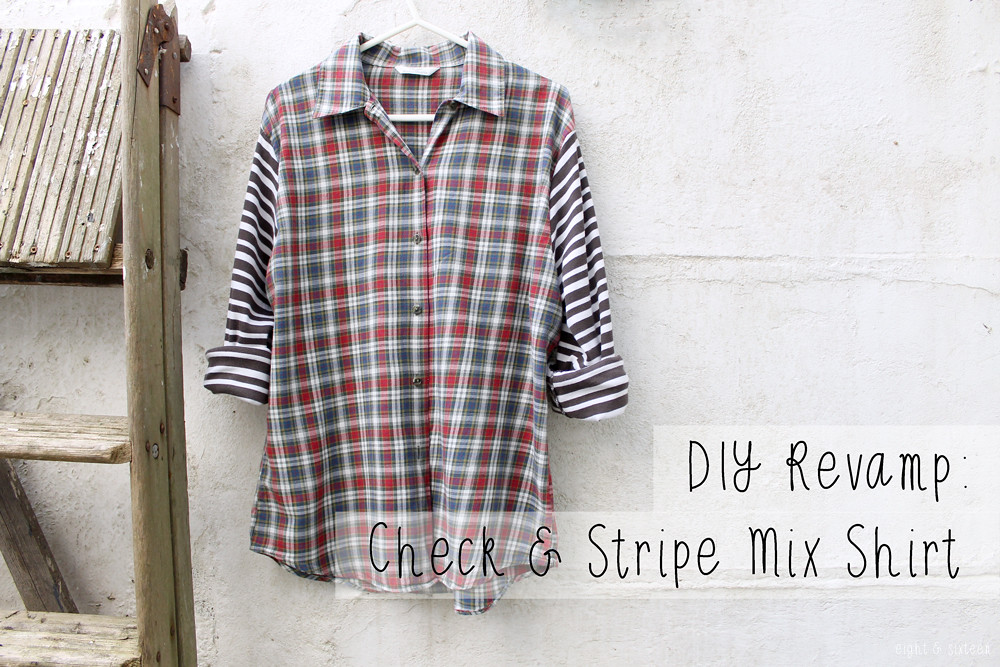
Today I'm sharing another DIY Revamp project, this time taken from Erin's blog E-Elise Etc..
I loved Erin's Denim & Check Mix Shirt when she first posted it in 2013, and though it may not be as popular on the high street now, I decided to do a 90's spin on the idea and get pattern clashing!


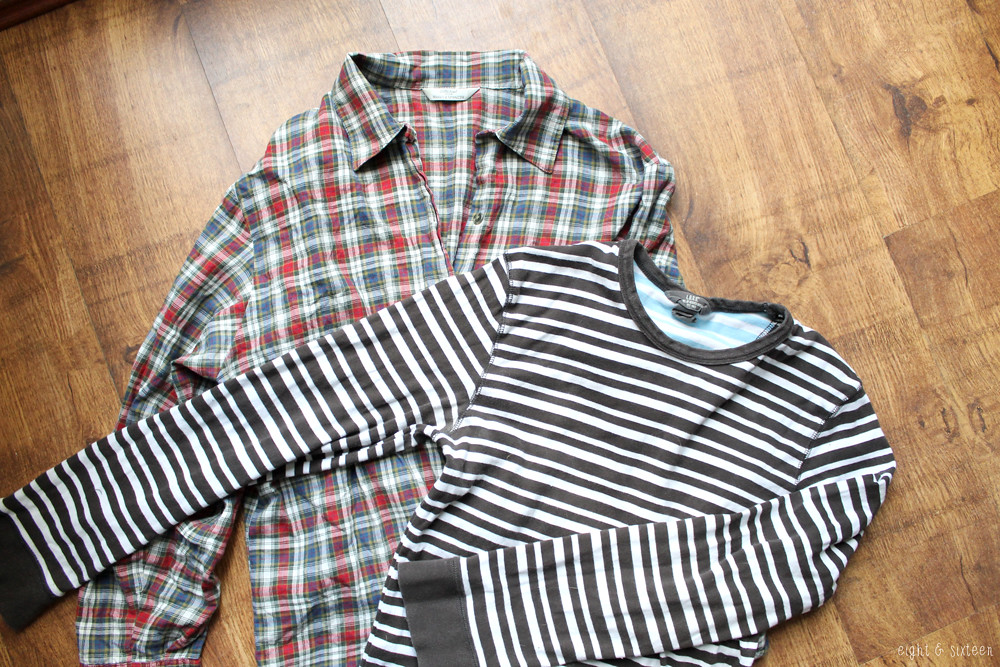
For this DIY you will need two different shirts - colour and pattern choices are up to you, but I wanted to create a grungey mix. Keep in mind the fabrics that you choose - because the striped top I used is jersey, I had to be careful when sewing to stretch the fabric into place, but if you use two cotton shirts this won't be an issue.


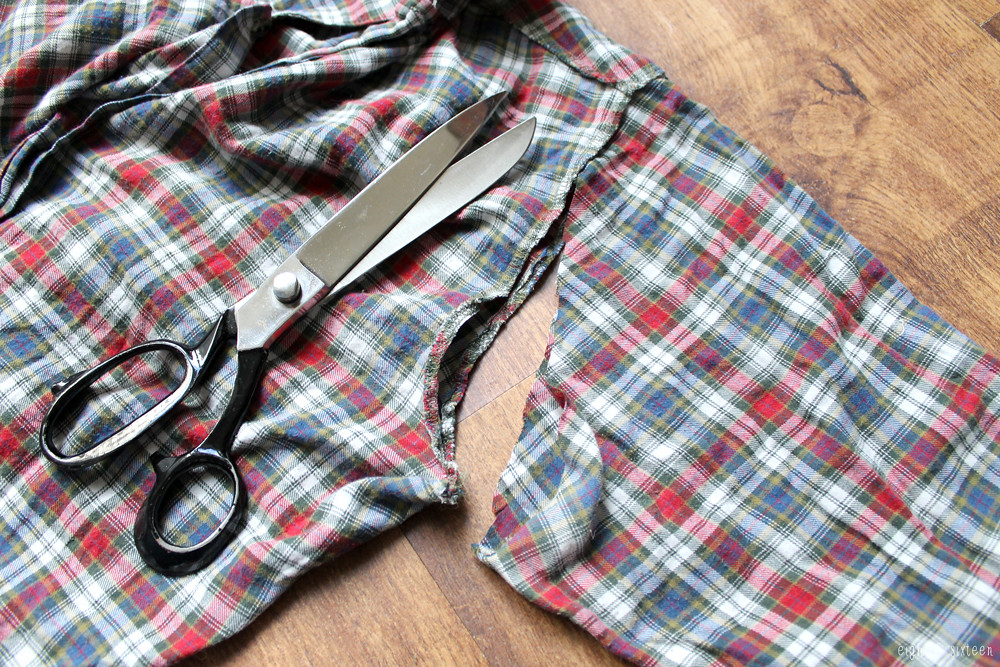
First, cut off the sleeves from both of your tops, being careful to cut as close to the stitching as possible.


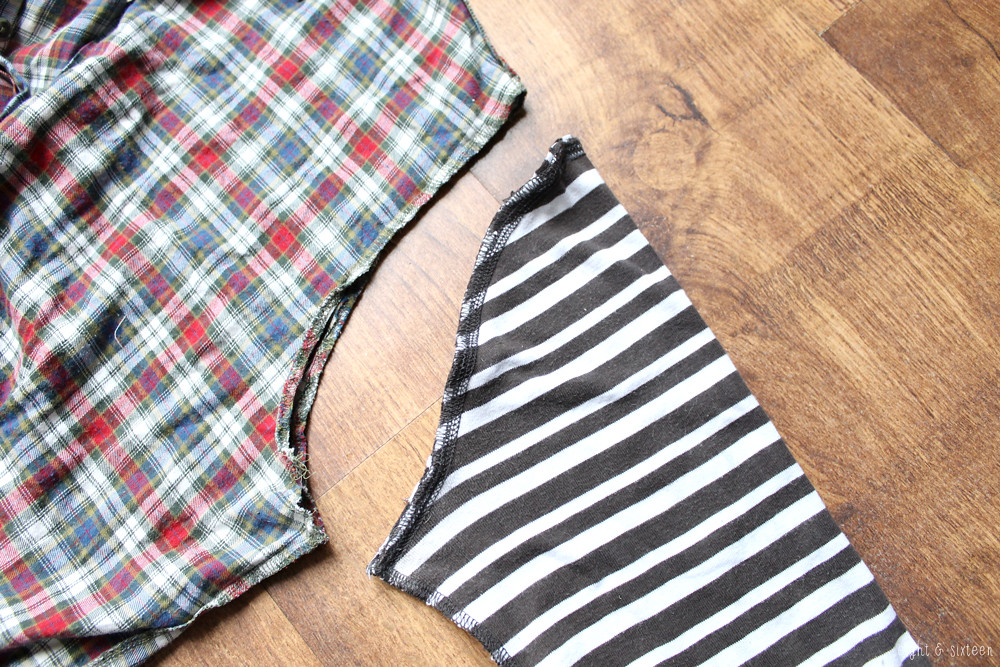
Align your new sleeve pieces to the contrasting armholes and pin into place. Start pinning from the underarm side seam and match this seam to the sleeve seam.
Sew together with a 1cm seam allowance and then zig zag stitch or overlock the edges to finish.

This is a great way to breathe a new lease of life into otherwise unworn shirts - and a great way to get creative with colour and pattern blocking. There are lots of ways to personalise this DIY too, like adding a contrasting pocket as Erin did in her original post.


We'd love to hear from you if you give this DIY a go - use the hash tag #eightandsixteen to share your photos with us!

Skye

Wednesday 27 August 2014

DIY Embroidery Thread Wreath

diy embroidery thread storage wreath crafts sewing eight and sixteen diy embroidery thread storage wreath crafts sewing eight and sixteen

A couple of months back whilst Skye and I were browsing the beautiful fabric selection at Liberty we stumbled across a decorative wreath that was part of the display. The wreath was, of course, sewing themed with cotton reels, pins, buttons, tape measures and ribbon. Although only for decorative purposes the way that the cards of embroidery floss had been added onto the wreath seemed like a great practical storage idea to me and so today’s DIY project was born!

The great thing about storing embroidery thread/floss this way is that you can easily unravel and cut off a piece whenever you need to use it. There’s no threads getting tangled in a storage box and its easy to spot the colour you want quickly without having to rummage. 

diy custom stamped fabrics

You can use whatever fabric you like for the base of the hoop but for mine I created my own custom print with handmade button stamps. Often you will find DIYs that use wine corks as the stamp handle but since I didn’t have any I improvised and used a few twig slices I had left over from another project. In keeping with the crafty theme I glued pretty buttons to the twigs then used an ink pad to stamp on a random design and set aside to dry before moving on to the wreath DIY.

To make the wreath you will need: a polystyrene hoop, fabric, sheets of card, pins, embroidery threads, glue (optional)

diy embroidery thread storage wreath crafts sewing eight and sixteen

1. Cut your chosen (or hand-stamped!) fabric into strips about 3" wide and wrap around your polystyrene hoop making sure not to leave any gaps. Attach in place with a dab of glue or small dressmaking pins on the reverse side

diy embroidery thread storage wreath crafts sewing eight and sixteen

2. You can buy readymade cards to wrap your threads onto or you can make your own. To do this create a template that looks something like the one above and cut out from a medium weight card

3. Cut two diagonal slits into one edge of the card to secure the ends of the thread in place and wrap away!

diy embroidery thread storage wreath crafts sewing eight and sixteen

4. Pin the wrapped cards onto your wreath & add a loop of ribbon onto the reverse side if you wish to hang it up. As the hoop isn't heavy a pin should hold it in place fine!

We'd love to hear from you if you try out this DIY project - use the hashtag #eightandsixteen to share your photos with us!

Erin

Tuesday 26 August 2014

Advertise With Us In September!

If you run a creative business or blog and would like to sponsor Eight & Sixteen throughout September then we would love to hear from you! Although Eight & Sixteen is still a very new venture, we have been overwhelmed with your support so far and are loving every minute of what we're building here.

We are currently offering buttons swaps for up to two months and discounted rates on paid ads if you book a spot with us for two months rather than one. You will also be featured in a spotlight post on our advertisers during the month as well as #ff on Twitter.

We've loved having some of our creative friends and businesses in our sidebar this month, and you can find out more about them all HERE.

If you'd like any more information on advertising with Eight & Sixteen, feel free to email us at: eightandsixteen[at]gmail[dot]com or just pop us a comment below.

Erin & Skye

Monday 25 August 2014

5 Five-Minute Back To School Washi Tape Projects!


One of the most versatile supplies in any crafter's collection has to be washi tape. There are endless uses for this brightly coloured craft essential, and it's a great way to get a quick craft fix.
Here are five washi tape projects that only take 5 minutes and will make back to school prep more fun!

washi pens

Decorated Pens & Pencils
An essential that can sometimes look pretty plain and simple is your pen and pencil collection but with just a few strips of washi tape you can add a pop of colour to your desk or pencil case! - E


Colour Coded Notebooks
If you've got lots of different notebooks for different subjects or tasks, why not colour co-ordinate them with washi tape? You could cover the whole front cover of your books or simply apply a few strips to the spine. - S

washi bookmarks

Bookmarks 
To make these bold bookmarks I used an old piece of thin card packaging cut into rectangles. I layered on strips of washi tape diagonally creating a pattern and after trimming off the excess tape I finished off the bookmarks using a hole punch and some ribbon - E


Paperclip Flags
Paperclips are great for keeping track of any loose sheets or bookmarking a particular page, and using washi tape strips to create these cute flags will make them stand out even more. - S


Pen Pots
Pen/pencil pots are essential if you want to keep track of all of your stationery, and a great way to create your own personalised pots is to cover old tins or in this case a porridge pot. Make sure you rinse out your chosen pot and then get sticking! - S


We'd love to hear from you if you give these DIY's a go - use the hash tag #eightandsixteen to share your photos with us!

Saturday 23 August 2014

Friday 22 August 2014

Buy Or DIY - Three Ways To Add A Pop Of Colour To Any Room

add a pop of colour to any room
For this post I wanted to try out something new and talk DIY-able home decor and today I'm looking at simple ways to add a pop of colour to any room - perfect if you want to change things up but don't want to completely redecorate. Inspired by the products shown above, here are three ways you can instantly update and refresh your home.

1. Glass Jars
Recently I've seen loads of these coloured glass jars popping up all over the high street. There are some beautiful options out there to buy from stores like H&M, Zara and Next but it's also easy to make your own version, recycling food/candle jars with this simple trick... use Mod Podge and food colouring to tint the glass! I tested out and shared this technique on my blog last year - here's a link to the tutorial if you want to try it out!

2. Garlands
Although generally associated with summertime parties and festivals, bunting and garlands can make a pretty addition to any room all year round. There are tons of tutorials out there for various styles so you'll definitely be able to find one that suits your taste. Paper, wool, fabric and felt all work well for this project so you can really get creative and recycle some otherwise unwanted supplies.

3. Picture Frames
Most of us have at least a photo or two out on display and these boldly coloured picture frames are a great way to make them stand out. Why not upcycle an old plain wooden frame with a lick of paint - you could even dig out those half-used tester pots lurking in your craft stash! Alternatively cover frames with bright patterned fabrics and tie in with the rest of your decor by making matching cushions.

Where to find the items featured above:

We'd love to hear from you if you try out any of these ideas - use the hashtag #eightandsixteen to share your photos with us!

Erin

Thursday 21 August 2014

Personal Planner Giveaway!

*Giveaway now closed*


Today we're super excited to share with you our first ever giveaway here at Eight & Sixteen! We absolutely loved picking our very own Personal planners (you can read our reviews HERE) and we've teamed up with Personal Planner to offer two lucky winners either a Wall Planner or Personal Planner for themselves!

To enter, simply use the Rafflecopter form below. The competition is open for two weeks and is open to UK residents only. Good luck :)


Erin & Skye


Wednesday 20 August 2014

DIY "The Grim" Tealeaves Mug Inspired By Harry Potter


Here is our final DIY in the latest We love... series; a Harry Potter inspired "The Grim" tealeaves mug.
Sharpie pens are a great way to personalise crockery, and this iconic design from Harry Potter is sure to give your friends a little scare when they finish their tea!
Quick and easy to do, this DIY can be totally customised; why not try the famous Platform 9 3/4 sign, the Deathly Hallows symbol, or even a Gryffindor scarf wrapped around the mug.


1. Take a clean plain mug and Sharpie pens in black and brown.


2. Draw on your design - even though it's a little fiddly drawing inside the mug, simply dotting the design on worked really well and allows you to build up the image slowly. Plus, the tealeaves design means that it doesn't matter if you make a mistake - just work over it and see it as a large area of tealeaves!
I used the brown Sharpie to start with, and then built up layers of black over the top - this is optional but just adds a little more texture to the design.

Once you're happy with your design, place the mug in a cold oven. Turn the oven to 170°c and bake the mug for 30 minutes. Turn the oven off but leave the mug inside until the oven has completely cooled. Repeat this process again.

Tip: I would advise only washing the mug in warm soapy water and not a dishwasher to keep the design looking sharp!


We'd love to hear from you if you give this DIY a go - use the hash tag #eightandsixteen to share your photos with us!

Skye


Tuesday 19 August 2014

Personal Planner: Review & A Giveaway!

If you’re anything like us you love a good new notebook or diary but often find yourself wishing you could change the layout or find one that starts in the month of your choosing... if this sounds like you then we think you’ll love Personal Planner!

With us both running two (in Erin's case three!) blogs on top of everything else a diary is a must have, but it can be really hard to find a pre-made diary that can cater to our specific needs, and this is where Personal Planner come in.
These cute, handy and high quality planners are completely customisable and are packed with tons of great optional features. Here's what we came up with when we were let loose on the website!

Erin's Planners*
personal planner review eightandsixteen

For my notebook planner I chose to use one of my own photographs on the cover instantly making it a one of a kind! For the inside layout there are four different options so you can tailor it to suit you. I think these little notebook planners would be great as general day-to-day dairies however I have been using mine as a sort of ‘blogging to-do list’, noting down little tasks I need to remember to get done each day. So, I opted for landscape sections for the weekdays with smaller sections assigned to the weekends. For the back section of the planner you can choose from a variety of options including square/ruled/blank pages, sheet music, colouring pages, sudoku, maps, yearly calendar overviews and more!

Most of all I really loved being able to choose how I wanted almost all of the planner elements to look. From the cover to little features such as space to record your workouts or the weather and even the colour of the elastic closures and handy detachable rulers, you can easily create something that’s unique to you and your lifestyle.

personal planner review eightandsixteen

Similarly the wall planner is also fully customisable although this time I opted for one of the pretty pre-made designs for the cover and page details. The best feature of the wall planners has to be the fact that you can add multiple columns each with their own title and image. As I’m using the planner for blogging I assigned each blog I write for it’s own column and have been using post-it notes to give me an overview of my upcoming schedule when I’m away from my laptop. Not only is this design great if you run multiple blogs but it would also be brilliant as a family calendar as each person could have their own column!

Skye's Planners*

Just like Erin, I chose to use one of my own photographs for my Personal Planner. I love the option to do this as it instantly makes the diary feel like mine, and it definitely makes me smile when I see it!
For my diary I wanted to be able to create something that could act as both a personal diary and a blog planner. I checked out each template option on the website to see which layout I thought would work best for this and in the end I went with a vertical weekly layout and added the option to have half of each day lined and half left plain. This means that I can jot down all personal bits in the ruled sections at the top of each day, and then I have the bottom half of the day to jot down anything blog related. This layout is already working brilliantly for me!
I then chose squared and blank paper for the remaining pages at the back to be used as ideas/doodles pages and also added a few pages for addresses as I really like to have those in a diary.

I completely agree with Erin about how great a Personal Planner is if you want to create something unique. There are so many options to choose from to make sure that you are creating something completely personal to you, and I think these would also make a really lovely gift!


For my Wall Planner, I decided to keep it solely blog related, so added two columns for each blog. I love the fact that you can add a little photograph to each column - a small detail, but one that really makes this planner stand out. So far I have been writing in all planned blog posts that I have, and then noting in what I have to get done on weekends/evenings and then highlighting the to-do's. I love the way Erin has used post-it notes on her wall planner! The Wall Planner is a great way to see at a glance what I need to get done - in all my excitement with Eight & Sixteen I've noticed a lack of posts on my own blog now that I've started filling out the planner. Hopefully this means I'll be able to keep a closer eye on things from now on!


We'd love to know what you think of our planners, and be sure to check back in the next few days as we will be launching an exciting giveaway in collaboration with Personal Planner!

Erin & Skye


* These planners were kindly sent to us to review, all views and opinions are our own.

Monday 18 August 2014

Recipe: Golden Snitch Truffles Inspired By Harry Potter


For our We Love... Harry Potter series, we knew that a recipe was a must have. There are endless paragraphs in the books that leave your mouth watering with all the magical treats on offer, so it seemed only natural to try and re-create that magic.

This recipe was found via Pinterest (you can see the original recipe here) and as soon as I laid my eyes on these truffles I couldn't wait to give them a go.

I couldn't find any gluten free edible gold glitter powder, so I had to use the Onken gold shimmer spray for the whole recipe, but it worked really well and I was pretty impressed.
I also halved the recipe - here are the measurements I used to make 12 truffles:

• 120g milk chocolate chips
• 85g whipping cream
• 1 tbsp vanilla extract
• 45g cocoa powder
• 50g dark chocolate


First, you need to whip your cream and vanilla extract together to form stiff peaks and then fold this into your melted milk chocolate. Pop into the freezer for about 45 minutes, then mix in the cocoa powder and create your truffle shapes.


Use the shimmer spray to cover your truffles all over. Place these onto a separate plate and then pop into the fridge.
Then you need to melt the dark chocolate for the snitch wings. Using a piping bag, start drawing out the wings onto a sheet of baking paper.


For 12 truffles I needed to make 24 wings, but I made about 30 in case any broke (they did!). Pop this sheet into the freezer for a few minutes to set, remove and spray with the shimmer spray, and then return to the freezer to set for 10 minutes or so.
Take your truffles from the fridge and wings from the freezer, and then stick the wings to the truffles. The chocolate melts super quickly so it's fiddly but also quite easy to get the wings in place. Repeat with all of the truffles and then step back to admire your handiwork!

These are some of the tastiest truffles I've ever made, and definitely the most magical - I think this recipe would be great for a Halloween party!


We'd love to hear from you if you give this DIY a go - use the hash tag #eightandsixteen to share your photos with us!

Skye


Friday 15 August 2014

Craft Favourite: Frixion Pens


The next product to feature in our Craft Favourite spotlight is the Pilot Frixion pen.

These pens are an absolute firm favourite in both of our books, and our craft stashes will never be without them! The beauty of the Frixion pen is that the ink is erasable - as you might have guessed - by friction. This means that on paper you can use the top end of the pen to rub the ink away, and on fabric you can erase the ink using an iron.

I personally cannot craft without a Frixion pen now - from marking quilt lines on a quilt, to notches on a dress pattern, or measurements on a paper craft, these pens are just so darn useful!


Do you have a crafty product that you can't live without? We'd love to hear about it!

Skye


Wednesday 13 August 2014

DIY Wands (Harry Potter Inspired)

wands diy tutorial harry potter inspired crafts

Today's DIY project is one I've been meaning to try out and share for at least two years after seeing this awesome version from majann on deviantART. Although I eventually got around to trying out the idea back at the beginning of the year I never actually shared the results on my blog. So, when Eight & Sixteen came along and we decided to do a We Love... feature on Harry Potter I knew it would be the perfect time to share this DIY!

To make your own wand you will need: a wooden chopstick, a glue gun, small beads, acrylic paints, a paintbrush & sponge brush

wands diy tutorial harry potter inspired crafts

1. Grab a chopstick, your glue gun and a large wooden bead. Attach the bead onto the end of the chopstick using hot glue - this will act as the base of the handle of your wand - and leave to dry before moving on to step two

2. Carefully apply layers of hot glue onto the chopstick, building up a textured surface and handle shape. Whilst the glue is still warm you can manipulate it by twisting and tilting the chopstick to get the glue to drip where you want it to sit

3. Whilst the glue is still warm you can also add on small beads or twine to create a more textured surface. As the glue will still be hot to the touch remember to be careful not to burn your fingers! I used some craft tweezers to gently push the beads into the glue to keep them in place

4. Once you're happy with the shape and texture of the wand set aside to dry fully. You can stand the wand in a glass jar or something similar whilst it is drying to avoid it sticking to your work surface

wands diy tutorial harry potter inspired crafts

5. Now it's time to get painting! Use acrylic paint to add on a base coat or two in a traditional colour such as brown and set aside to dry

6. If you want to create a more textured looking surface on your wand and give it a 3D effect use a sponge brush to lightly dab on a second colour - metallics work really well for this! Again, set aside to dry fully and you're done!

wands diy tutorial harry potter inspired crafts

As you can see from the photographs I experimented with both different textures and colours. I also tried out two different types of glue gun - one standard and one with a fine point nozzle (which I often use for more intricate jewellery crafts). As you can see the standard glue gun works best for this project as it makes it much easier to build up a proper handle shape on the chopstick.

The great thing about this project is that no two wands will turn out the same - just experiment, be creative and see how it turns out!

wands diy tutorial harry potter inspired crafts

We'd love to hear from you if you try out this DIY project - use the hashtag #eightandsixteen to share your photos with us!

Erin

Tuesday 12 August 2014

Meet Our Friends... Introducing August's Sponsors

sponsors

Welcometo our second sponsors post where we introduce you to the lovely people you can find in our sidebar this month!

Below you will find a bit more information about each of the sponsors as well as both their social media and business links. Of course we couldn't introduce this lovely bunch to you without also including our top picks from their websites! Keep reading to find out more...

-------------------------------------------------------------------------------------------------------------------------------------------------------  


locketz

Locketz With Love

We love Amber's online store full of cute little home decor and jewellery pieces! Our top picks are: the Hanging Owl Tealight Holder (£7.45) and the cute Pirates Of The Caribbean Keyring (£3.45)
Here's a little introduction to Locketz With Love from Amber herself...

"I have always been artistic from a very young age but I first started Locketz with Love when I was around 13 making jewellery as a hobby and to make some pocket money. As the years went on, Locketz with Love grew and became more refined, now selling handmade gifts, bags, jewellery, interiors and accessories. My background in marketing and design helped to develop Locketz with Love into what it is today and now I am successfully launching whole collections of handmade work to go on my very own website.

I am a lover of all things crafty and artistic and at first found it difficult to narrow my focus down to a particular group of products. In my studio (aka garage) in Great Dunmow, you can find all sorts of treasures however my ultimate love is fabric and beads which is reflected in the work I do for Locketz with Love."


Social Media Links - Facebook | Twitter
Business Link - Shop

------------------------------------------------------------------------------------------------------------------------------------------------------- 


water

Water Painted Dreams

We love Hayley's variety of content including everything from books to beauty, personal style and most recently university prep! Our top picks are: her monthly reading wrap up series and this DIY paper blogging calendar for those who aren't ready to completely switch over to digital!
Here's a little bit more information about Hayley's blog ...


"Hello everyone! My name is Hayley and I'm a chemistry student from Edinburgh. When I'm not blowing things up (just kidding) I like to blog about books, fashion and crocheting! On my blog you'll find lots of book reviews, OOTDs, hauls, crafty posts, recipes. Etc etc! I try to keep my content as varied as possible so there's something for everyone. You'll also see lots of photos of my faithful sidekick, Batdog."

Social Media Links - Blog | Facebook | Twitter | Instagram

------------------------------------------------------------------------------------------------------------------------------------------------------- 


hugs

Hugs Are Fun

We love Rebecca's blog on all things crafty as well as her cute and quirky modern cross stitch patterns available on Etsy! Our top picks are: the Vintage Camera Cross Stitch Pattern ($5) and pretty Oval Bamboo Embroidered Pendant Necklace ($35)
Here's a little bit more information from Rebecca...

"Hugs are Fun was born from a desire to create new and modern cross stitch designs and has expanded from there! I still sell cross stitch patterns but I have also turned my focus to other crafts, lately embroidery and English paper pieced quilting are my favorites!

I blog about all the different projects I experiment with and occasionally share free cross stitch patterns and tutorials!

If I'm sitting then I'm probably stitching something, so I figured I might as well share what I make!"
 

Social Media Links - Blog | Facebook | Twitter |
Instagram
Business Link - Shop

------------------------------------------------------------------------------------------------------------------------------------------------------- 


landp

From L&P To English Tea (And Back Again)

We love Anjali's real mix of posts, our top picks are: her Auckland Adventures series and her amazing selection of Nail Art Posts
Here's a snippet of what you can expect to find over on Anjali's blog...

"I'm Anjali and I blog at From L&P to English Tea (And Back Again). I started blogging when I moved from New Zealand to England, but have kept up with and fallen in love with it ever since. While I'm back home in NZ now, I still blog, and I'm still loving it. You can usually find me posting about books, movies, travel (near and far!), DIY, photography and my rather large Harry Potter obsession."

Social Media links - Twitter | Pinterest | Facebook | Instagram
Business Link - Etsy

------------------------------------------------------------------------------------------------------------------------------------------------------- 

mrs m

Made By Mrs M

We love Kate's gorgeous digitally printed fabrics, our top picks are: Streets In The Sky Fabric (£32) and these Fabric Covered Buttons (£3.50)
Here's a little more info about Kate and her Etsy store Made By Mrs M...

"Kate studied Fashion & Textiles in the mid 1990's, only returning to the world of art and design after many years working in the City of London. Her work is inspired by life in the city, and in particular the architecture and textile design of the 1950's.

Kate's primary focus is her fabric designs, however she also works with ceramics, cross stitch and other media as well as exhibiting her textile art across the UK. Kate runs an increasingly popular art, craft and design blog, also entitled Made By Mrs M"

Social Media Links - Twitter | Facebook | Instagram | Pinterest
Business Links - Etsy | Folksy 

------------------------------------------------------------------------------------------------------------------------------------------------------- 

Thank you to all of or August sponsors - we hope you've enjoyed meeting them!

If you run a creative business or blog and would like to sponsor Eight & Sixteen in September then we would love to hear from you! Just drop an email to eightandsixteen@gmail.com and we will get back to you soon!

Erin & Skye

Related Posts Plugin for WordPress, Blogger...