


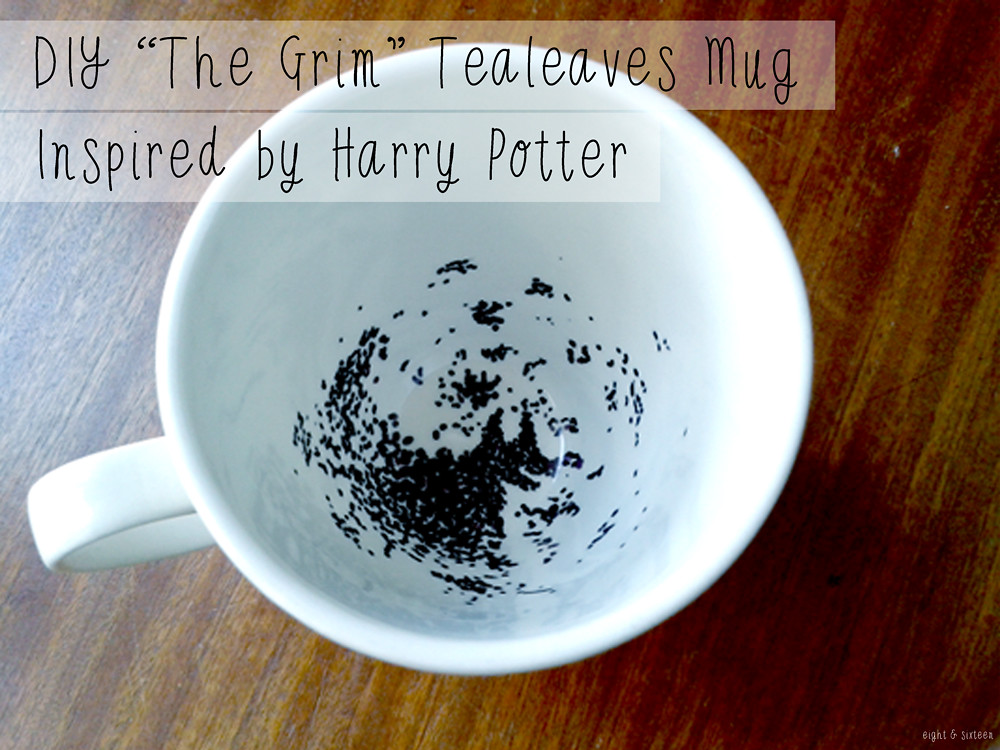
Here is our final DIY in the latest We love... series; a Harry Potter inspired "The Grim" tealeaves mug.
Sharpie pens are a great way to personalise crockery, and this iconic design from Harry Potter is sure to give your friends a little scare when they finish their tea!
Quick and easy to do, this DIY can be totally customised; why not try the famous Platform 9 3/4 sign, the Deathly Hallows symbol, or even a Gryffindor scarf wrapped around the mug.
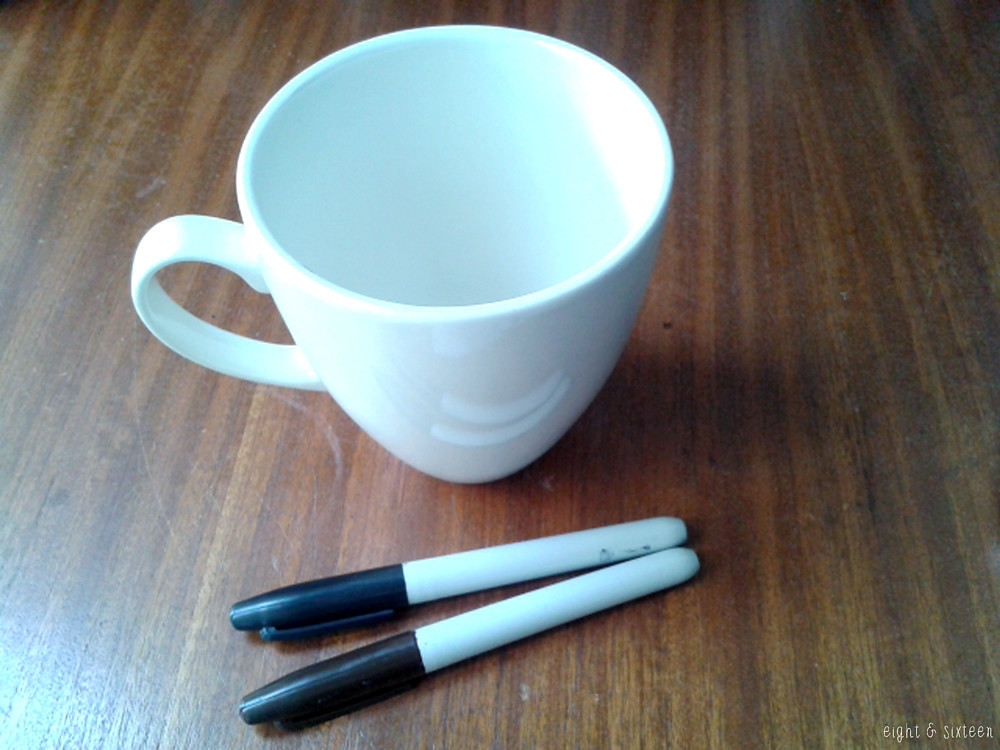
1. Take a clean plain mug and Sharpie pens in black and brown.
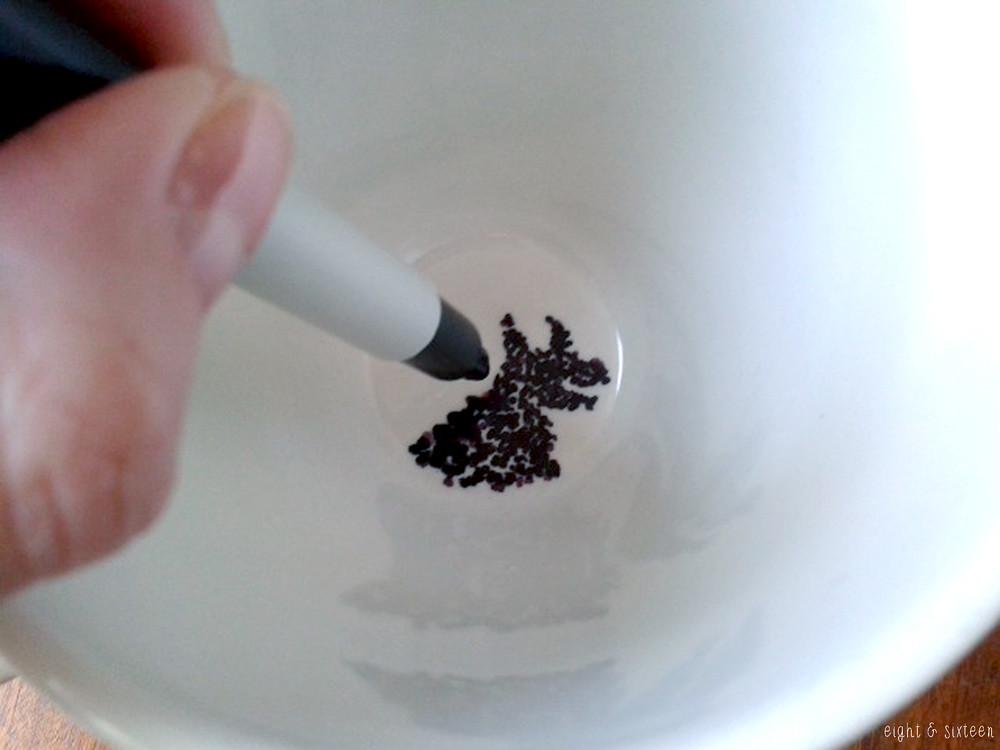
2. Draw on your design - even though it's a little fiddly drawing inside the mug, simply dotting the design on worked really well and allows you to build up the image slowly. Plus, the tealeaves design means that it doesn't matter if you make a mistake - just work over it and see it as a large area of tealeaves!
I used the brown Sharpie to start with, and then built up layers of black over the top - this is optional but just adds a little more texture to the design.
Once you're happy with your design, place the mug in a cold oven. Turn the oven to 170°c and bake the mug for 30 minutes. Turn the oven off but leave the mug inside until the oven has completely cooled. Repeat this process again.
Tip: I would advise only washing the mug in warm soapy water and not a dishwasher to keep the design looking sharp!

We'd love to hear from you if you give this DIY a go - use the hash tag #eightandsixteen to share your photos with us!
Skye
Skye
I love this!! So cool! I actually have a bunch of white mugs, so I should totally try this out! love it!
ReplyDeleteThank you Anjali :D please send us a pic if you have a go!
DeleteThis is so cool! As a HUGE Harry Potter geek, I'm loving your craft ideas :)
ReplyDeleteThank you Lisa! We've loved doing the Harry Potter series :)
DeleteBrilliant idea! I'd love to see the look on peoples faces after seeing this in the bottom of their mug.
ReplyDeleteLauren // OhHay Blogs!
xxx
Thanks Lauren - I think that would be priceless!
DeleteI tried this and really happy with the results - but after washing it simply just washed straight off?? Any tips?
ReplyDeleteYou need to use oil based sharpies that are for ceramic and glass
ReplyDelete