


When we were throwing around ideas for features here at Eight & Sixteen one style of DIY posts we came up with was revamps. We thought it would be fun to try out some of each other's DIY projects, put our own spin on them and share our versions with you here!
Today I'm sharing my take on Skye's Eye Mask post originally created for her blog Even Artichokes Have Hearts back in 2011 (in the early days of us becoming friends!). Skye's version was reversible featuring a cute embroidery design and a pretty floral print. For my version I've decided to incorporate my love of bunnies and add on ears! Here's how I made it...
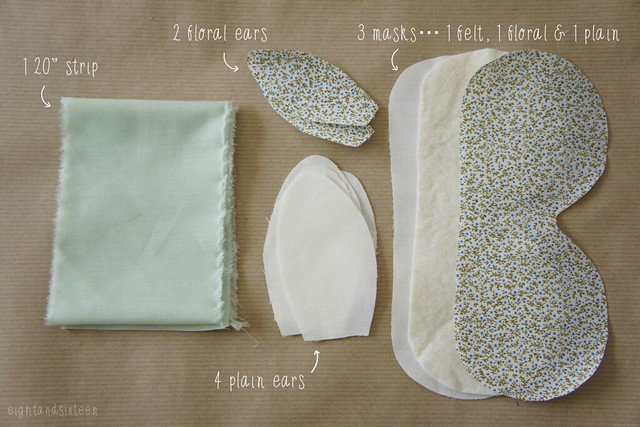
I started out by creating templates for both the main part of the mask and the bunny ears, then worked out what pieces I would need to cut. I then used my templates to cut them all out and also cut a long strip of mint green fabric to use to encase the elastic.
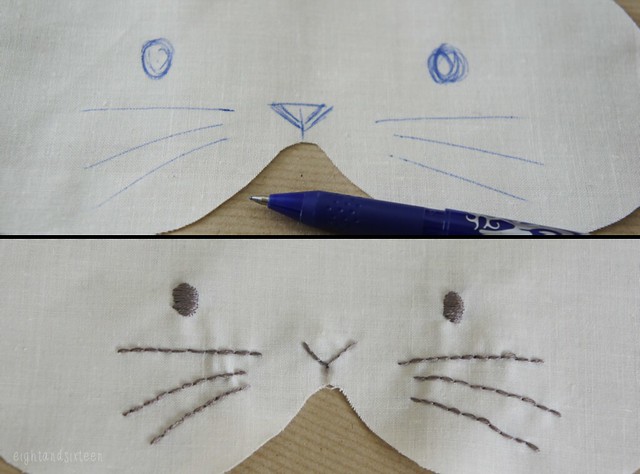
To add the bunny face onto the mask I grabbed one of my FriXion pens (these are erasable and fantastic!) and sketched on a design which I then hand stitched over using an embroidery thread.
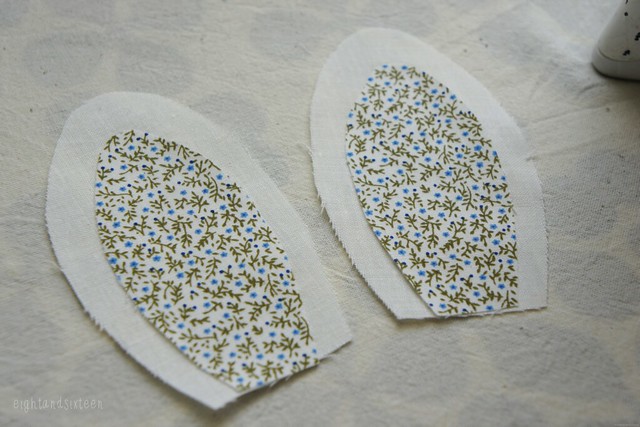
I wanted to add a little bit of colour to the front of the mask so I decided to add floral pieces as detailing on the ears. I ironed the floral fabric pieces onto the plain ones using a little bit of hemming web to fuse them together then hand stitched over the edges to keep everything in place and prevent fraying.
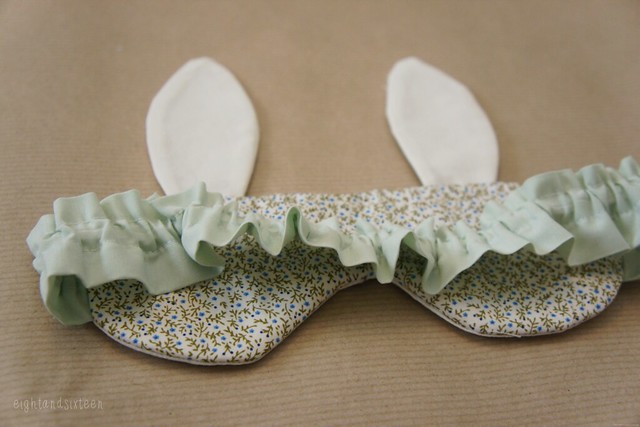
Then came the first bit of machine sewing! I stitched together the ears by sewing the front and back ear pieces together then turning inside out. Next I made a long tube with the mint green fabric, turned back the right way and stitched on two rows just a bit wider than my elastic. I used a safety pin to thread the elastic into the tube then lined up one end of the elastic with the end of the tube and stitched it place, and repeated with the other end creating a gathered effect.
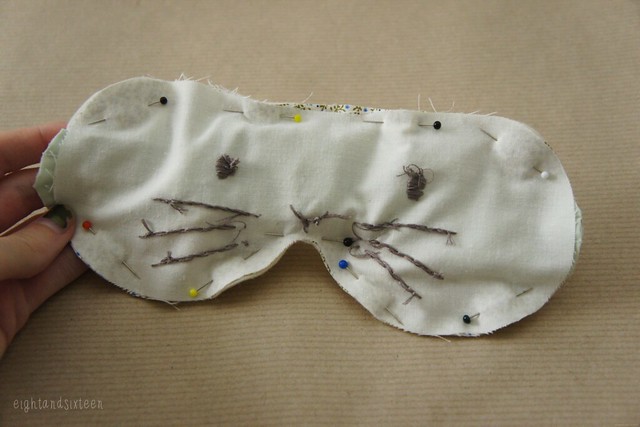
Finally I put all of the layers together in the right order - felt, floral fabric face up, ears face up, elastic band, front fabric face down and stitched almost all of the way around the outside - just leaving a small gap for turning out. I used an overlock style stitch on my machine as well as using a normal straight stitch just to help prevent fraying.
I crossed my fingers that it had all worked out according to plan then turned it back the right way - luckily it had worked! I ironed it flat and lastly closed up gap using a little hemming web.
There are definitely a few tweaks I would make if I were to have a second attempt at this project, particularly the shaping around the nose, but overall I'm pleased with how it turned out! :)
We'd love to hear from you if you try out this or any of our other DIY projects - use the hashtag #eightandsixteen to share your photos with us!
Erin
This is just so adorable!
ReplyDeleteThank you! :)
Delete