tabs

es about us es contact es archive es challenge es we love 9 es recipes es pintests es links
Showing posts with label christmas decoration. Show all posts

Thursday, 18 December 2014

DIY Button Snowflake Ornament


Today is the final DIY in our week of button projects - we hope you've enjoyed them!
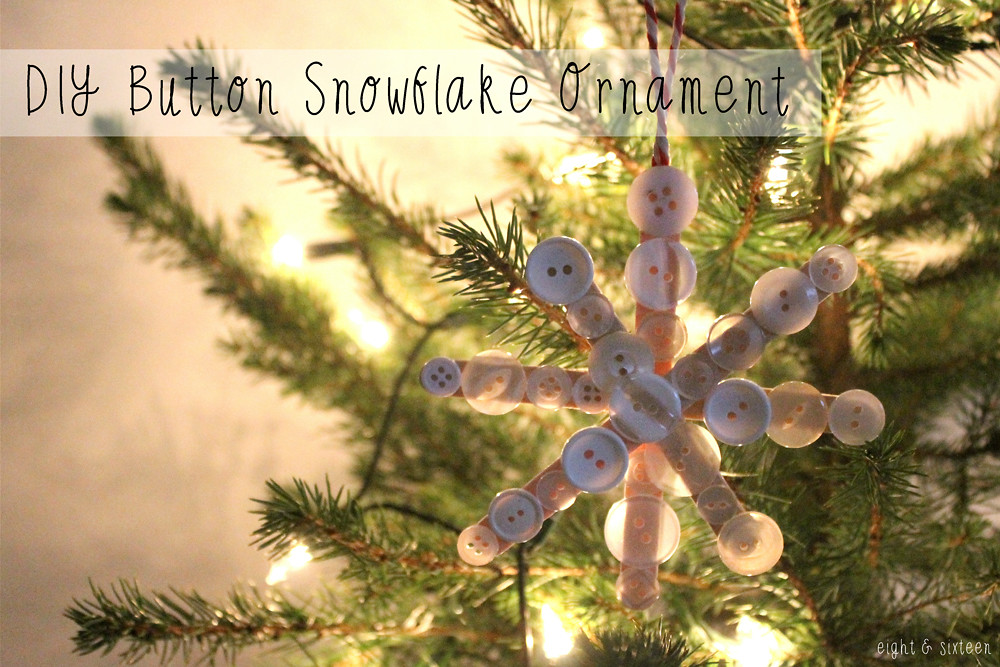
These decorations are great for the Christmas tree, but could also make sweet stocking fillers or even gift tags for presents!

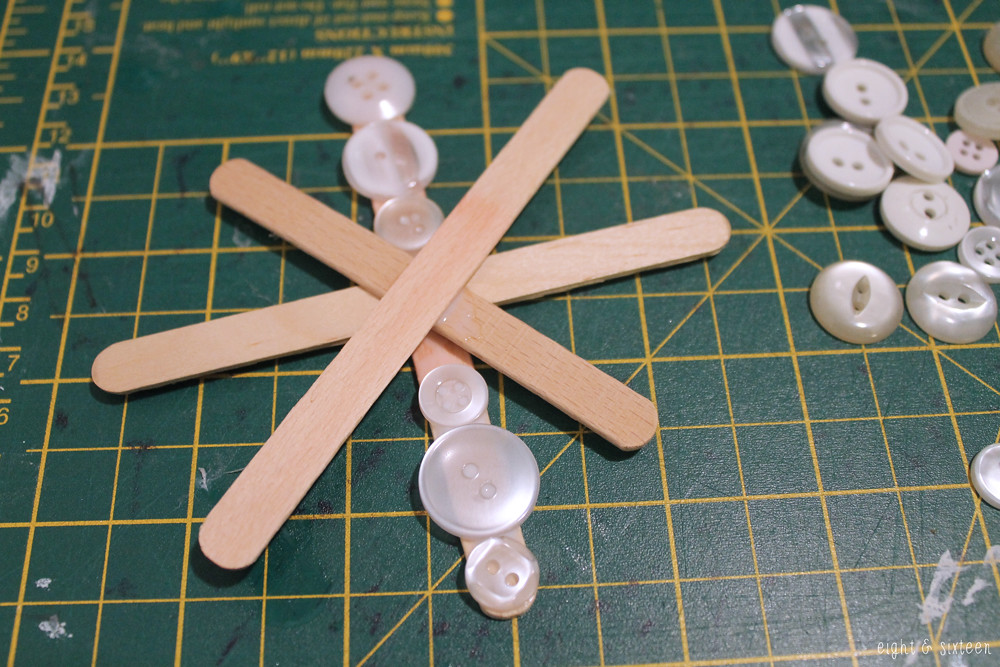
Note: I collected some lolly sticks to make this project even thriftier, but you can easily find packs of craft sticks to buy if you plan to make lots of decorations.


First you need to glue your sticks together to create your snowflake design. Leave this to dry as you don't want them moving around when it comes to the next step!


Starting with the stick on the bottom, start glueing your buttons into place.
Tip: Use smaller buttons at the centre of the sticks for a better fit.


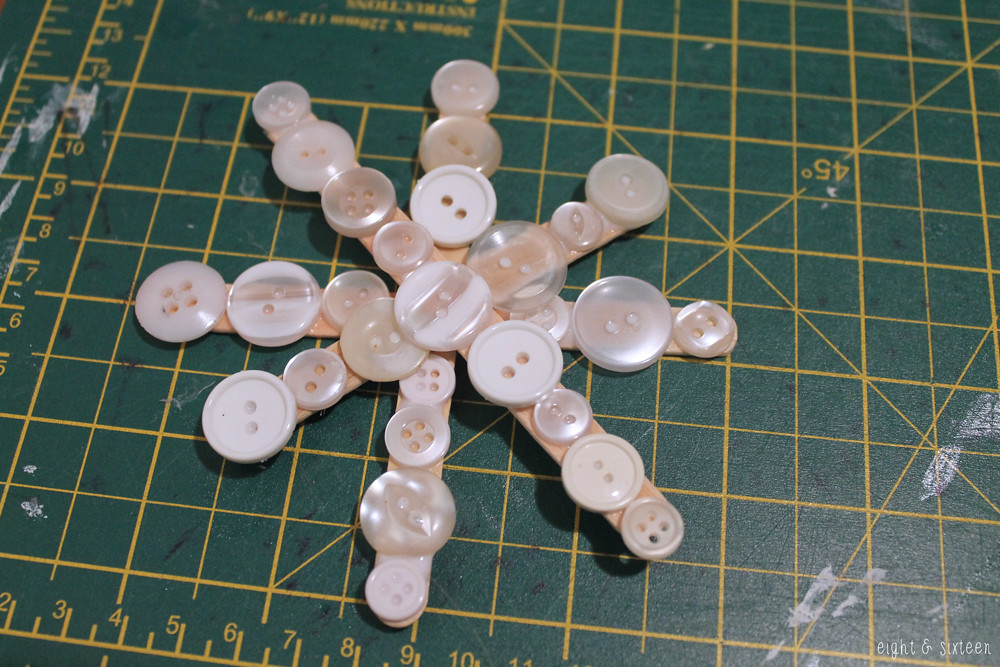
Continue glueing your buttons onto each stick, finishing with the top stick.


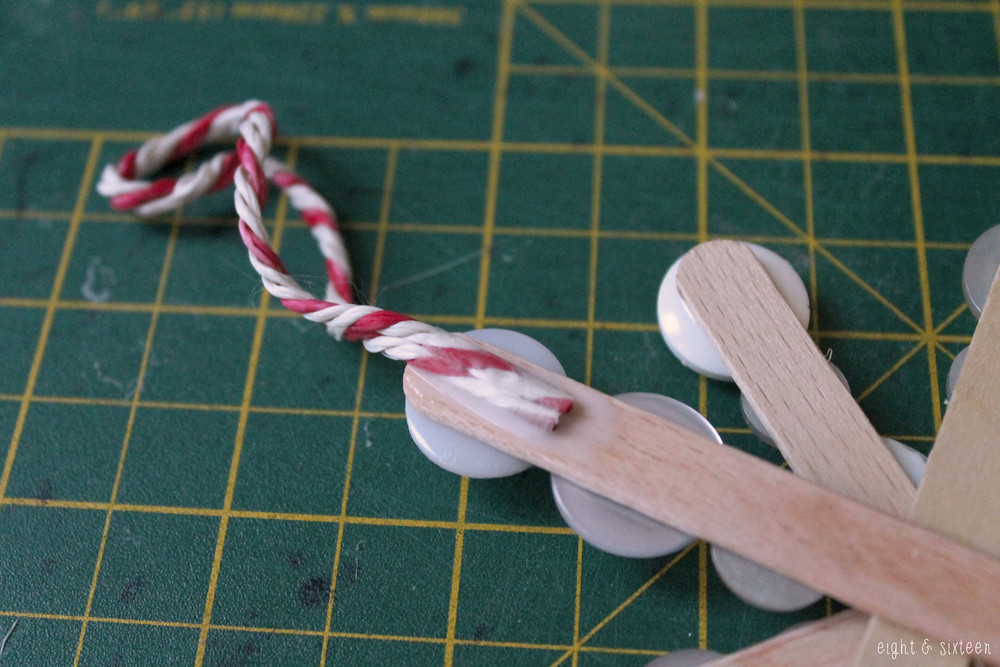
Using a piece of twine or ribbon, create a loop and glue this into place on the back of your snowflake. Hang your decoration on the Christmas tree, and step back to admire your handiwork!


We'd love to hear from you if you give this DIY a go - use the hash tag #eightandsixteen to share your photos with us!

Skye


Friday, 12 December 2014

DIY Cardboard Tube Wreath


Today's DIY is a super simple festive wreath made from painted cardboard tubes and a few decorative berries. Depending on how many tubes you have to hand you can make this wreath as simplistic or extravagant as you like, and you could also try adding different embellishments such as bows or mistletoe.


To start off, take your cardboard tubes, flatten them and cut them into 4 pieces. If you prefer, you can paint your tubes before doing this, but I didn't want any plain edges showing once they'd been cut.


Paint all of your tubes (inside and out!) and leave to dry.
Once dry, divide up the tube pieces into the 'flower shapes' and start glueing them together. I used a little glue on the points, and then used paperclips to keep the pieces together until dry.


Repeat with all of your tube pieces, and then join all of these flowers into a circle and glue/paperclip in the same way. Leave to dry.
You can then embellish the wreath - I have used decorative berries on wire that I simply wrapped around the centre of each flower.

This wreath will only be suitable for indoor use, but is a great addition to any festive decor and it can be so easily customised to suit your colour scheme :)


We'd love to hear from you if you give this DIY a go - use the hash tag #eightandsixteen to share your photos with us!

Skye


Friday, 5 December 2014

PinTest: Twine Ball Ornament


We have another festive PinTest for you today, and this is another great idea for Christmas tree decorations or decor around the home.
I love the idea of twine decorations and think that the natural look and colour works really well against a Christmas tree draped in fairy lights.

You can find the original Pin here, and here's how I made mine...


Blow up a balloon to the size you'd like your ornament to be - try and keep it small if you plan to hang them on a tree, but you could also try an oversized one to hang from a door frame or lots of little ones to make a garland.


Cover the balloon in cling film - the original pin says that this step is essential, so I didn't take any chances!


Cover the balloon in a layer of PVA glue, and then start winding twine around it to create a criss cross pattern.


Optional: I used glitter glue to cover several areas of the string, but you can leave it plain.

I used excess twine to create a loop at the top of my decoration, but you could also add some ribbon afterwards.
Leave the ornament to dry overnight somewhere secure - I hung mine on the washing line!
Once dry, pierce the balloon and pull it out of a gap in the twine being careful not to squish the ornament out of shape.

This has been a great PinTest for me and one that I can see myself trying again. It's a little messy but the simplicity of it is so worth it for the outcome, and I think that these would be great fun to spend an afternoon making.


We'd love to hear from you if you give this DIY a go - use the hash tag #eightandsixteen to share your photos with us!

Skye


Related Posts Plugin for WordPress, Blogger...