


Coasters are a great beginner quilting project as you get to learn all the basic techniques but on a small, more manageable scale. I made these cobweb coasters back in the summer and they were actually my first ever completed quilting and binding project, so if you're a beginner this could be the perfect Halloween project for you!
Below I will take you through a step-by-step of how to get your coaster ready for binding but as the binding process itself takes a little bit of explaining and I'm no expert I have linked to a great tutorial which will show you how to finish off the project.
To make your own cobweb coaster you will need: a 5x5" plain coloured fabric square, a 5x5" patterned fabric square, a 5x5" square of wadding/batting, a sewing machine, an erasable pen, pins/clover clips, strips of fabric for binding, an iron, a needle and thread, a ruler
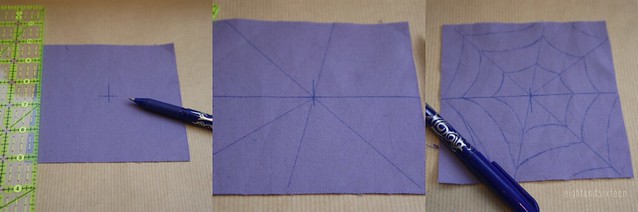
1. Take an erasable pen (we recommend Frixion pens) and draw out a cobweb design onto your plain coloured square. Start by plotting out the diagonal lines using a ruler then go back and fill in the curved lines
2. Next layer up your fabric "sandwich" ready to sew. Place the patterned fabric face down on your work surface, followed by your square of batting and finally your plain fabric face up - pin in place if necessary
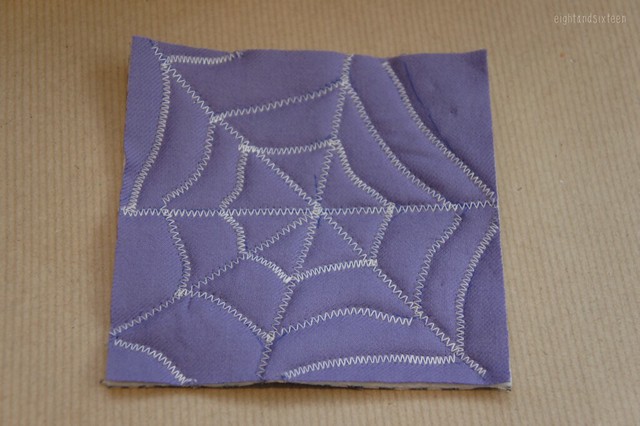
3. Choose your preferred quilting stitch and sew over the cobweb design, joining all of the layers together
4. Trim off any excess threads and neaten off the edges of your fabric making sure it is still square. Use a zig zag stitch to go around the edges just to keep them flat ready for the binding process
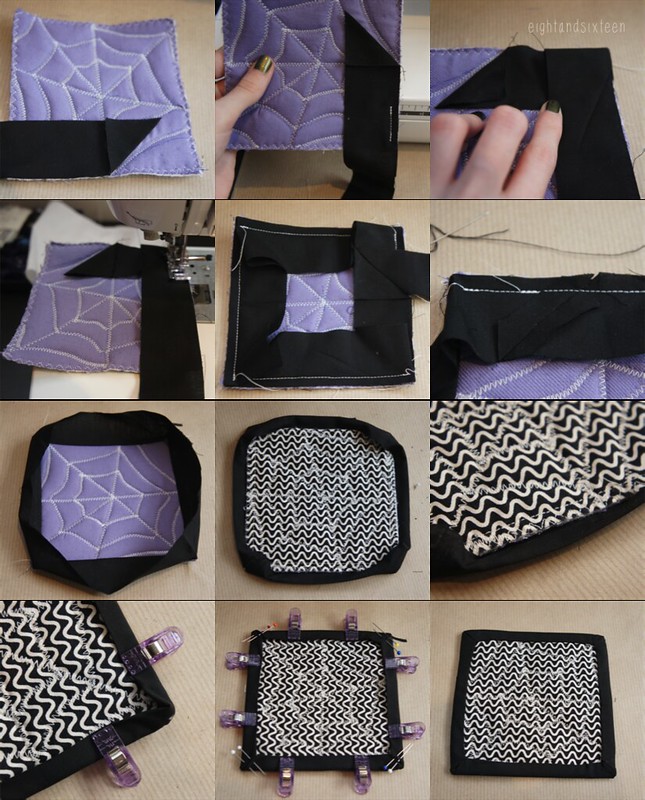
5. To bind the coaster I would recommend using the 'one piece' or single binding method, finishing off with a ladder stitch. If you are a beginner here is great tutorial to get you started - http://verykerryberry.blogspot.co.uk/2011/01/single-binding-tutorial.html - however if you already have a preferred method of binding then of course you can use that instead!
We'd love to hear from you if you try out this spooky DIY project - use the hashtag #eightandsixteen to share your photos with us!
Erin
No comments:
Post a Comment