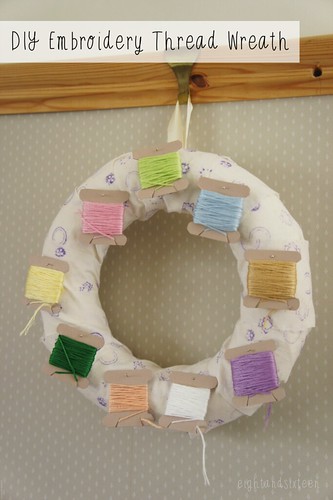
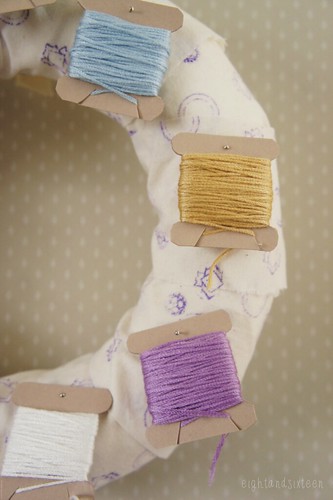
A couple of months back whilst Skye and I were browsing the beautiful fabric selection at Liberty we stumbled across a decorative wreath that was part of the display. The wreath was, of course, sewing themed with cotton reels, pins, buttons, tape measures and ribbon. Although only for decorative purposes the way that the cards of embroidery floss had been added onto the wreath seemed like a great practical storage idea to me and so today’s DIY project was born!
The great thing about storing embroidery thread/floss this way is that you can easily unravel and cut off a piece whenever you need to use it. There’s no threads getting tangled in a storage box and its easy to spot the colour you want quickly without having to rummage.
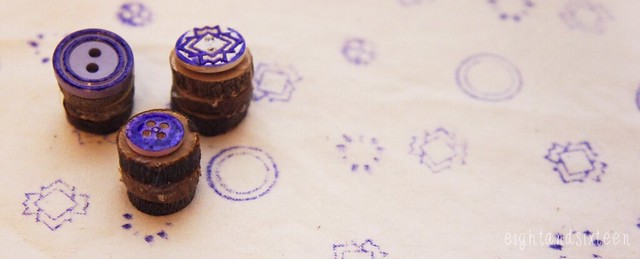
You can use whatever fabric you like for the base of the hoop but for mine I created my own custom print with handmade button stamps. Often you will find DIYs that use wine corks as the stamp handle but since I didn’t have any I improvised and used a few twig slices I had left over from another project. In keeping with the crafty theme I glued pretty buttons to the twigs then used an ink pad to stamp on a random design and set aside to dry before moving on to the wreath DIY.
To make the wreath you will need: a polystyrene hoop, fabric, sheets of card, pins, embroidery threads, glue (optional)
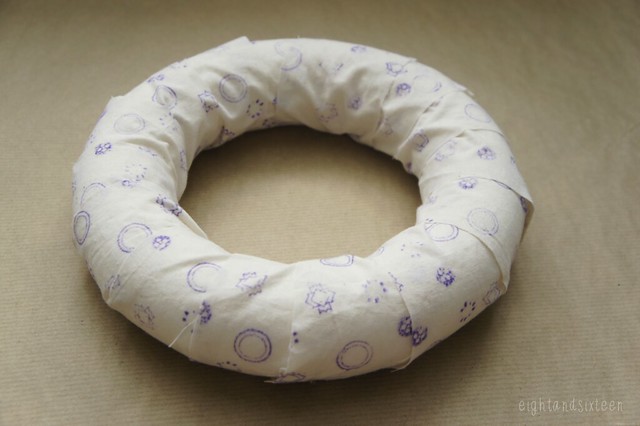
1. Cut your chosen (or hand-stamped!) fabric into strips about 3" wide and wrap around your polystyrene hoop making sure not to leave any gaps. Attach in place with a dab of glue or small dressmaking pins on the reverse side
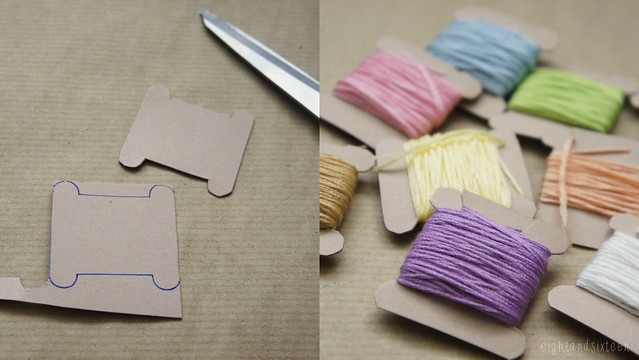
2. You can buy readymade cards to wrap your threads onto or you can make your own. To do this create a template that looks something like the one above and cut out from a medium weight card
3. Cut two diagonal slits into one edge of the card to secure the ends of the thread in place and wrap away!
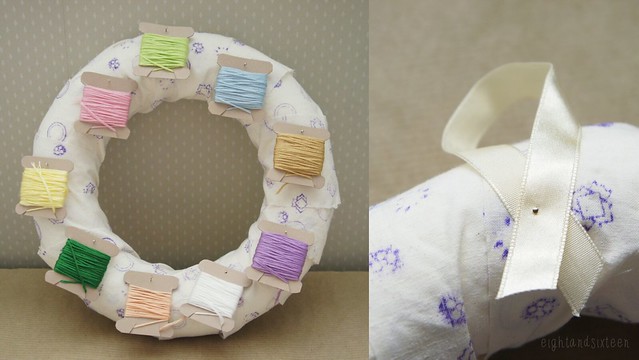
4. Pin the wrapped cards onto your wreath & add a loop of ribbon onto the reverse side if you wish to hang it up. As the hoop isn't heavy a pin should hold it in place fine!
We'd love to hear from you if you try out this DIY project - use the hashtag #eightandsixteen to share your photos with us!
Erin


That's really great!. Thank you for the lovely craft idea.
ReplyDelete~Xyra
Thank you, glad you like the idea! :)
Delete